
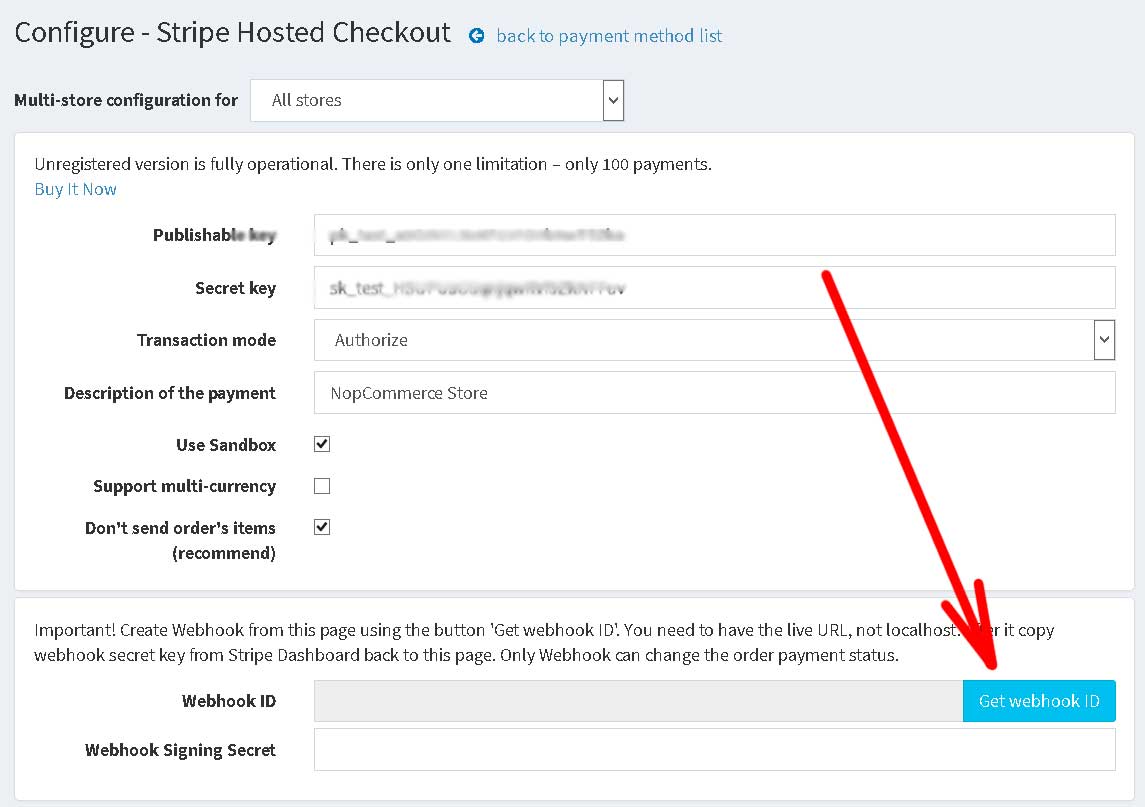
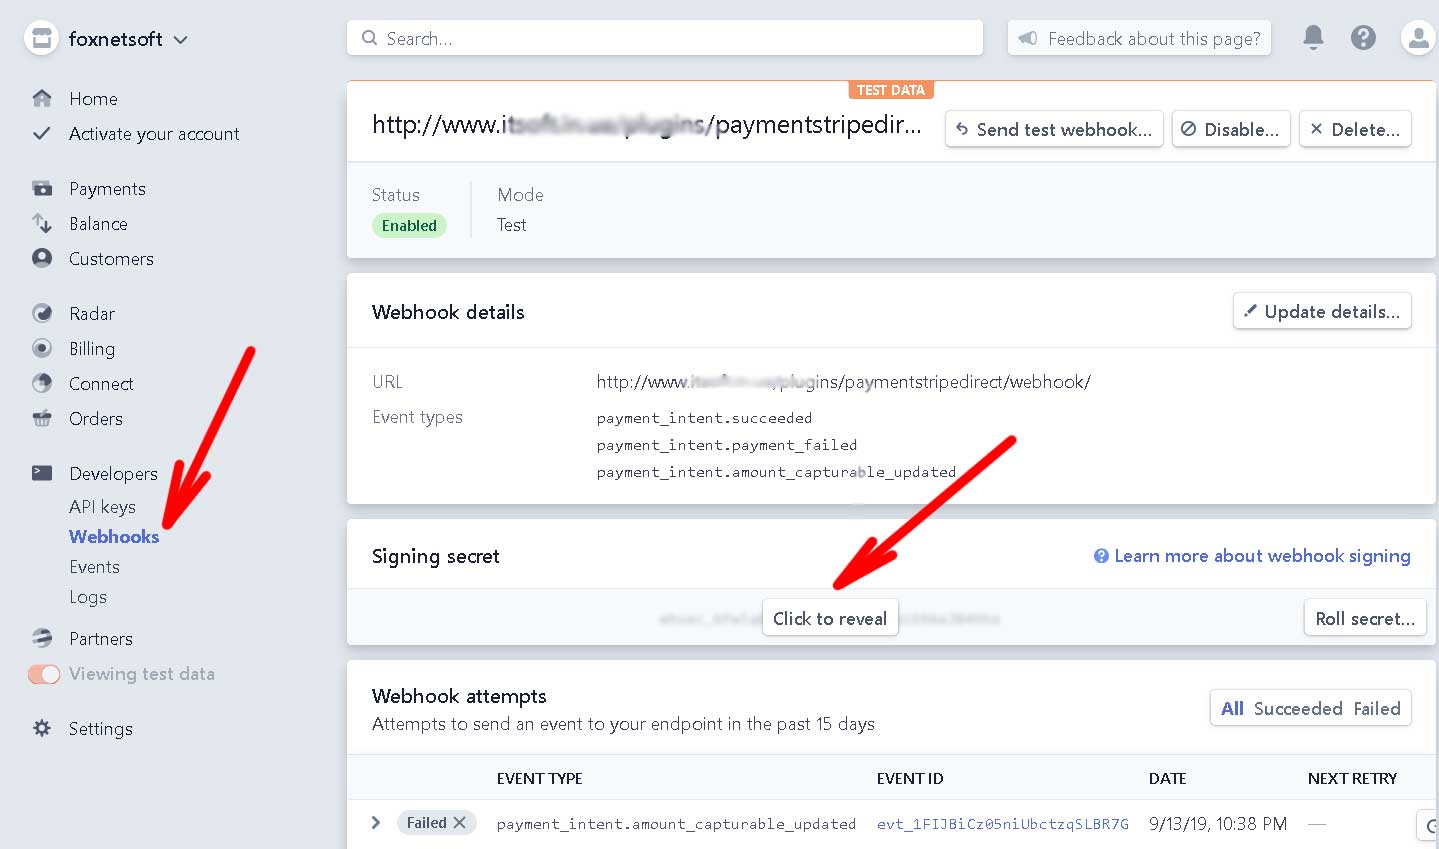
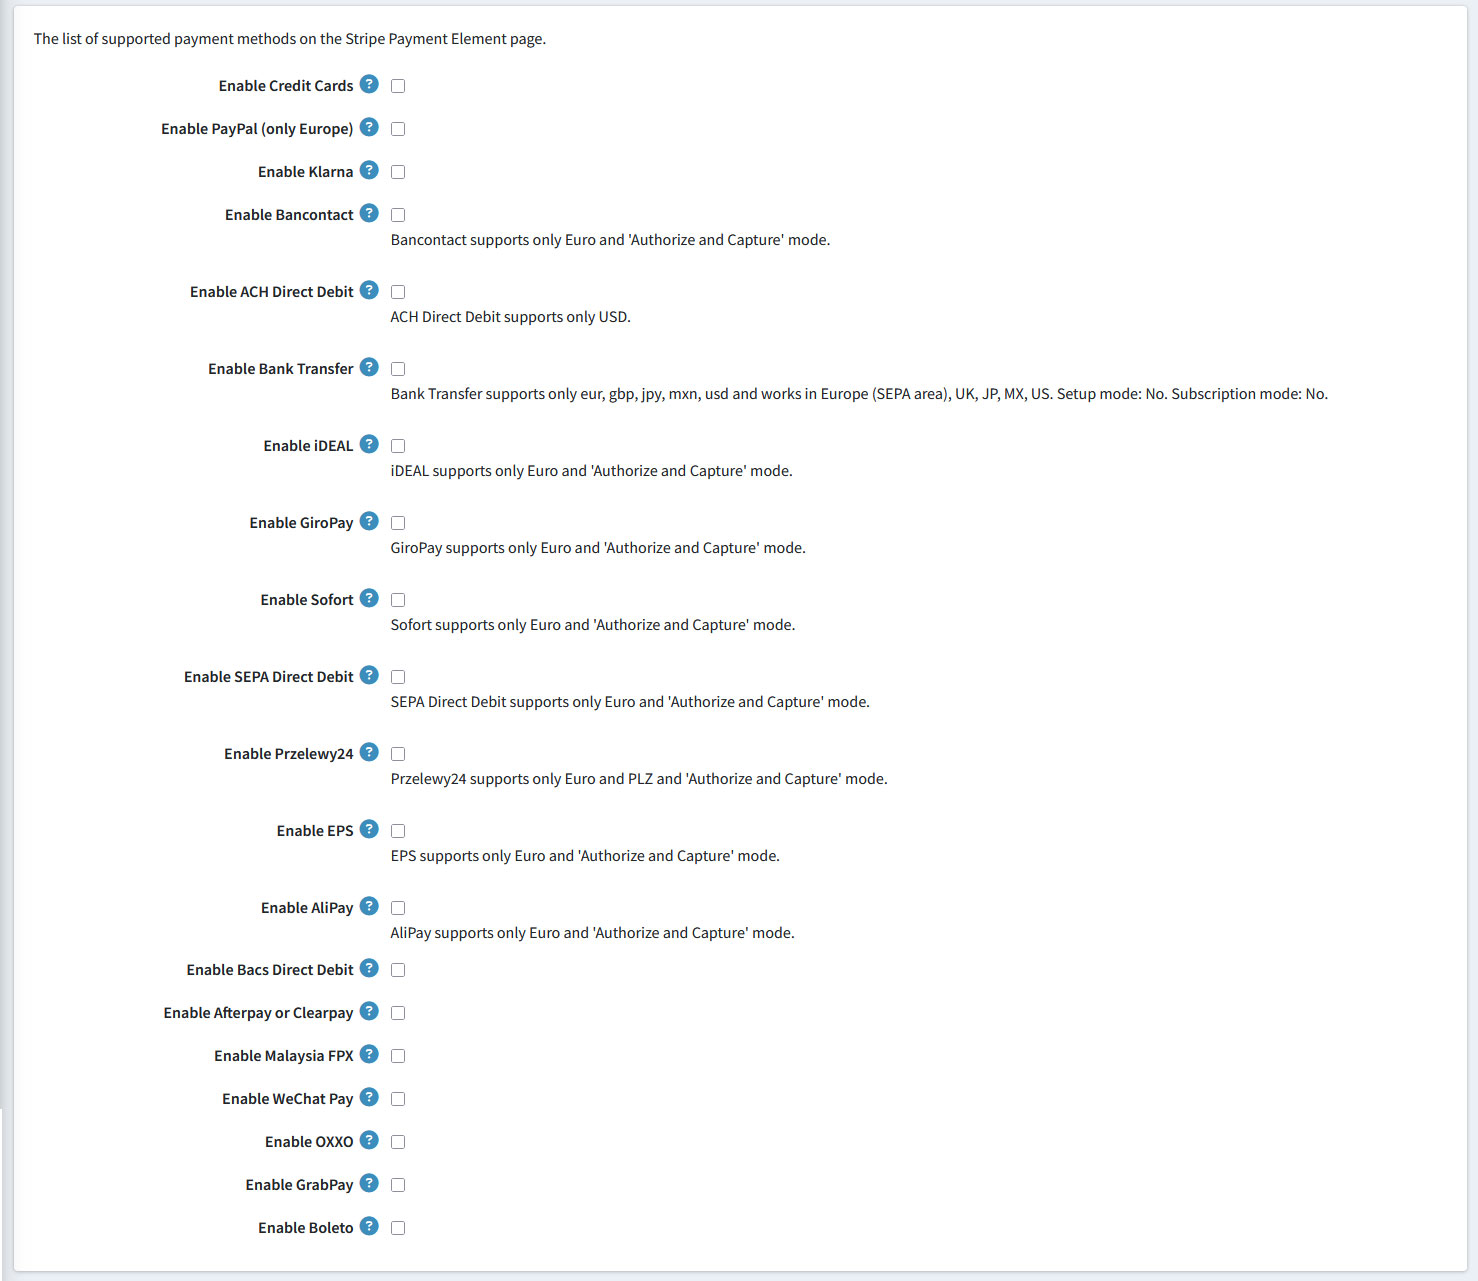
Installation and configuring plug-in Stripe Hosted Checkout It's easy to configure the plugin. See pictures. 2. You should configure the Webhook ID. The Webhook changes the payment status of the nop order. Open the plugin configure page and press the button 'Get Webhook Id', you should have the live URL with https, not localhost. After it open the Stripe Dashboard and copy the Webhook secret key for this webhook ID. 3. The customer could pay before creating the order or after it. 4. The plugin could save the transanction information in the order note. 5. Stripe supports many payment methods. You could enable/disable them. If you disable all values then Stripe will try to show all possible methods for the customer. Please note, that each payment method could have own restrictions. Example. Only for the currency or only for the customer from the selected country. 6. You could add additional payment fees. 7. The plugin redirects the customer to the Stripe Hosted Checkout page.
1. Copy Stripe credentials on the plugin configure page.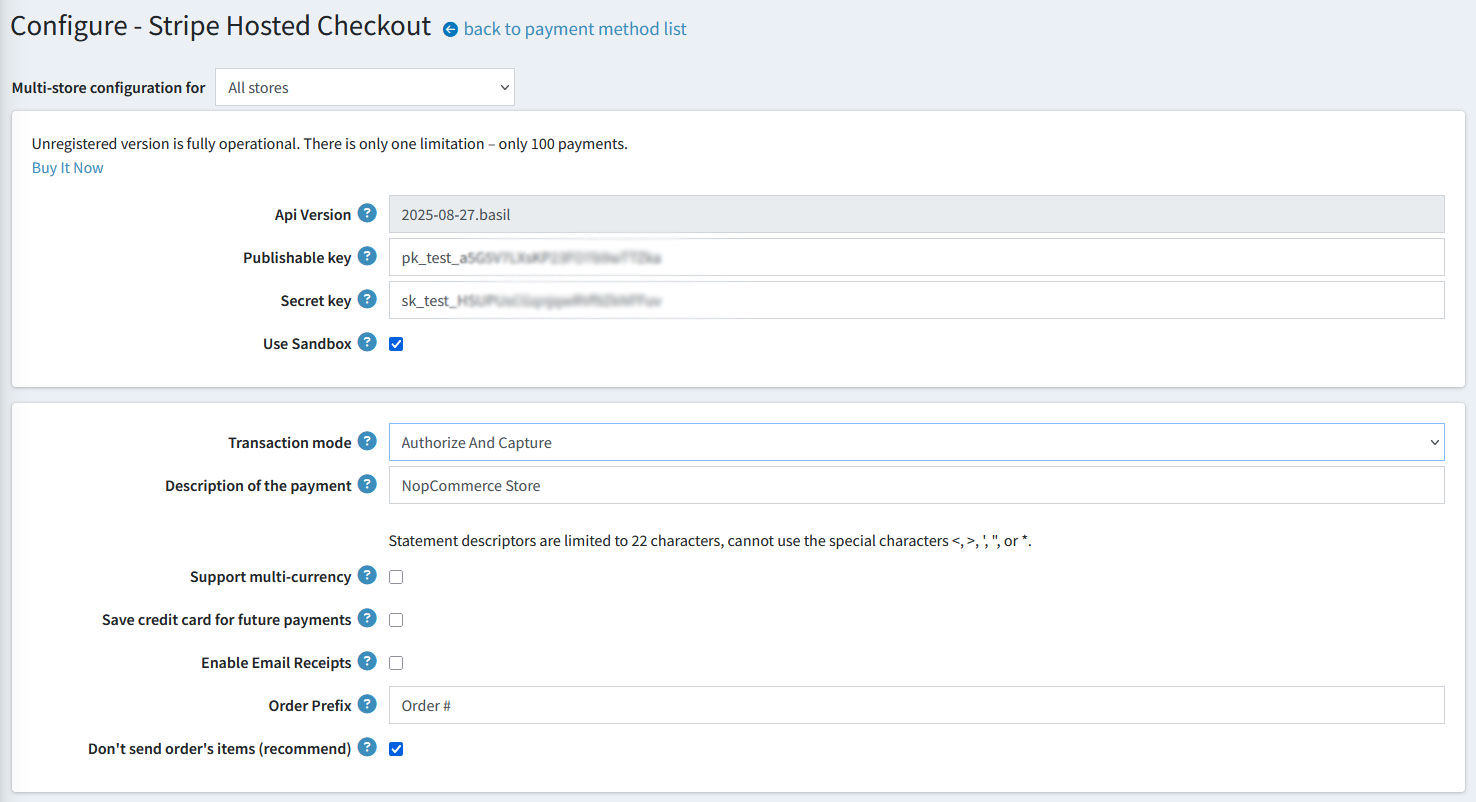


The customer could pay by Apple Pay/Google Pay only from mobile devices (not from PC).
The Link button only appears on checkout if the customer was registered with Link on the device, or his email address or phone number was used with a registered Link account.
It only appears if Apple Pay or Google Pay are not enabled on the browser.