
Installation and configuring plug-in Slider Manager
The plugin adds sliders and banners to your store: pictures, pictures by URL, YouTube or Vimeo videos, HTML5 videos and your own HTML. You choose where the slider appears, who sees it and when. A slider can also open in a pop-up window.
It's easy to configure the plugin. See pictures.
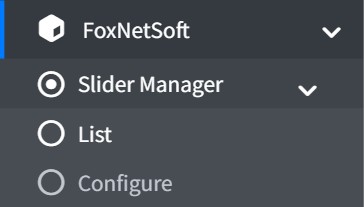
1. After installing, find the plugin in the admin menu: 'FoxNetSoft' - 'Slider Manager'. 'List' opens the sliders, 'Configure' opens the plugin settings.
2. Open 'Configure', check 'Enabled' and press 'Save'. The store shows the sliders only when the plugin is enabled.

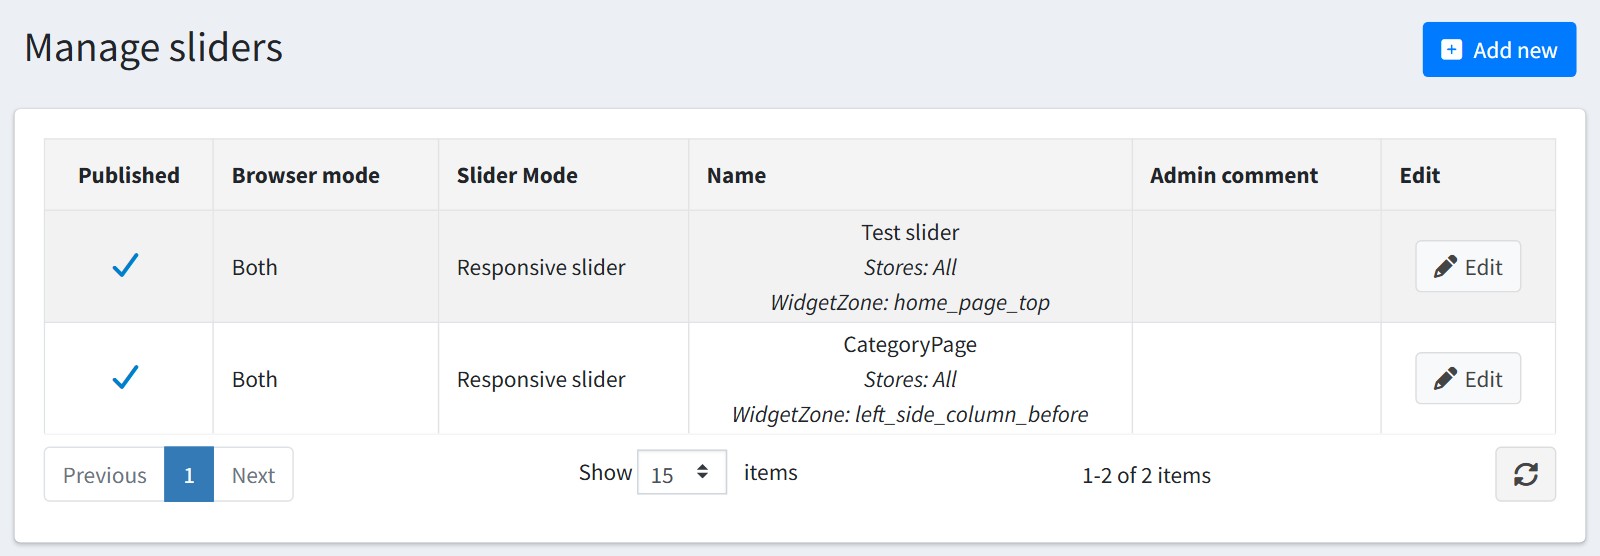
3. Open 'List'. The grid shows every slider with its browser mode, slider mode, stores and widget zone. Press 'Add new' to create a slider or 'Edit' to change one.
4. The 'Main' tab.
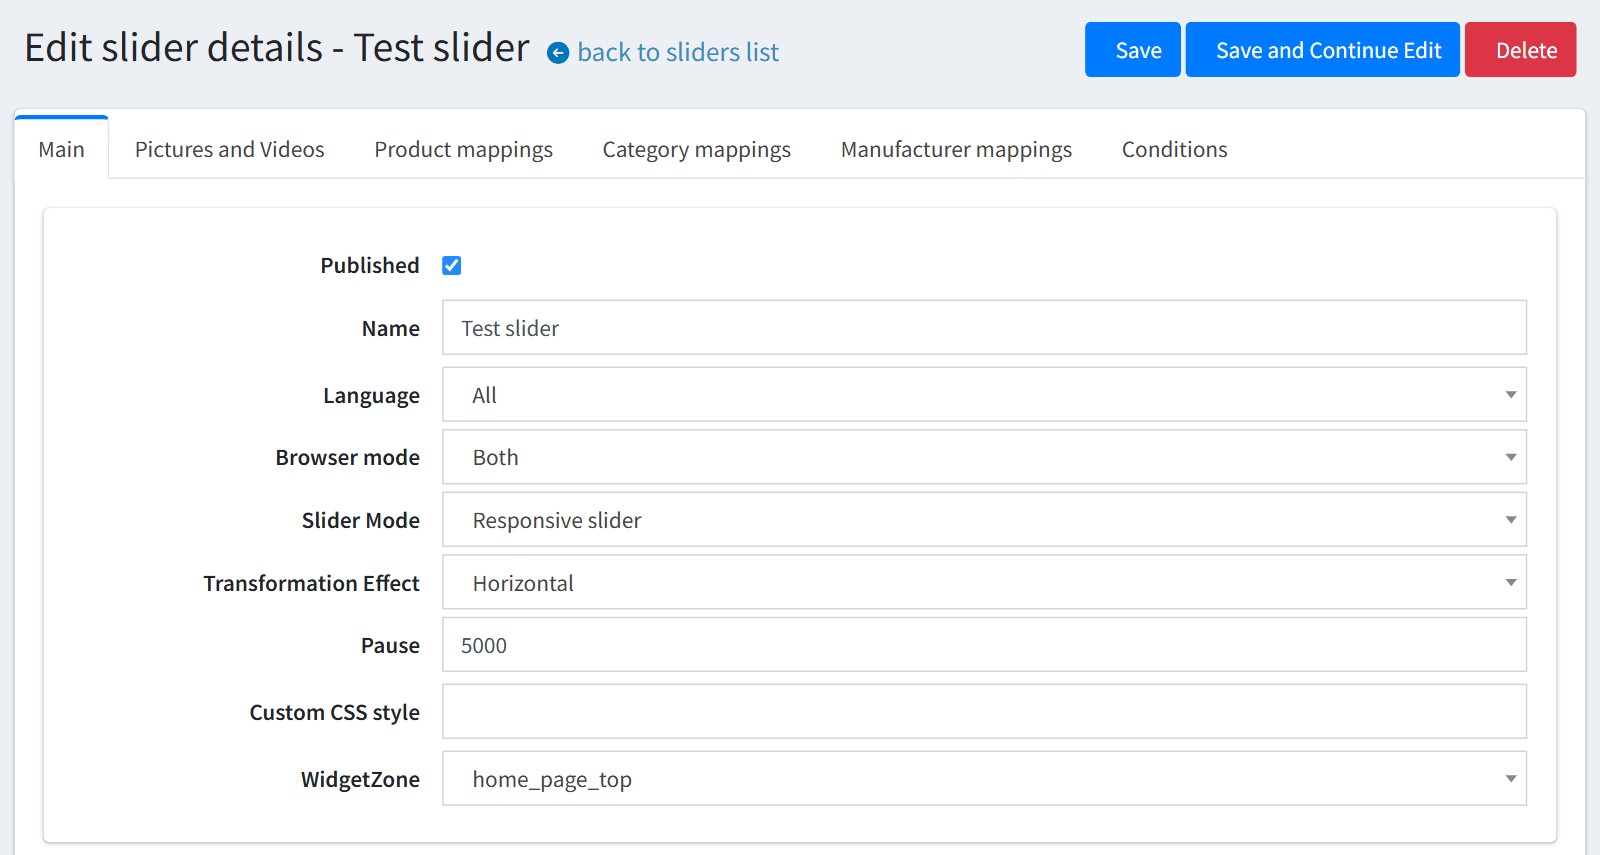
'Published' - uncheck it to hide the slider without deleting it.
'Name' - the name of the slider in the admin list.
'Language' - 'All', or one language if the slider must be shown only to the customers who use this language.
'Browser mode' - 'Both', 'Desktop' or 'Mobile'. Show the slider on all devices, only on computers or only on mobile devices.
'Slider Mode' - 'Responsive slider' takes the width of the page. 'Fixed slider' has the 'Width' and 'Height' you set, in pixels. 'Pop up on Home page' and 'Pop up on any pages' open the slider in a pop-up window, see step 6.
'Transformation Effect' - how one slide changes to the next: 'Horizontal', 'Vertical' or 'Fade'.
'Pause' - how long each slide is shown, in milliseconds. 5000 is 5 seconds. Empty - 4 seconds.
'Custom CSS style' - inline CSS for the slider block, for example margin-bottom: 20px;
'WidgetZone' - the place on the page where the slider appears. home_page_top is the top of the home page. The list has the zones of the home page, the category and product pages, the blog and the side columns.
5. The second block of the 'Main' tab.
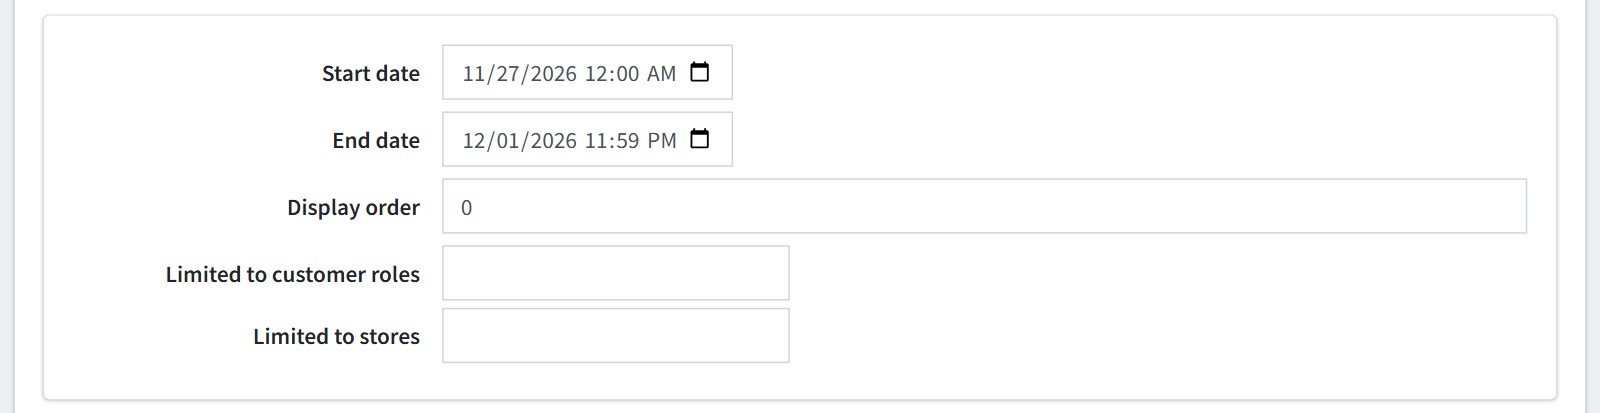
'Start date' and 'End date' - show the slider only during a campaign, for example Black Friday. The dates are in UTC. Leave them empty to show the slider all the time.
'Display order' - the order of the sliders in the same widget zone.
'Limited to customer roles' - show the slider only to the selected roles, for example only to registered customers. Empty - to everybody.
'Limited to stores' - for a multi-store site. Empty - in all stores.
6. Pop-up window. Choose 'Pop up on Home page' or 'Pop up on any pages' in 'Slider Mode'. 'WidgetZone' is hidden for these modes. Set the 'Width' and 'Height' of the window in pixels (empty - automatic size) and the 'Title of the slider' - the title of the pop-up window. The title can be translated into every language of your store.
The pop-up opens every time the customer opens the page.
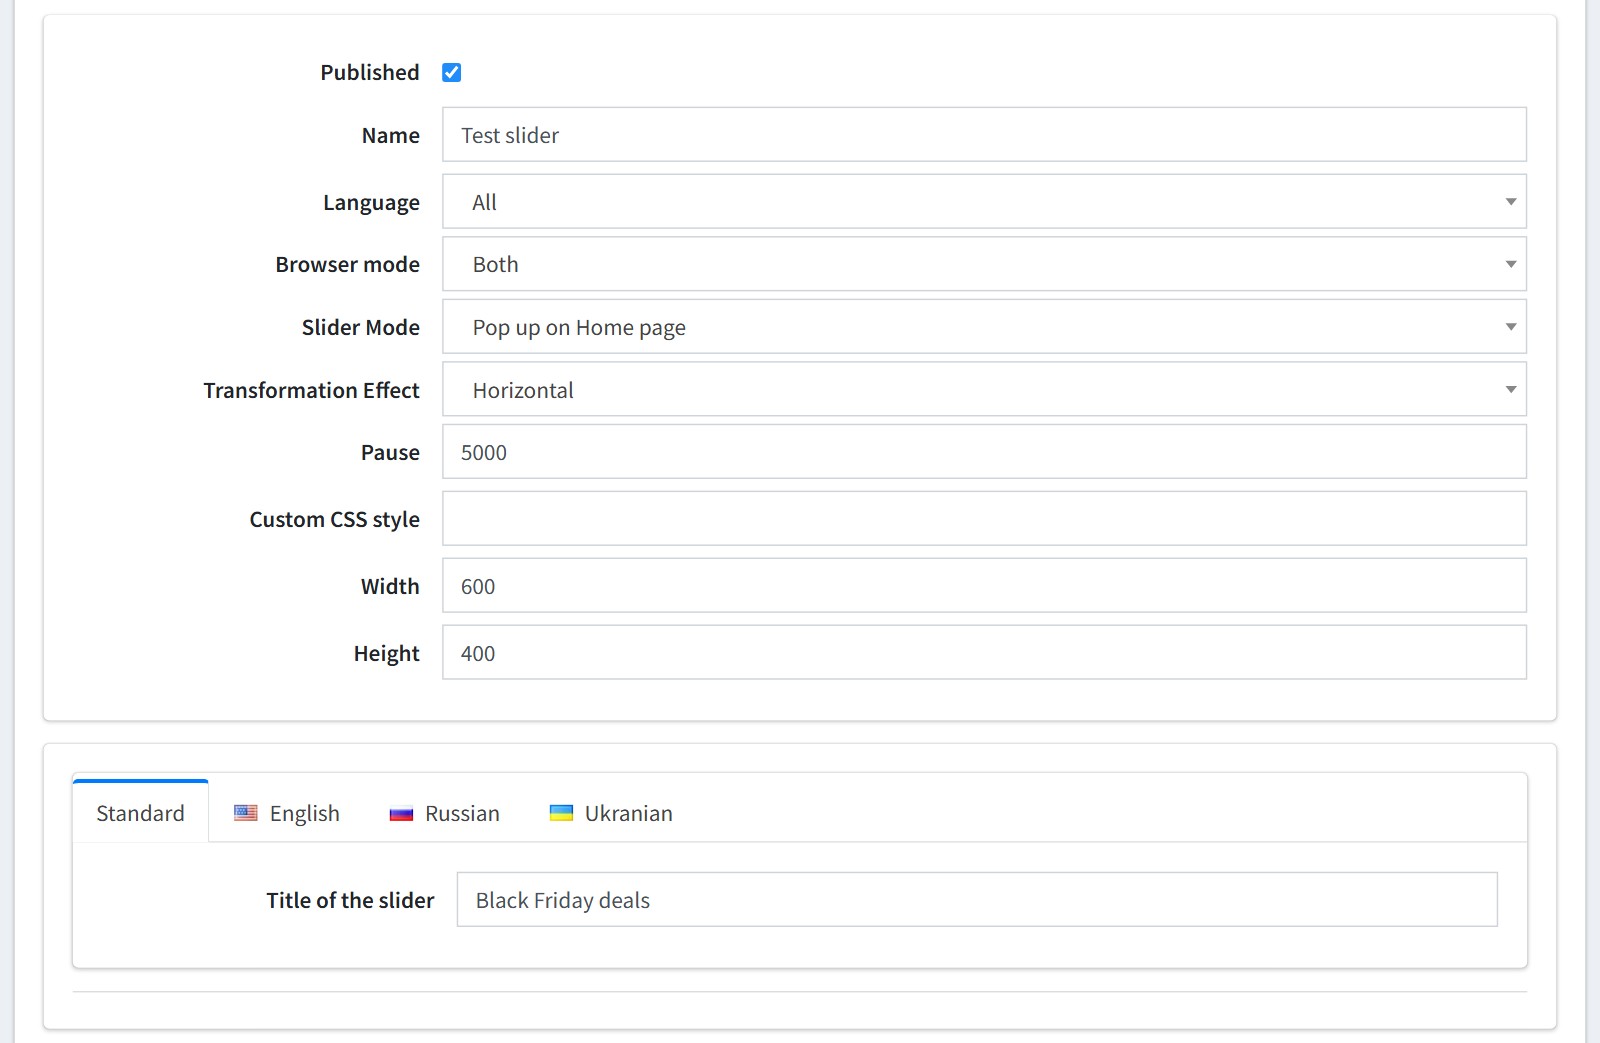
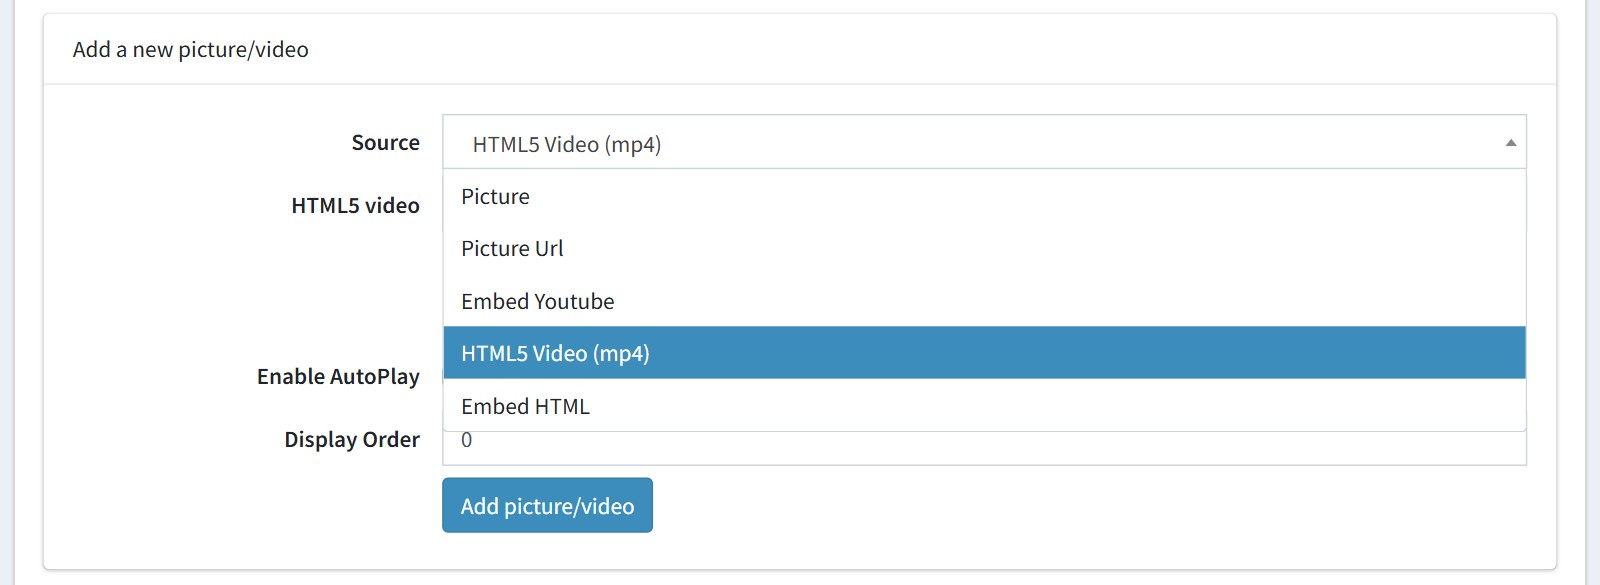
7. The 'Pictures and Videos' tab. Add the slides one by one. Select the 'Source':
'Picture' - upload a picture.
'Picture Url' - the direct URL of a picture.
'Embed Youtube' - a YouTube or Vimeo video. Paste the embed code with the IFRAME tag.
'HTML5 Video (mp4)' - the direct URL of an mp4 video. Check 'Enable AutoPlay' to start the video automatically.
'Embed HTML' - any HTML, for example a text banner. It is added to the page as it is, so check the code before you save it.
Set the 'Display Order' and press 'Add picture/video'.
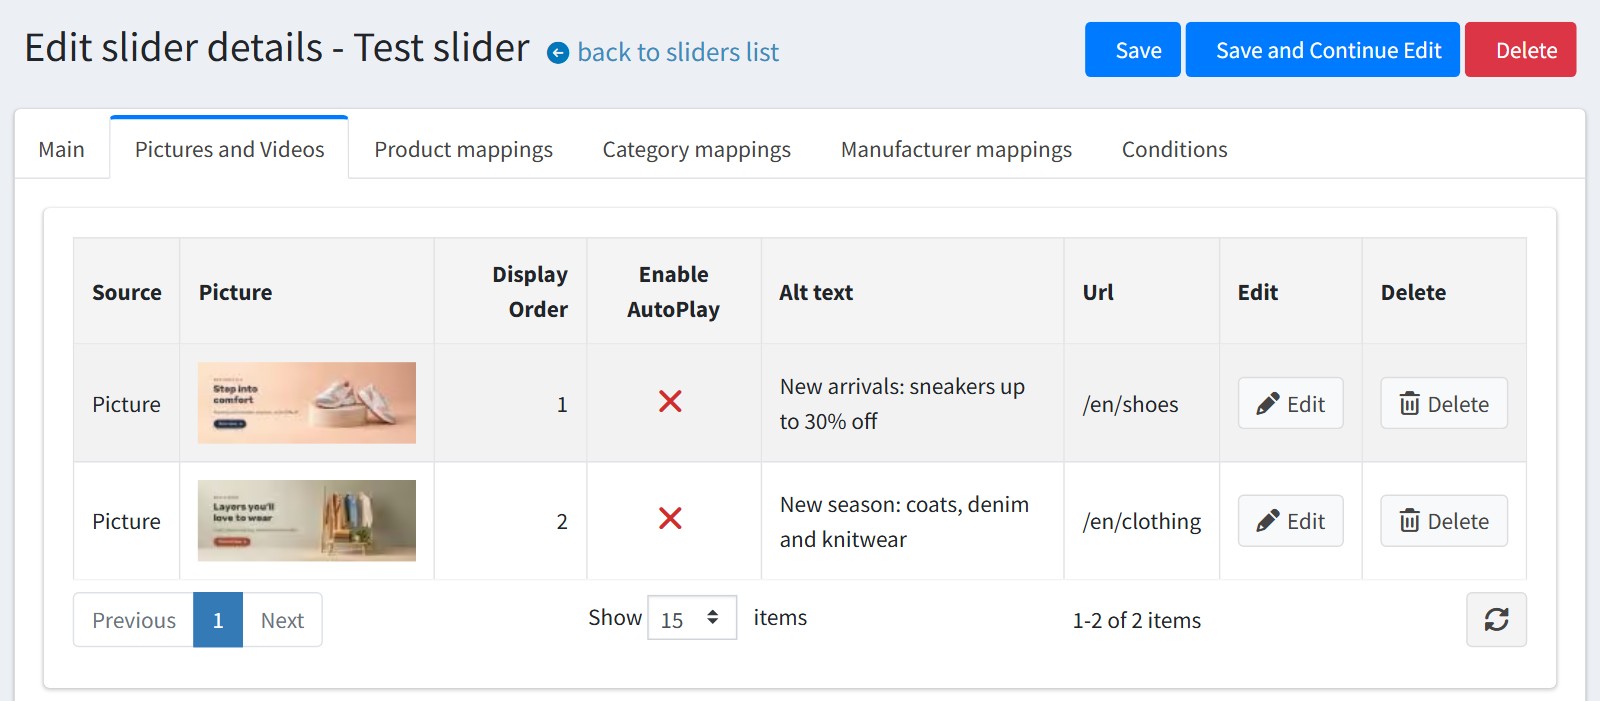
The grid shows all slides of the slider. Press 'Edit' to change the 'Display Order', the 'Alt text' of the picture and the 'Url' - the page the customer opens by clicking the slide.
Use pictures of the same size. The slider takes the height of the tallest slide.
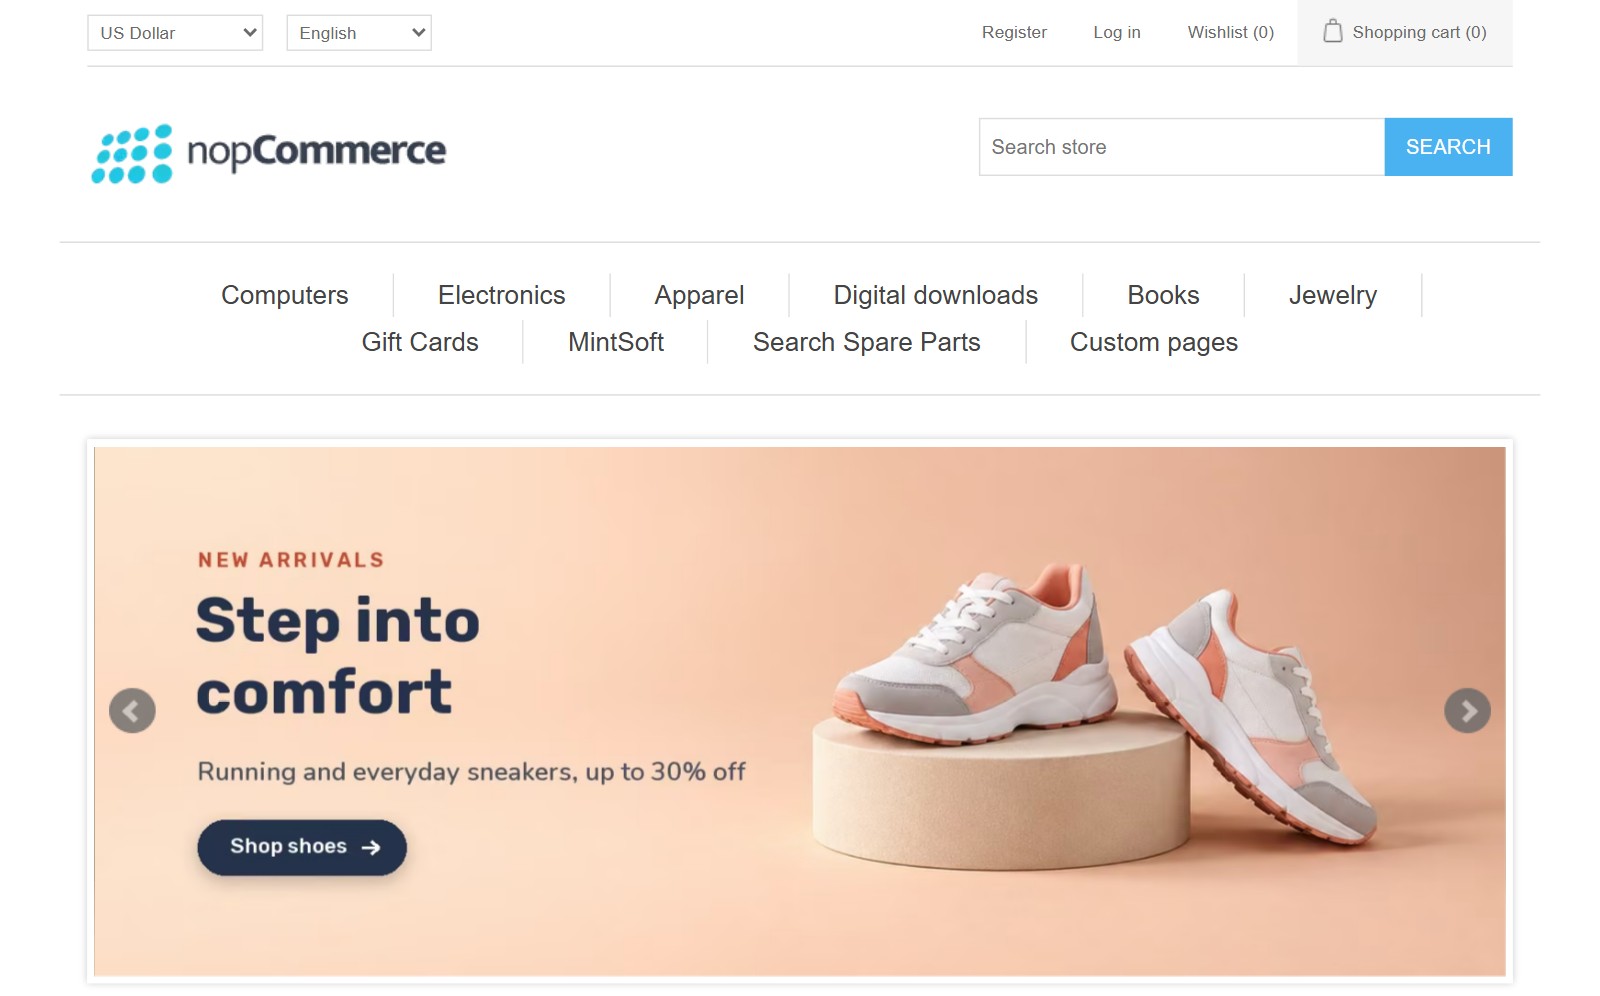
The slider in the store. 'Test slider' is in the home_page_top widget zone, so its slides are shown at the top of the home page. The slides change after the 'Pause', the customer can also use the arrows, and a click on a slide opens its 'Url'.
8. By default the slider is shown on every page that has its widget zone. The 'Product mappings', 'Category mappings' and 'Manufacturer mappings' tabs limit it to some pages.
Add products - the slider is shown only on the pages of these products.
Add categories - the slider is shown on the pages of these categories and on the pages of their products. Manufacturers work the same way.
Choose a widget zone that these pages have, for example productdetails_top for the product page or categorydetails_top for the category page. A pop-up slider works too: map it to a category and the pop-up opens only on the pages of this category.
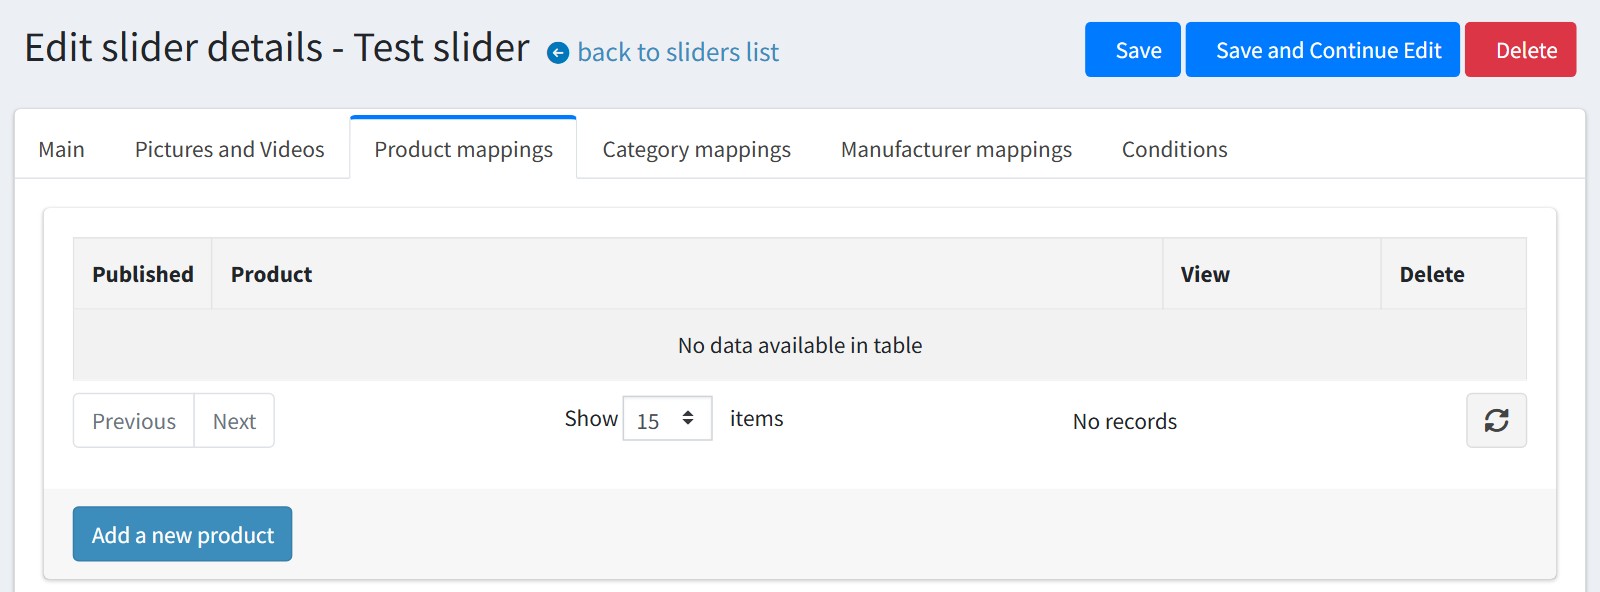
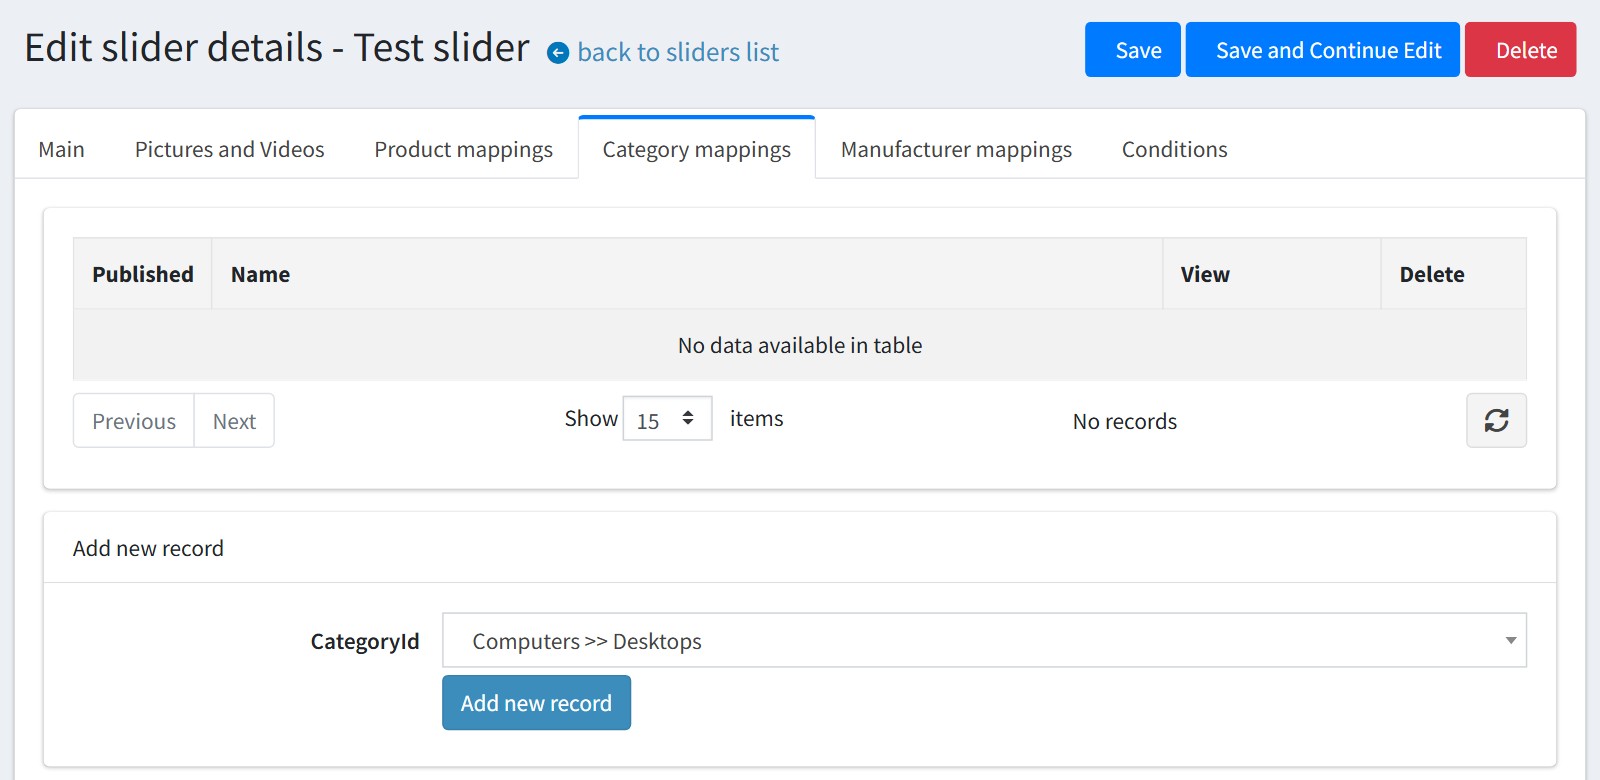
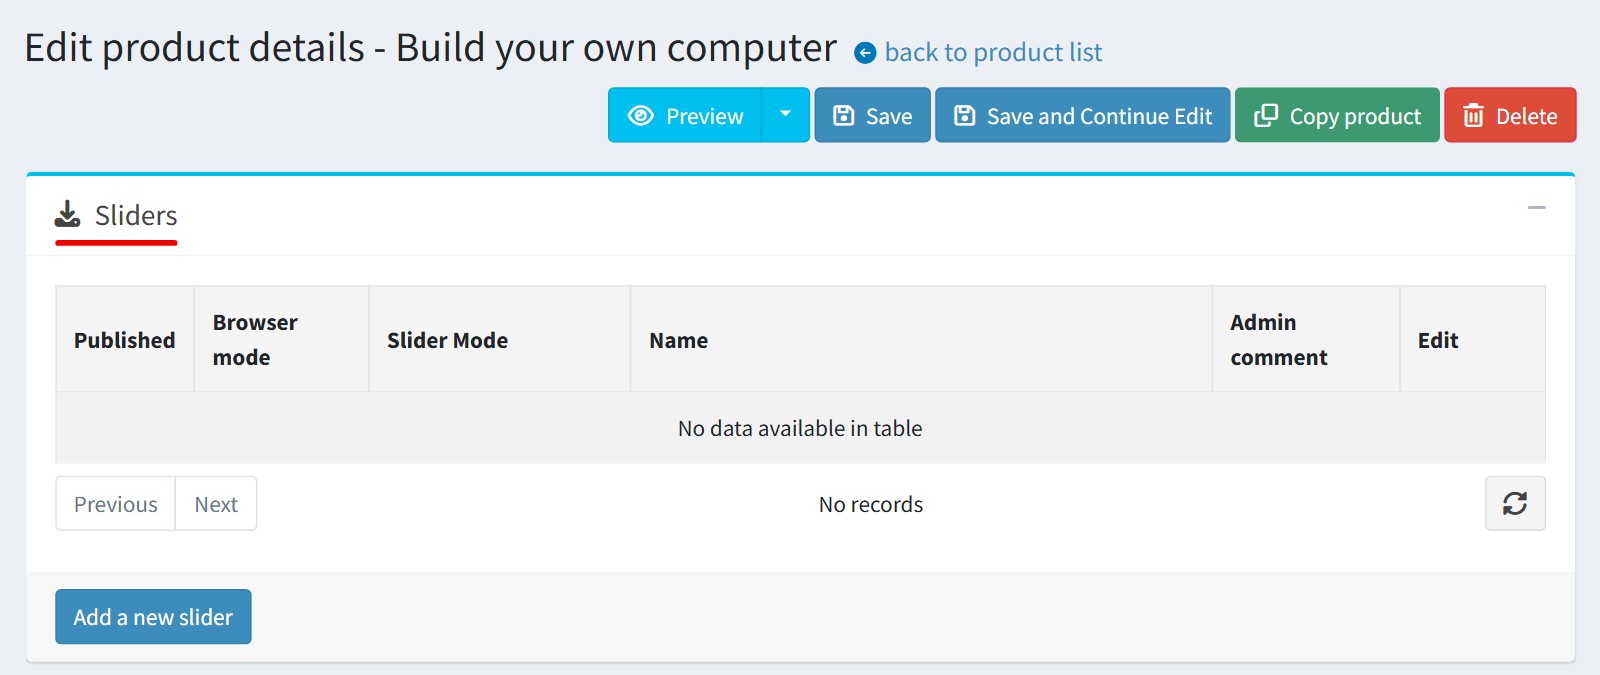
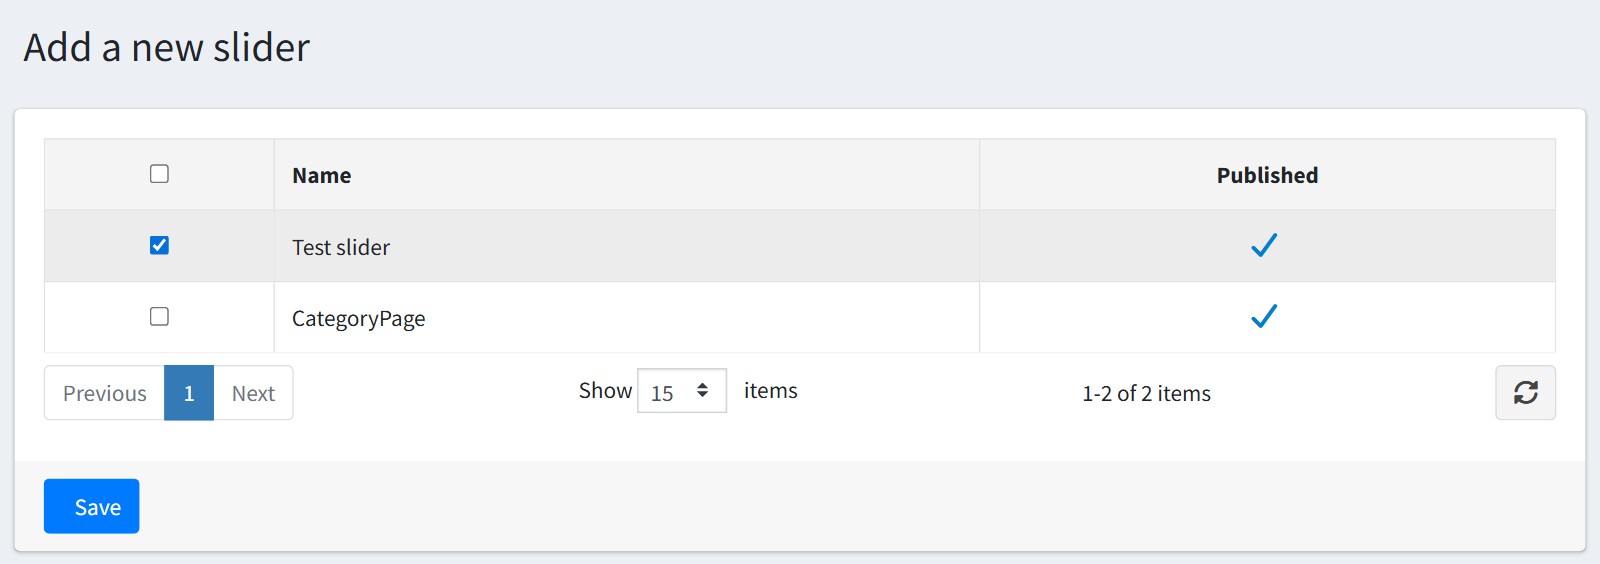
9. You can also add a slider from the product page in the admin. The plugin adds the 'Sliders' block there with the sliders of this product. Press 'Add a new slider', check the sliders and press 'Save'. The category and manufacturer pages have the same block.
10. To change the HTML of the slider for your theme, copy Plugins/FoxNetSoft.SliderManager/Views/SliderManager/PublicInfo.cshtml to Themes/YourTheme/Views/SliderManager/PublicInfo.cshtml and edit the copy. The plugin uses it instead of its own file, so your changes stay after a plugin update.
The admin pages of the plugin are in English. Translate the texts in 'Configuration' - 'Languages' if you work in another language.