Installation and configuring plug-in IP Filter (Firewall) with Anti Hacker Protect your nopCommerce store from unwanted visitors, bots, and hacking attempts. Block or allow by country, IP address, or IP range — with optional automatic bot protection. No coding required. Enable the plugin, set admin‑area allowed IPs, and receive notifications about blocked IPs. Choose Country Filter and Region Filter modes, turn on Anti‑Hacker (block non‑ASCII, static‑file probes, and custom hacker patterns), configure a custom Access Denied page, and update GeoLite2 databases. Add or edit individual IP rules (allow or block), assign to a specific store if needed, and leave comments for auditing. Use Import from CSV / Export to CSV for bulk operations; quickly edit or delete entries from the grid. Define IP ranges by specifying From and To addresses to allowlist or block entire network segments at once. Bulk‑manage ranges with CSV import/export, and scope rules per store when required. Maintain your block/allow list by country. Choose a country code from the dropdown, add an optional comment, and save to apply. Rules can be scoped per store if you run a multi‑store setup. Create, enable/disable, and manage automatic ban rules. Use this page to add new rules or edit existing ones that will automatically block an IP when the rule conditions are met. Auto‑ban an IP if a request URL contains (or exactly matches) a specific substring. Configure the rule name, store scope, set the URL substring, choose case‑sensitive matching, and pick Contains or Exact match mode. Auto‑ban an IP when your store’s error log shows repeated issues containing a chosen keyword within a short timeframe. Configure the keyword (substring), the minimum count, and the time window in minutes.🛡️ IP Filter (Firewall) with Anti‑Hacker
Why Store Owners Love It
Key Features
CN, VN, RU).Quick Start
Screenshots & What You Can Do on Each Page
1) Main Configuration

2) IP Addresses Tab

3) Region (IP Networks) Tab

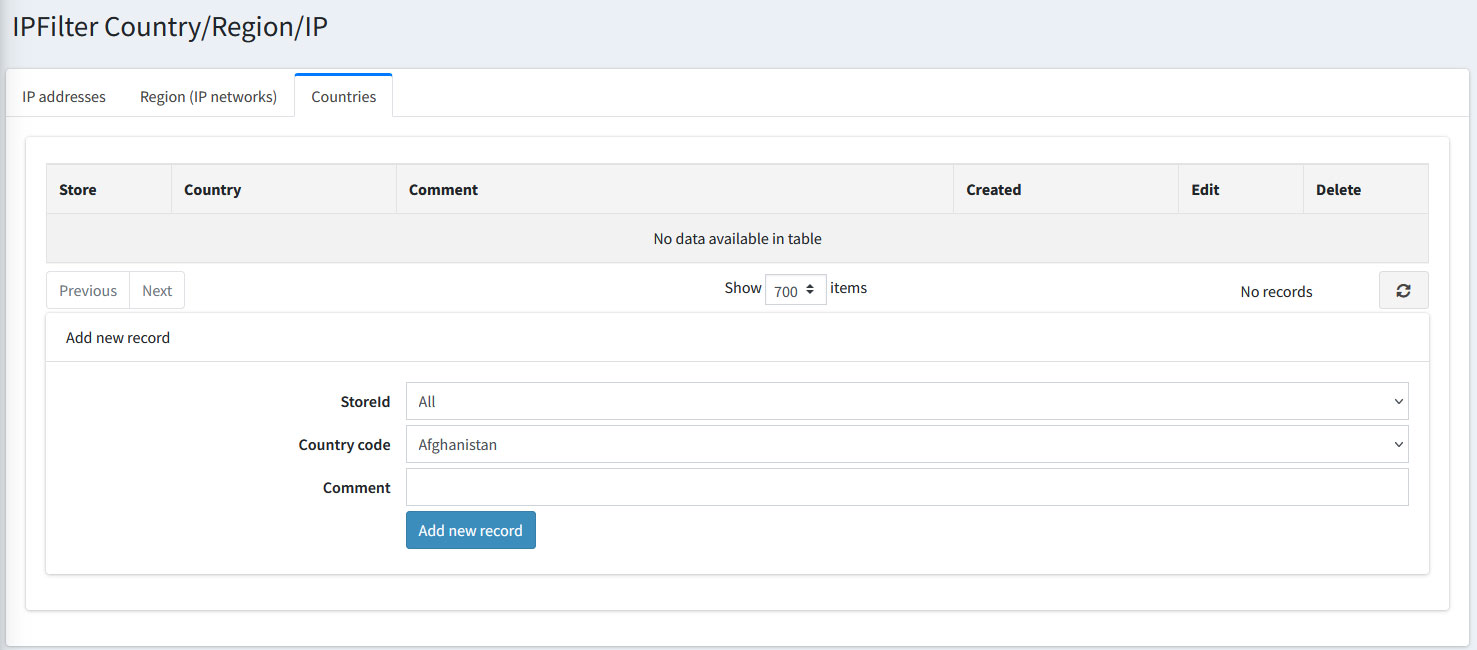
4) Countries Tab
5) Automatic IP Ban Rules — List

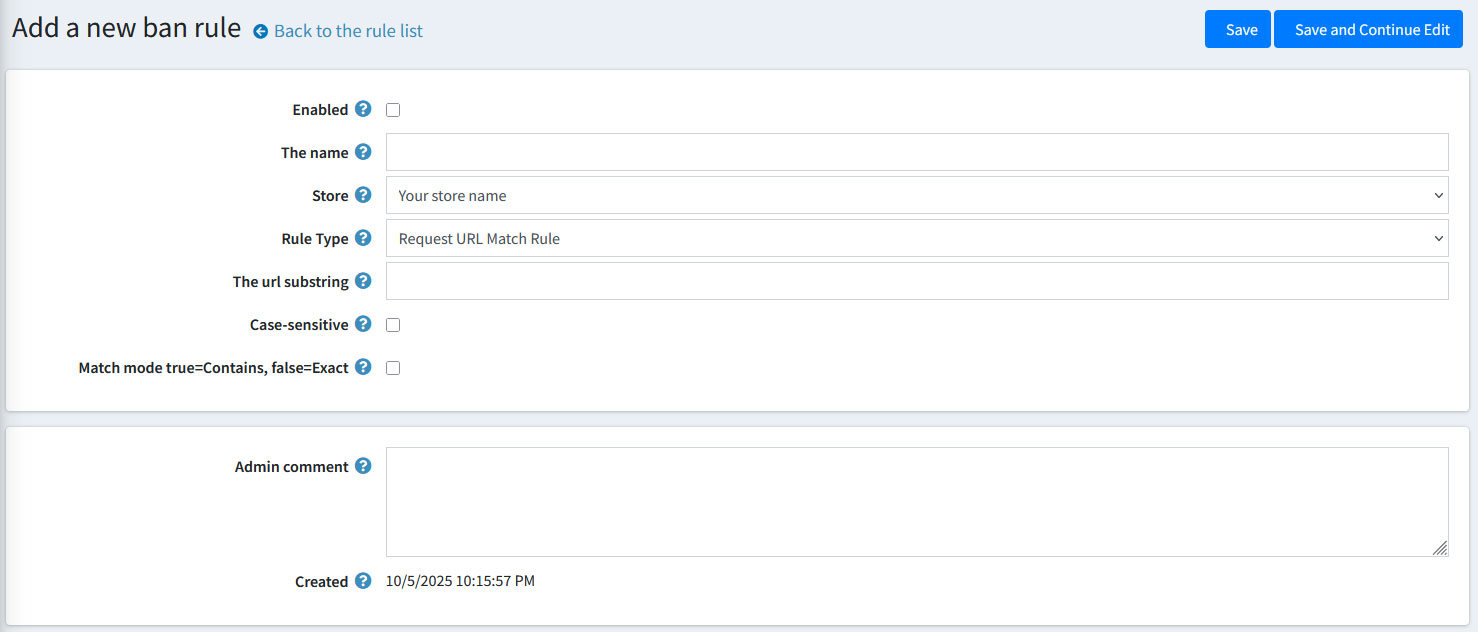
6) Automatic IP Ban Rule — Request URL Match Rule
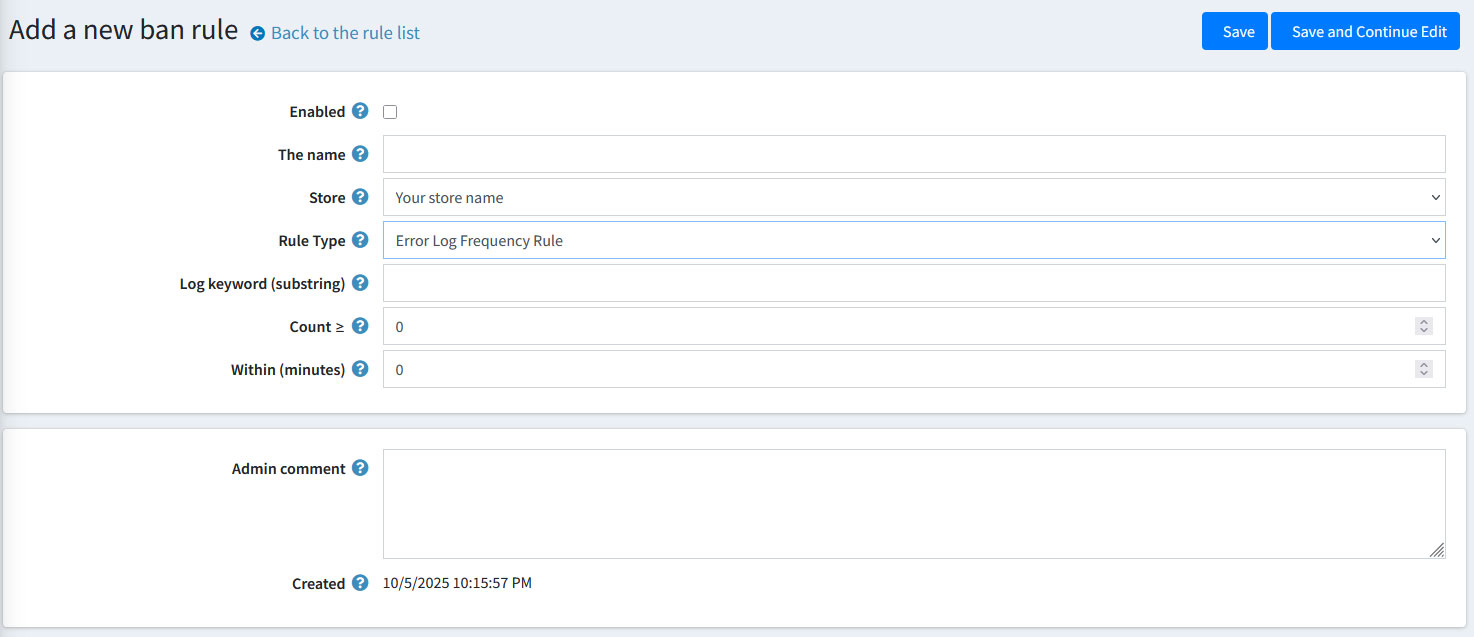
7) Automatic IP Ban Rule — Error Log Frequency Rule