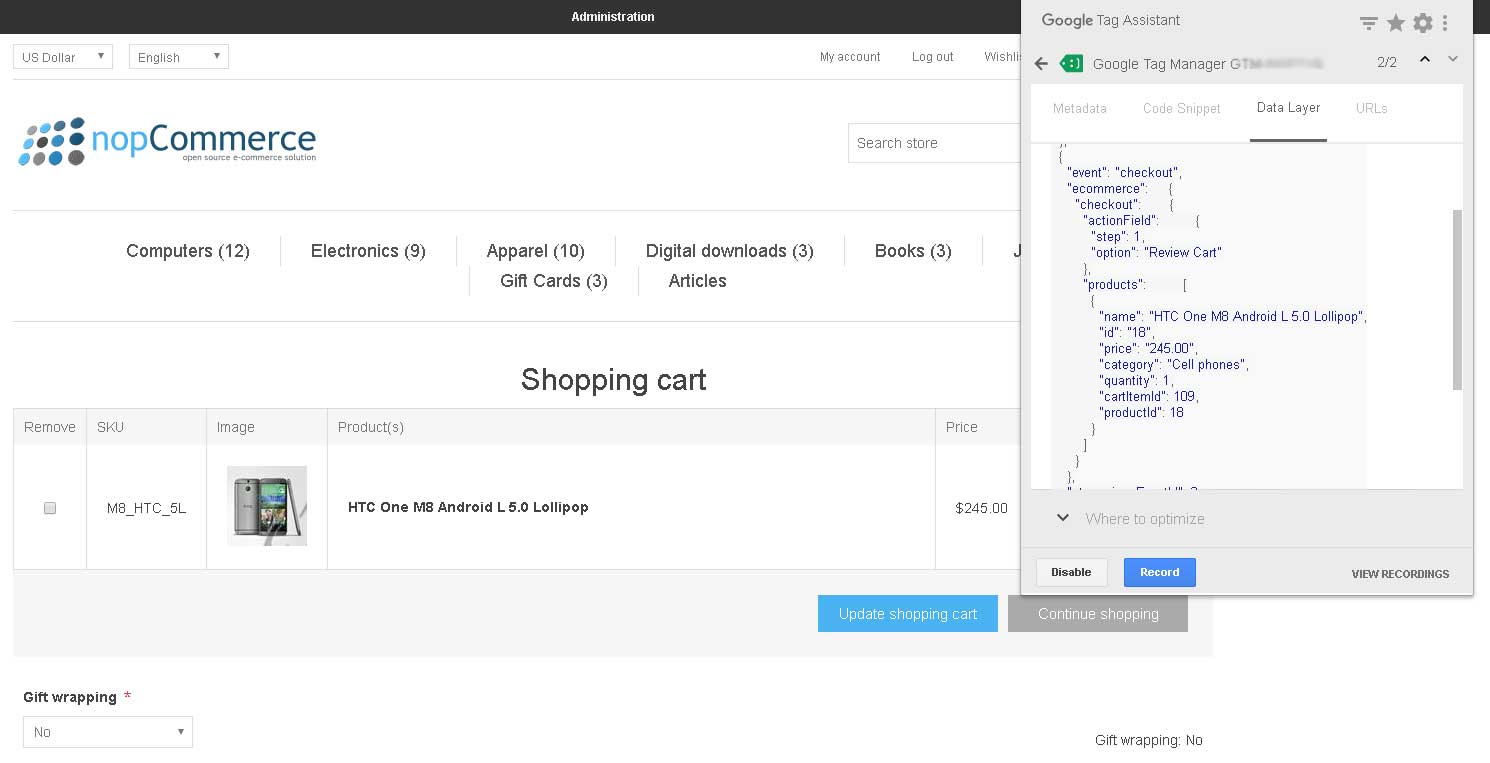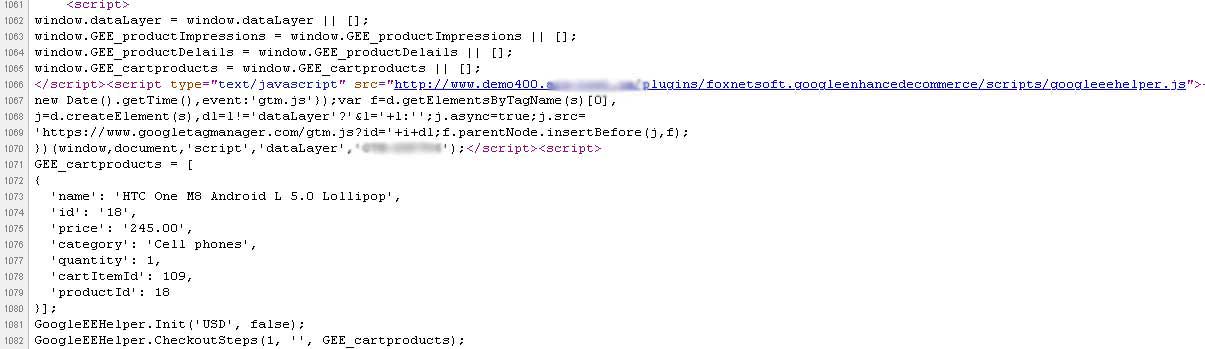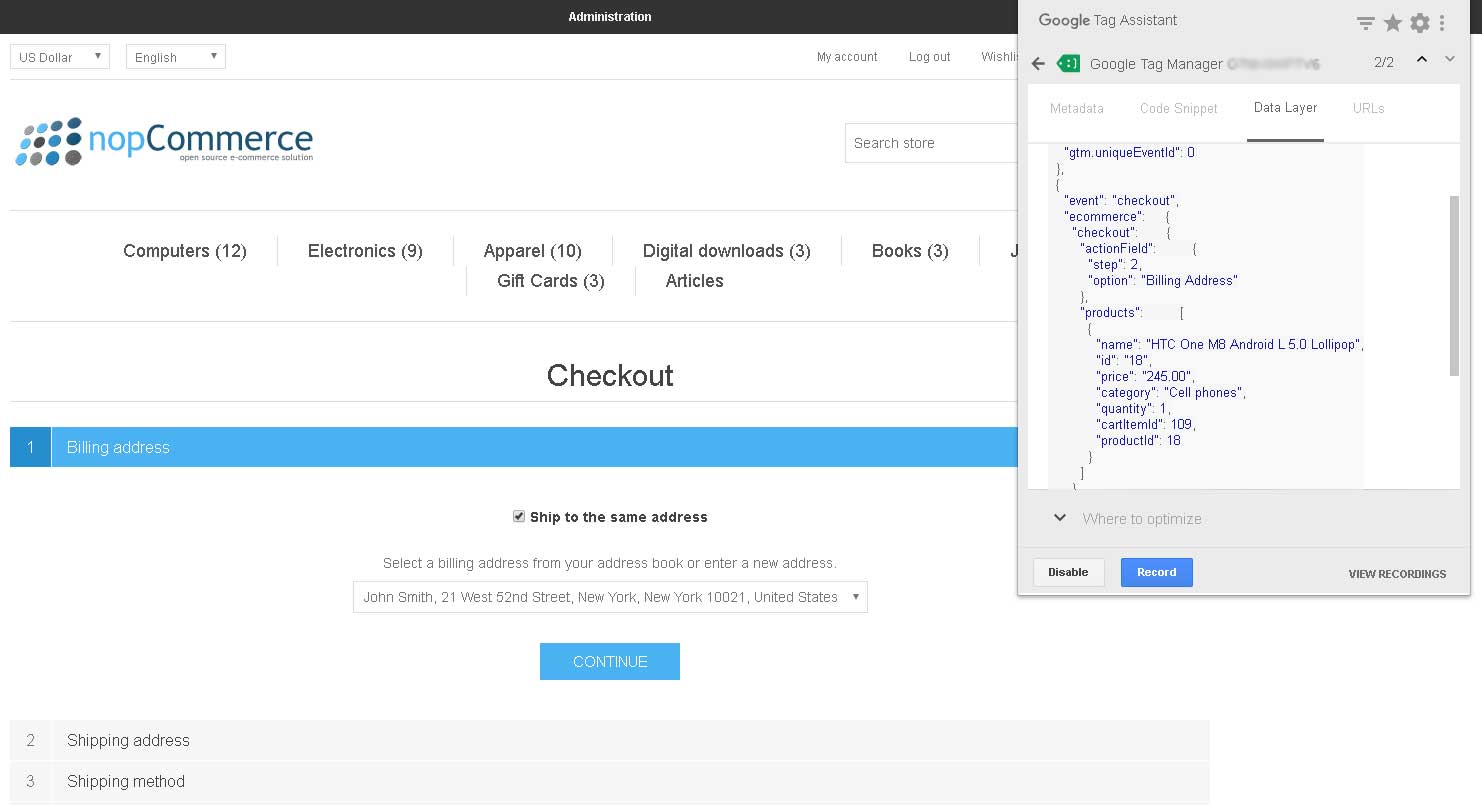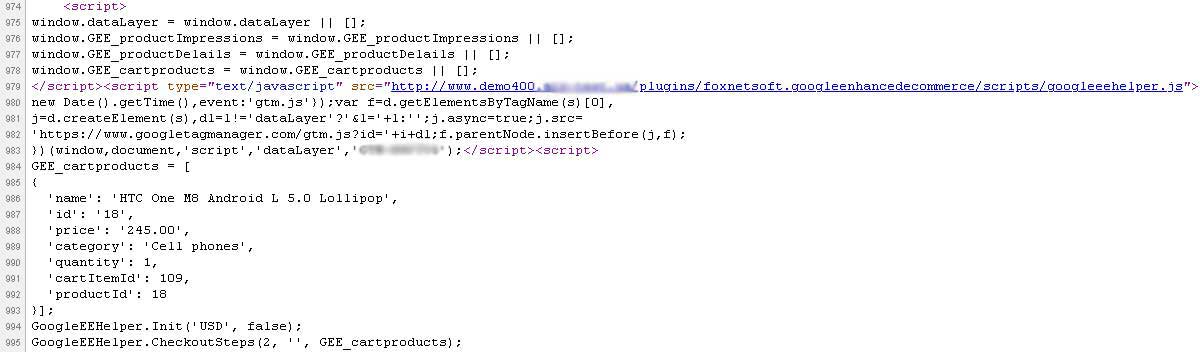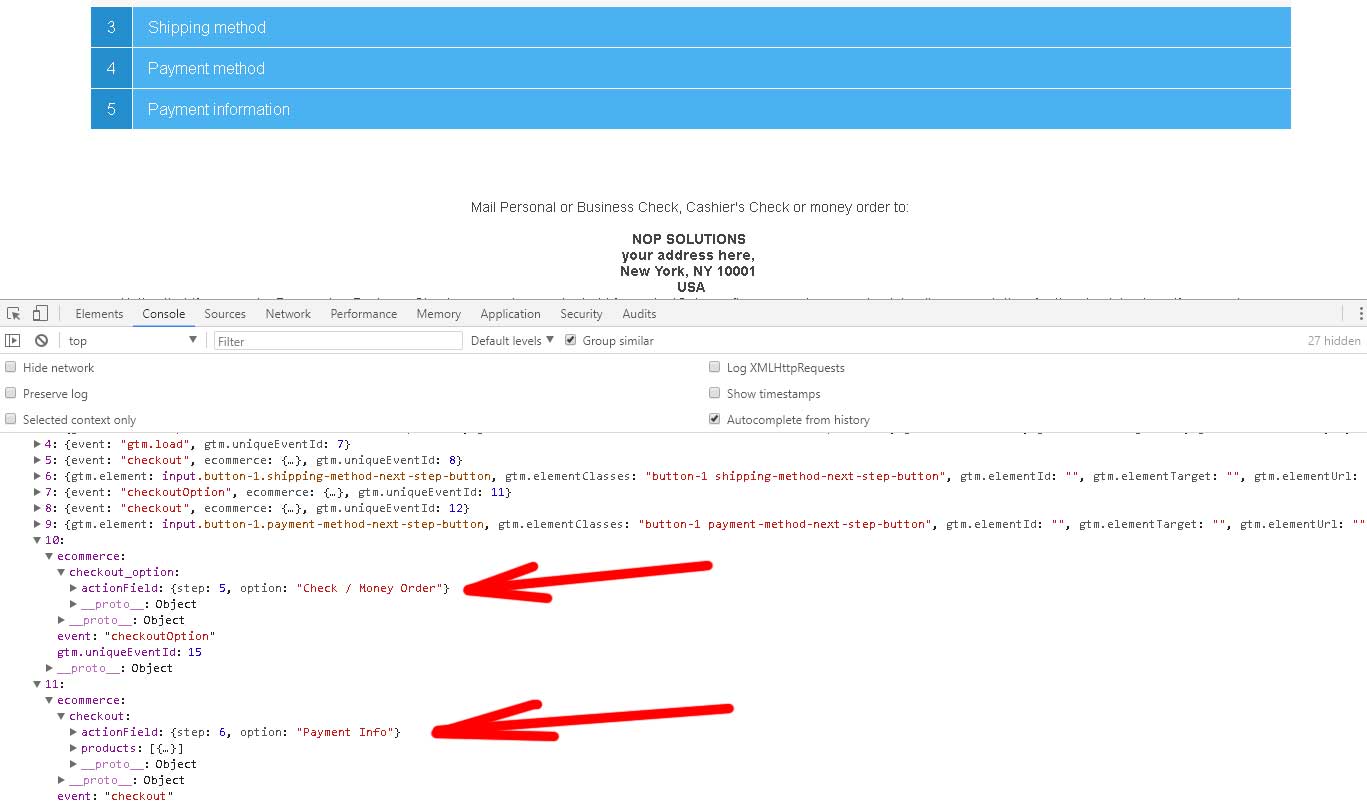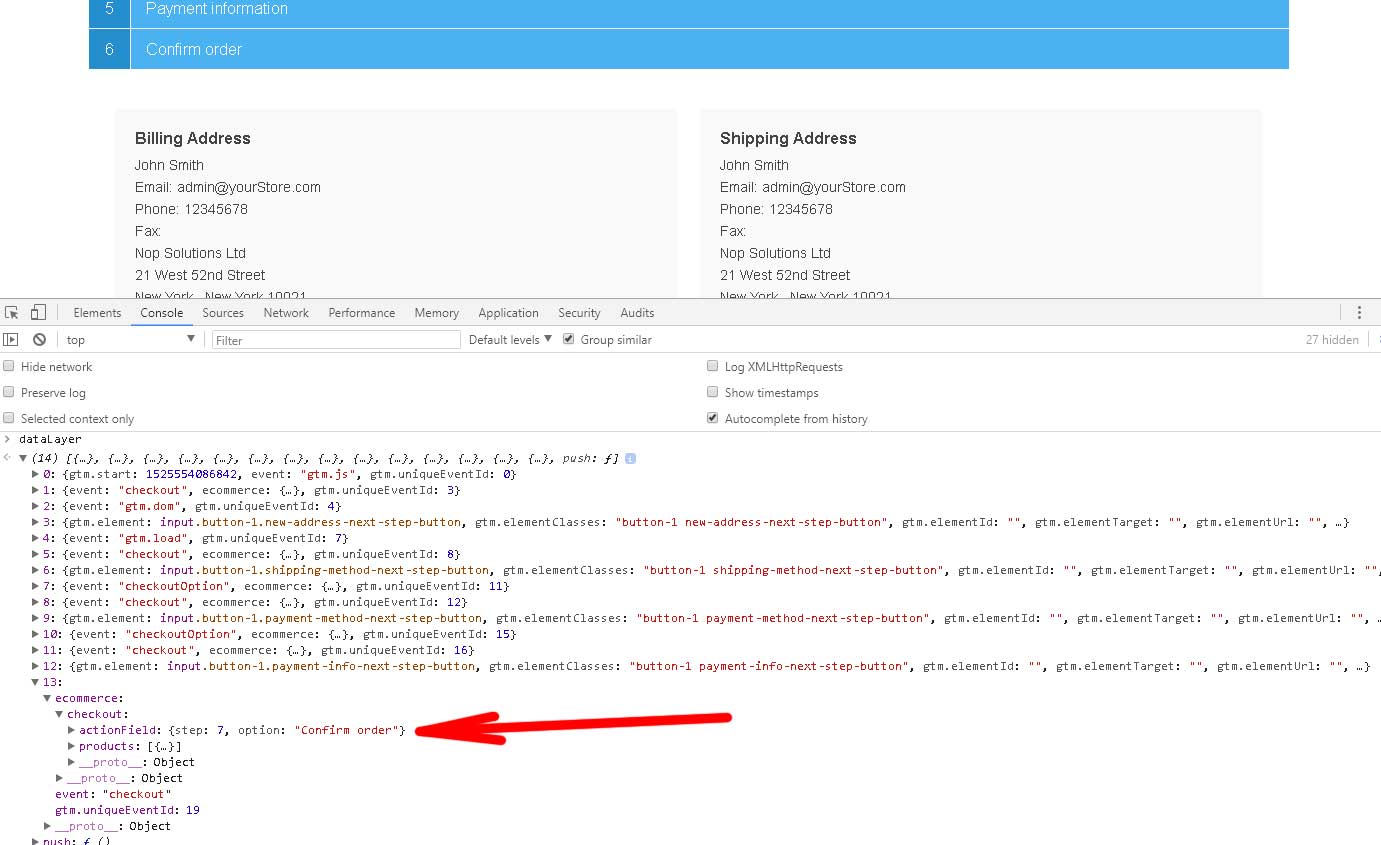
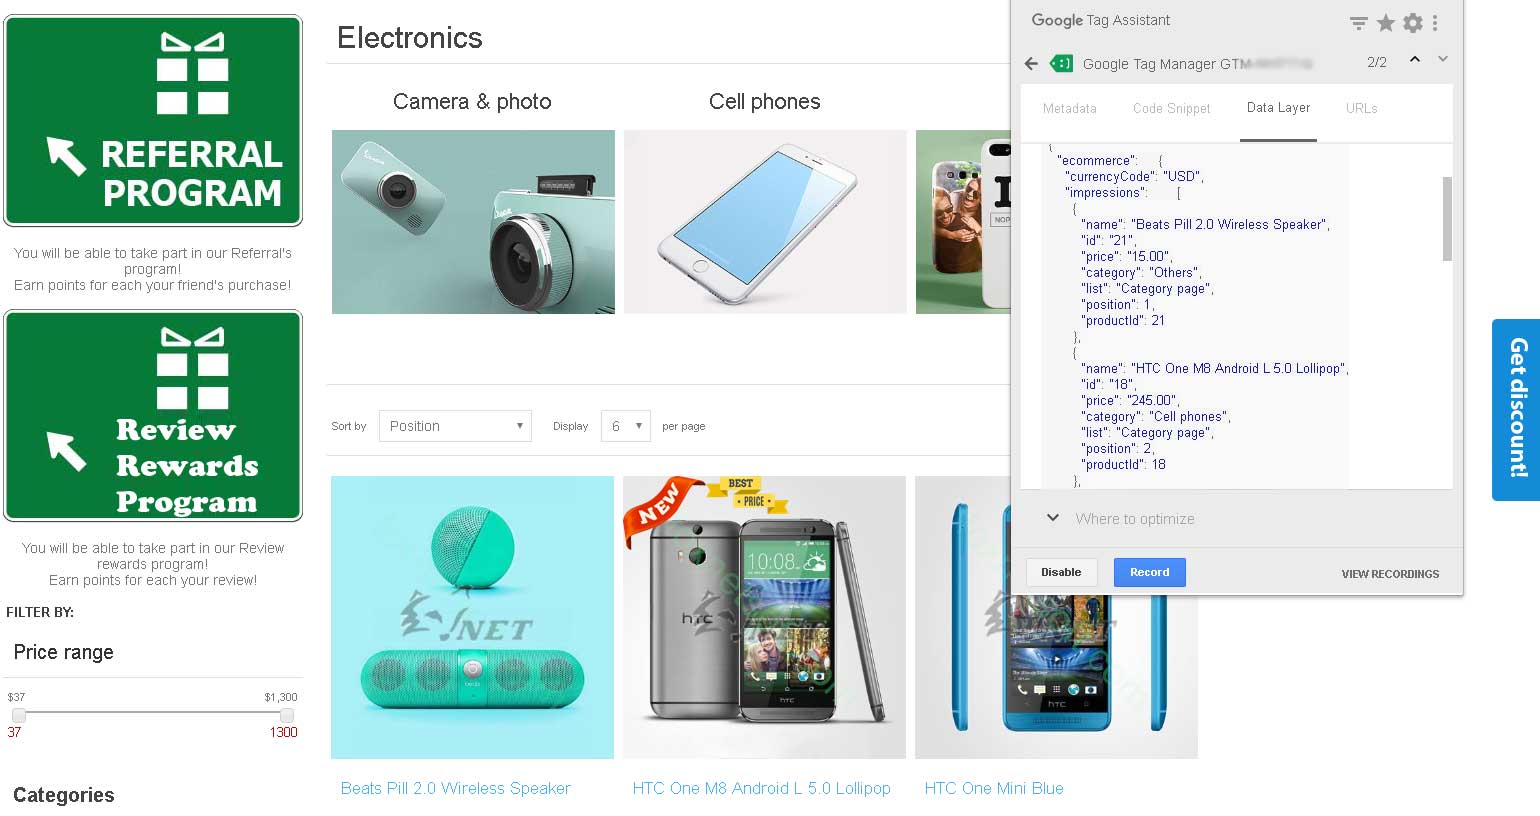
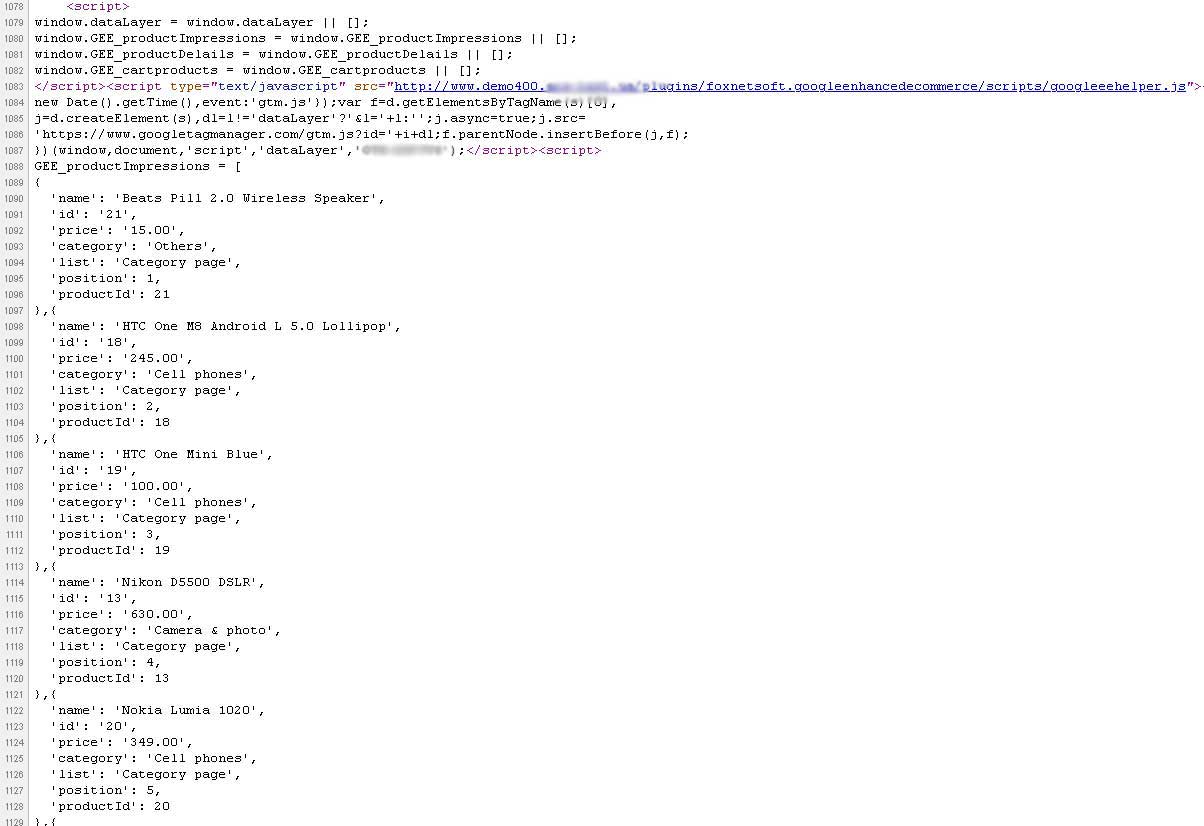
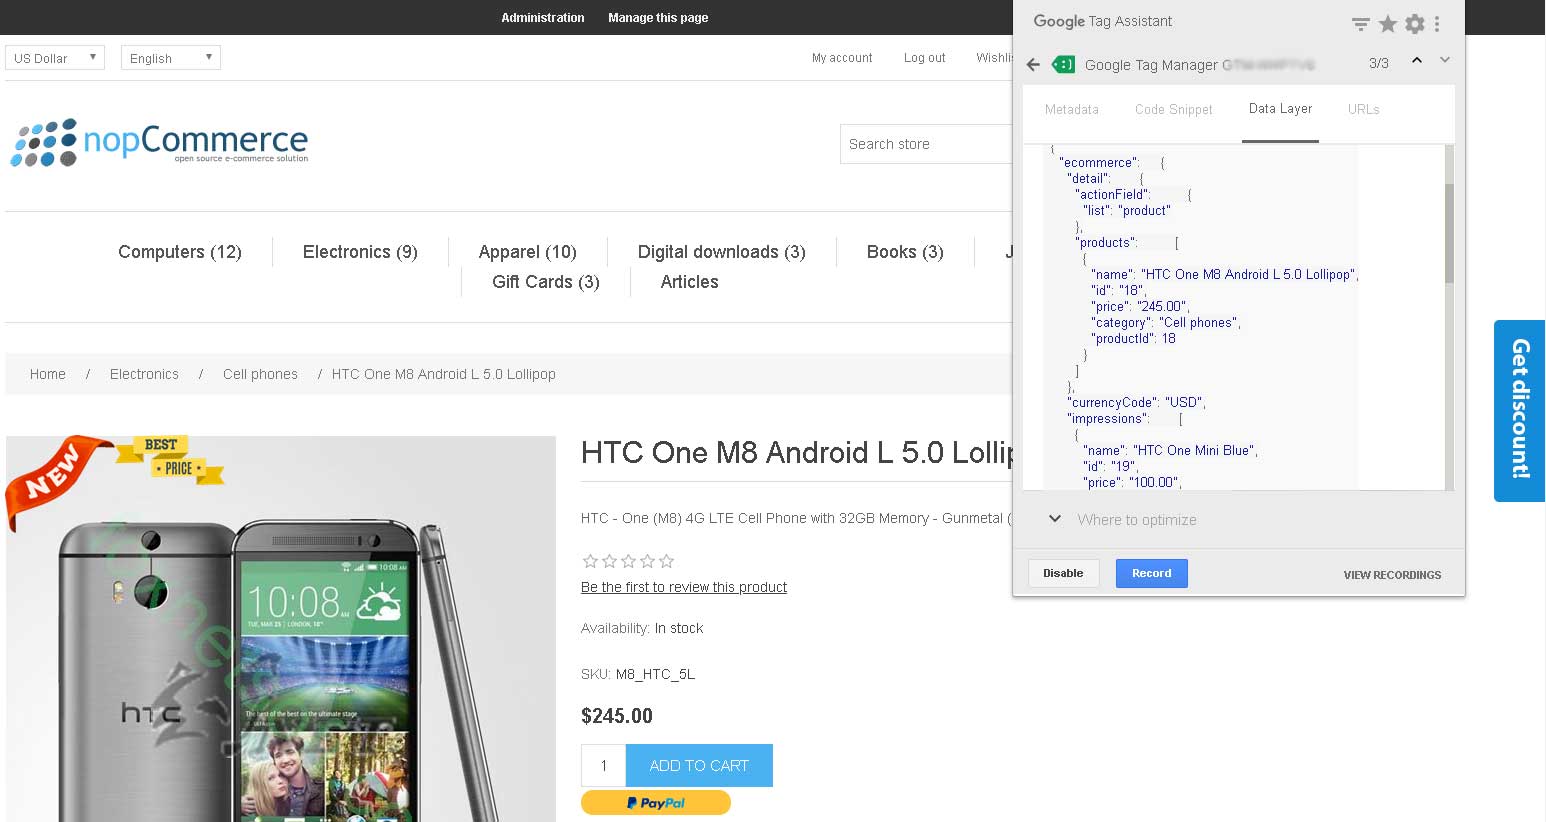
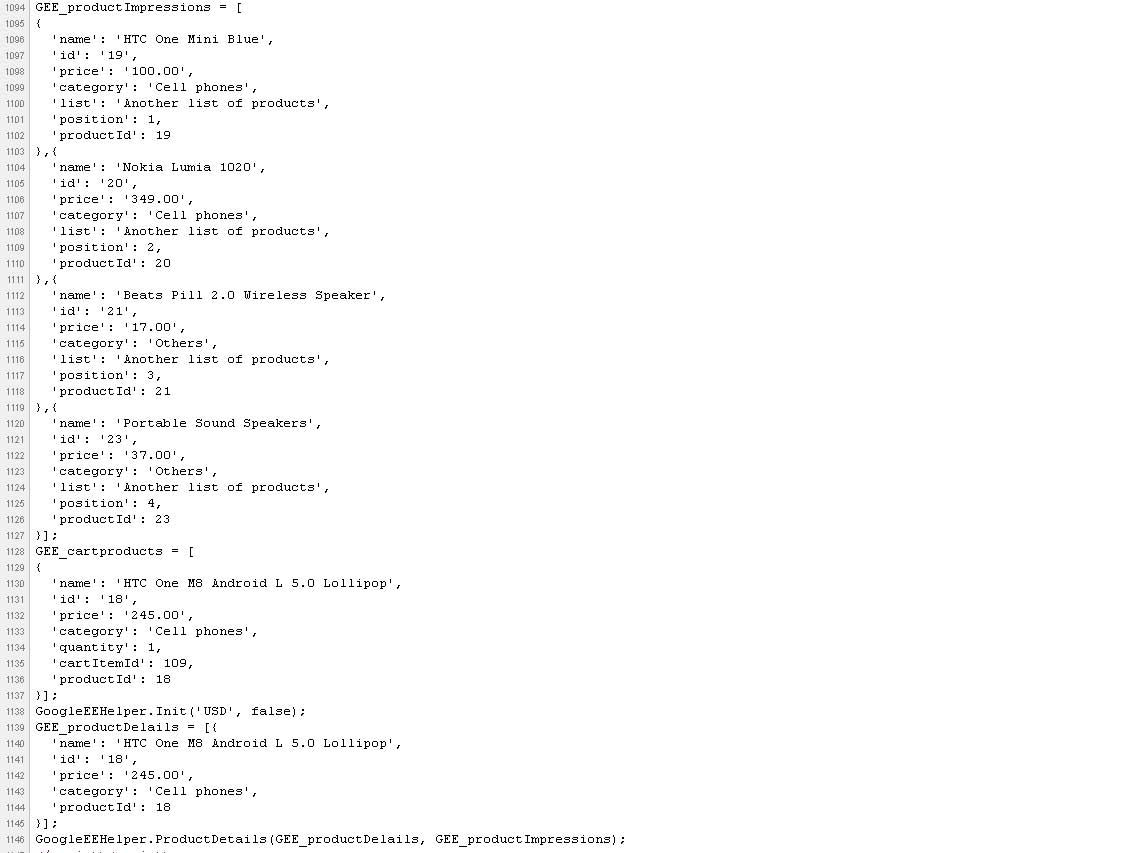
Installation and configuring plug-in Enhanced Ecommerce (UA) You can configure plugin very easy. Install plugin and open plugin configure page. You should set Merchant ID and select the product ID from the list if you use SKU as product ID, etc. Impressions. Plugin scans each store page and creates array of products on this page. Category/Manufacturer/Vendor/Search pages have a list of products. But product details page can have a cross-sell products, etc. If plugin finds the list of products on the page than plugin sends them using 'Impressions'. Plugin creates JavaScript array GEE_productImpressions. See parameters on this example. id - google product Id. You can change it on plugin configure page (mapping nop product ID to google product Id (if you use SKU as product Id for Google)) productId - real product Id from nop store. Detail Impressions If customer opens product details page plugin creates new dataLayer message. If this product is Grouped product plugin creates array of list. If plugin finds another list of products on the page (ex. cross-sell products) than plugin sends them using 'Impressions' tag too. Plugin creates JavaScript array GEE_productDelails. See parameters on this example. id - google product Id. You can change it on plugin configure page (mapping nop product ID to google product Id (if you use SKU as product Id for Google)) productId - real product Id from nop store. Add / Remove from Cart/Wishlist, Add to Wishlist, Add to Compare, Copy from Wishlist to Cart. We show example for 'Add to Cart' event. If customer adds product to cart plugin creates new dataLayer message. Purchases Plugin add event 'Purchases' on order completed page. See example id - google product Id. You can change it on plugin configure page (mapping nop product ID to google product Id (if you use SKU as product Id for Google)) productId - real product Id from nop store. Checkout Checkout has several steps If customer opens shopping cart page plugin creates new dataLayer message 'Review Cart' with step=1. Plugin creates JavaScript array GEE_cartproducts (products from cart) and GEE_wishlistproducts (products from wishlist) . See parameters on this example. id - google product Id. You can change it on plugin configure page (mapping nop product ID to google product Id (if you use SKU as product Id for Google)) productId - real product Id from nop store. If customer opens Checkout page plugin creates new dataLayer message 'Billing Address' with step=2. If customer opens 'Shipping address' block of checkout page plugin creates new dataLayer message 'Shipping address' with step=3. If customer opens 'Shipping Method' block of checkout page plugin creates new dataLayer message 'Shipping Method' with step=4. After selecting shipping method plugin sends it to Google too. See example 'Ground'. If customer opens 'Payment Method' block of checkout page plugin creates new dataLayer message 'Payment Method' with step=5. After selecting payment method plugin sends it to Google too. See example 'Check/Money Order'. If customer opens 'Payment Info' block of checkout page plugin creates new dataLayer message 'Payment Info' with step=6. If customer opens 'Confirm Order' block of checkout page plugin creates new dataLayer message 'Confirm Order' with step=7.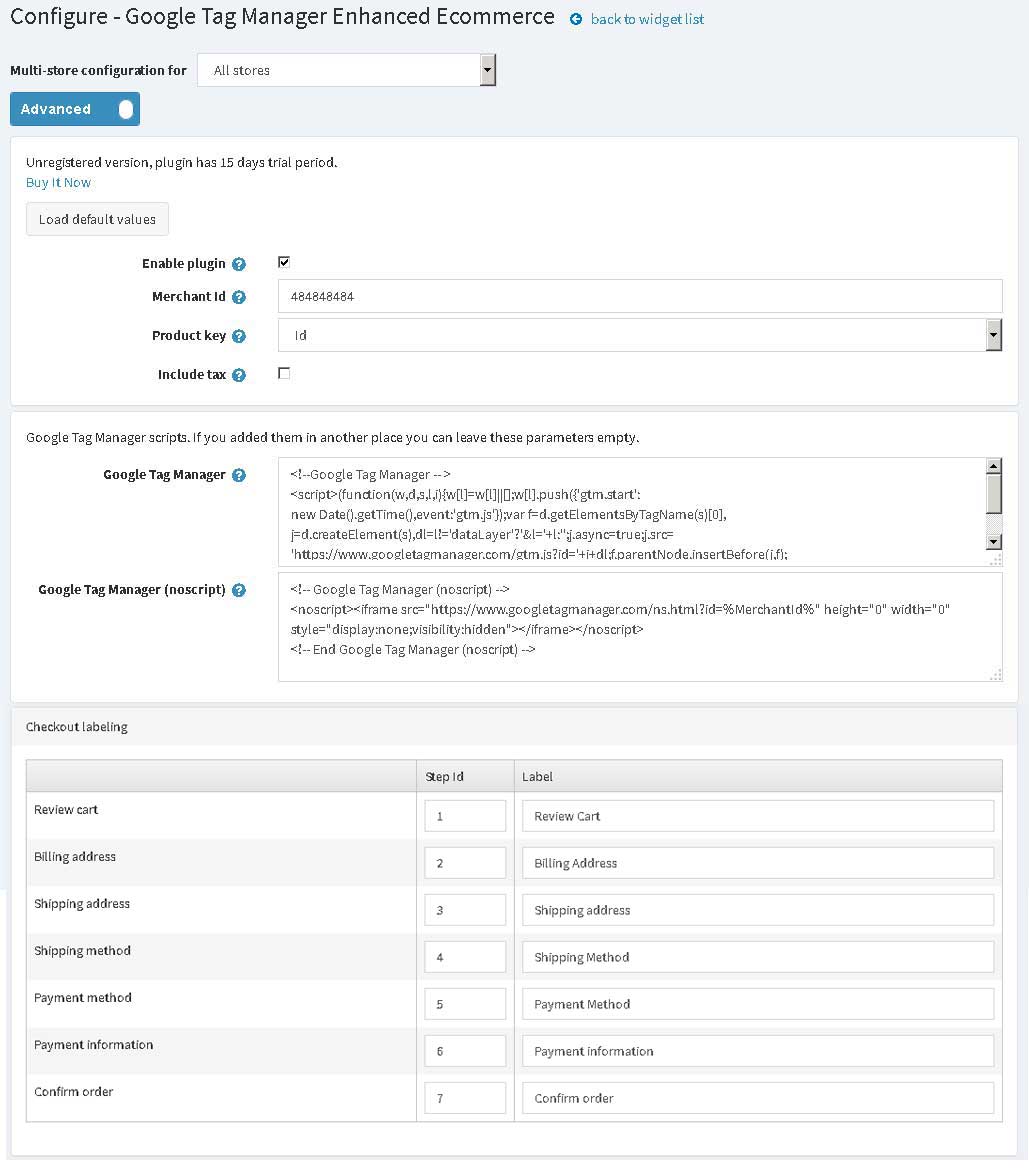
This is the list of all events: addToCart, addToWishlist, addToCompare, copyToCartFromWishlist, removeFromCart, removeFromWishList.


1 - Review Cart
2 - Billing Address
3 - Shipping address
4 - Shipping Method
5 - Payment Method
6 - Payment information
7 - Confirm order