
Installation and configuring plug-in Automatic Related Products
The plugin shows your products on the blog post, news and topic pages, and the related blog posts and news on the product page. You choose yourself which products go with which page.
It's easy to configure the plugin. See pictures.
1. Install the plugin. You will find it in the admin menu 'FoxNetSoft' - 'Automatic Related Products'.
'List' shows all attached products. 'Configure' opens the plugin settings.
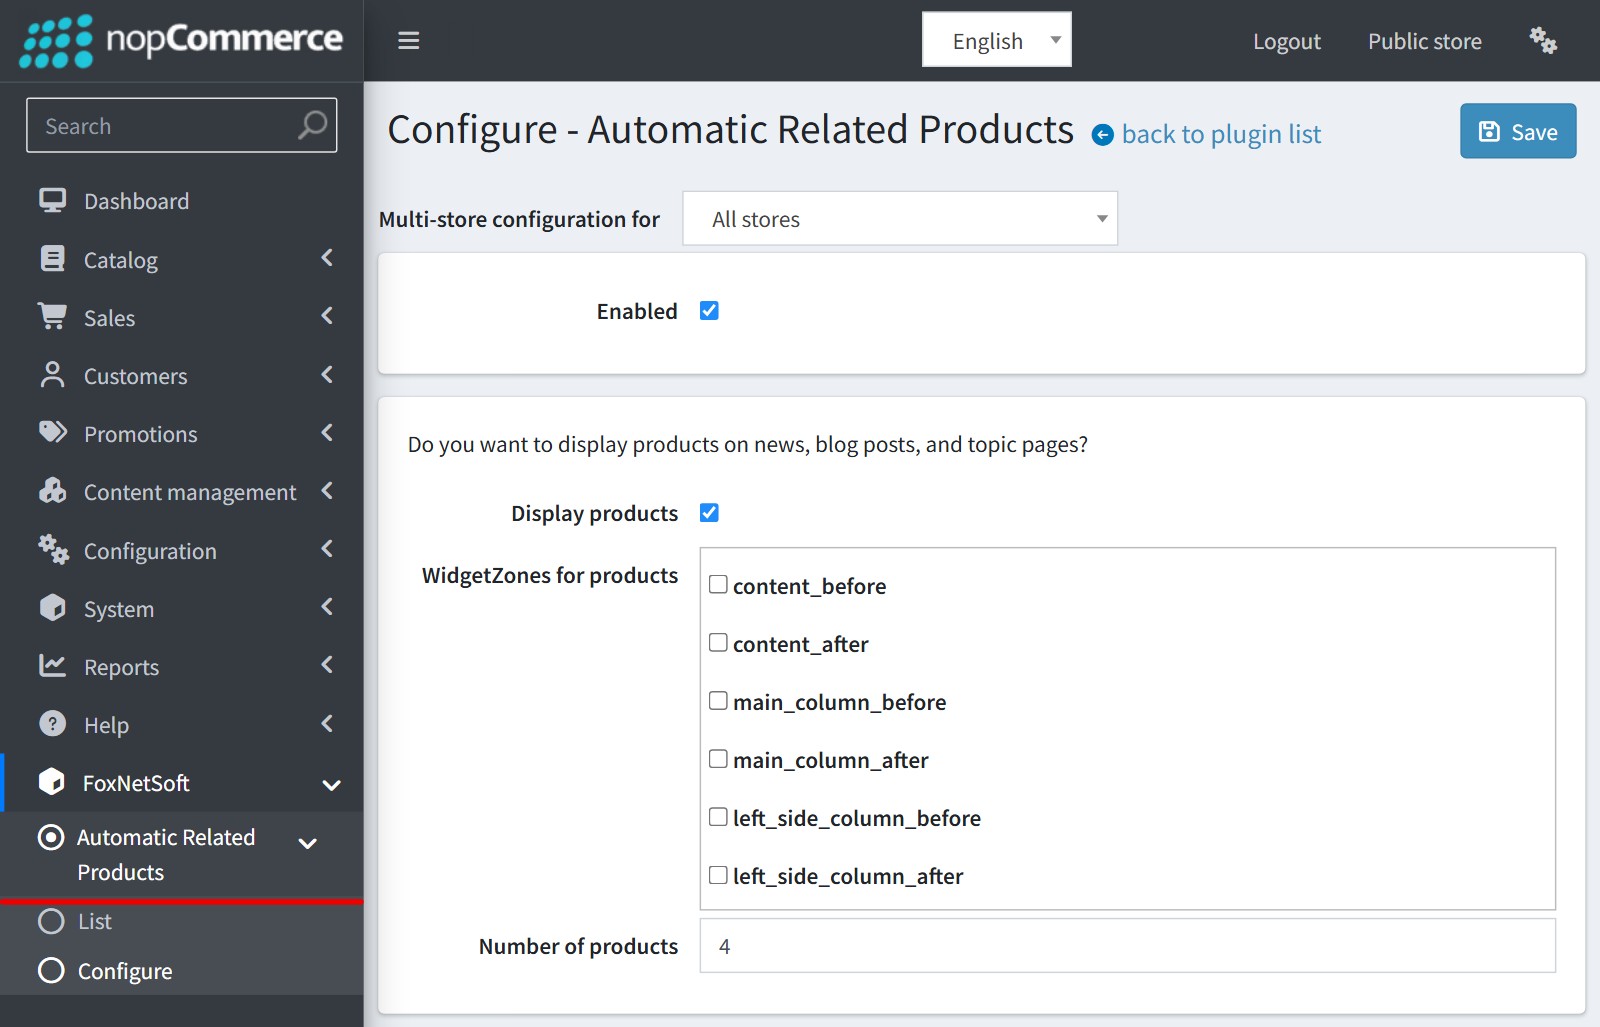
2. Open the configure page and enable the plugin.
'Display products' shows the attached products on the blog post, news and topic pages.
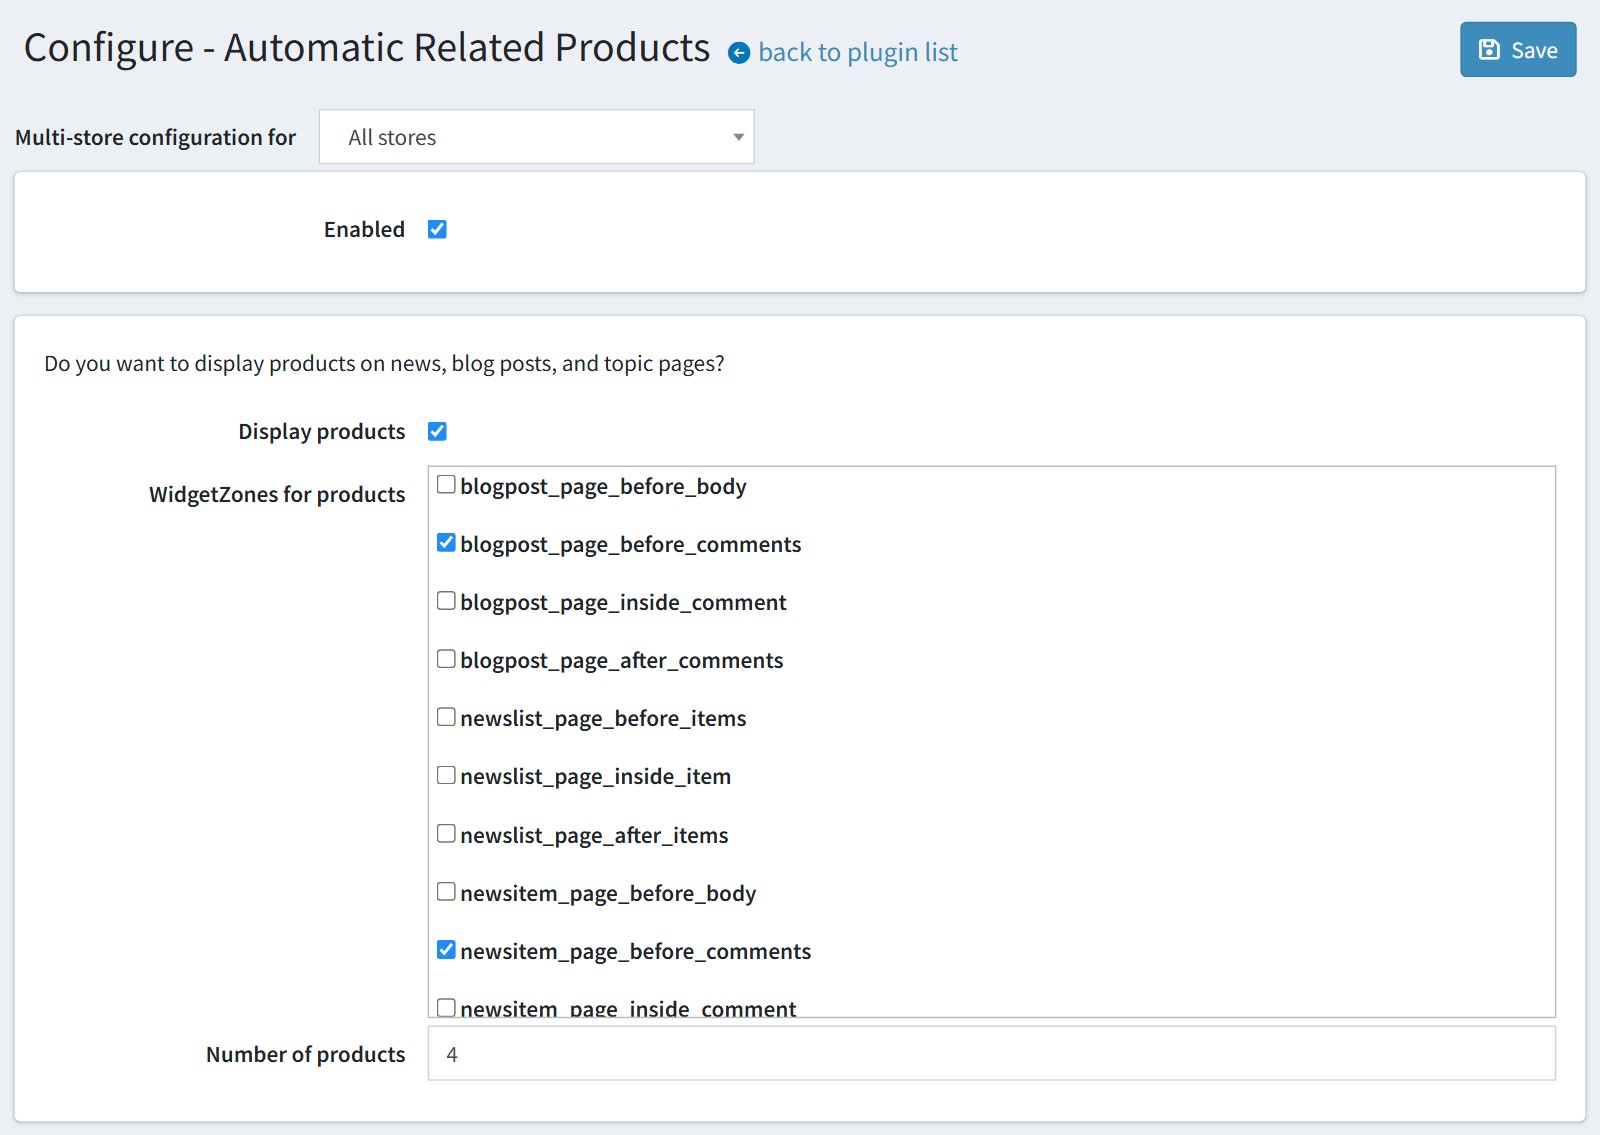
'WidgetZones for products'. Tick the places where the block appears. By default they are 'blogpost_page_before_comments' and 'newsitem_page_before_comments'.
'Number of products' - how many products the block shows.
The topic page has no own widget zone in the list. If you need the products on topic pages, tick a general zone such as 'main_column_after'. A general zone works on the blog post and news pages too, so do not tick it together with a blog post or news zone, or the block appears twice.
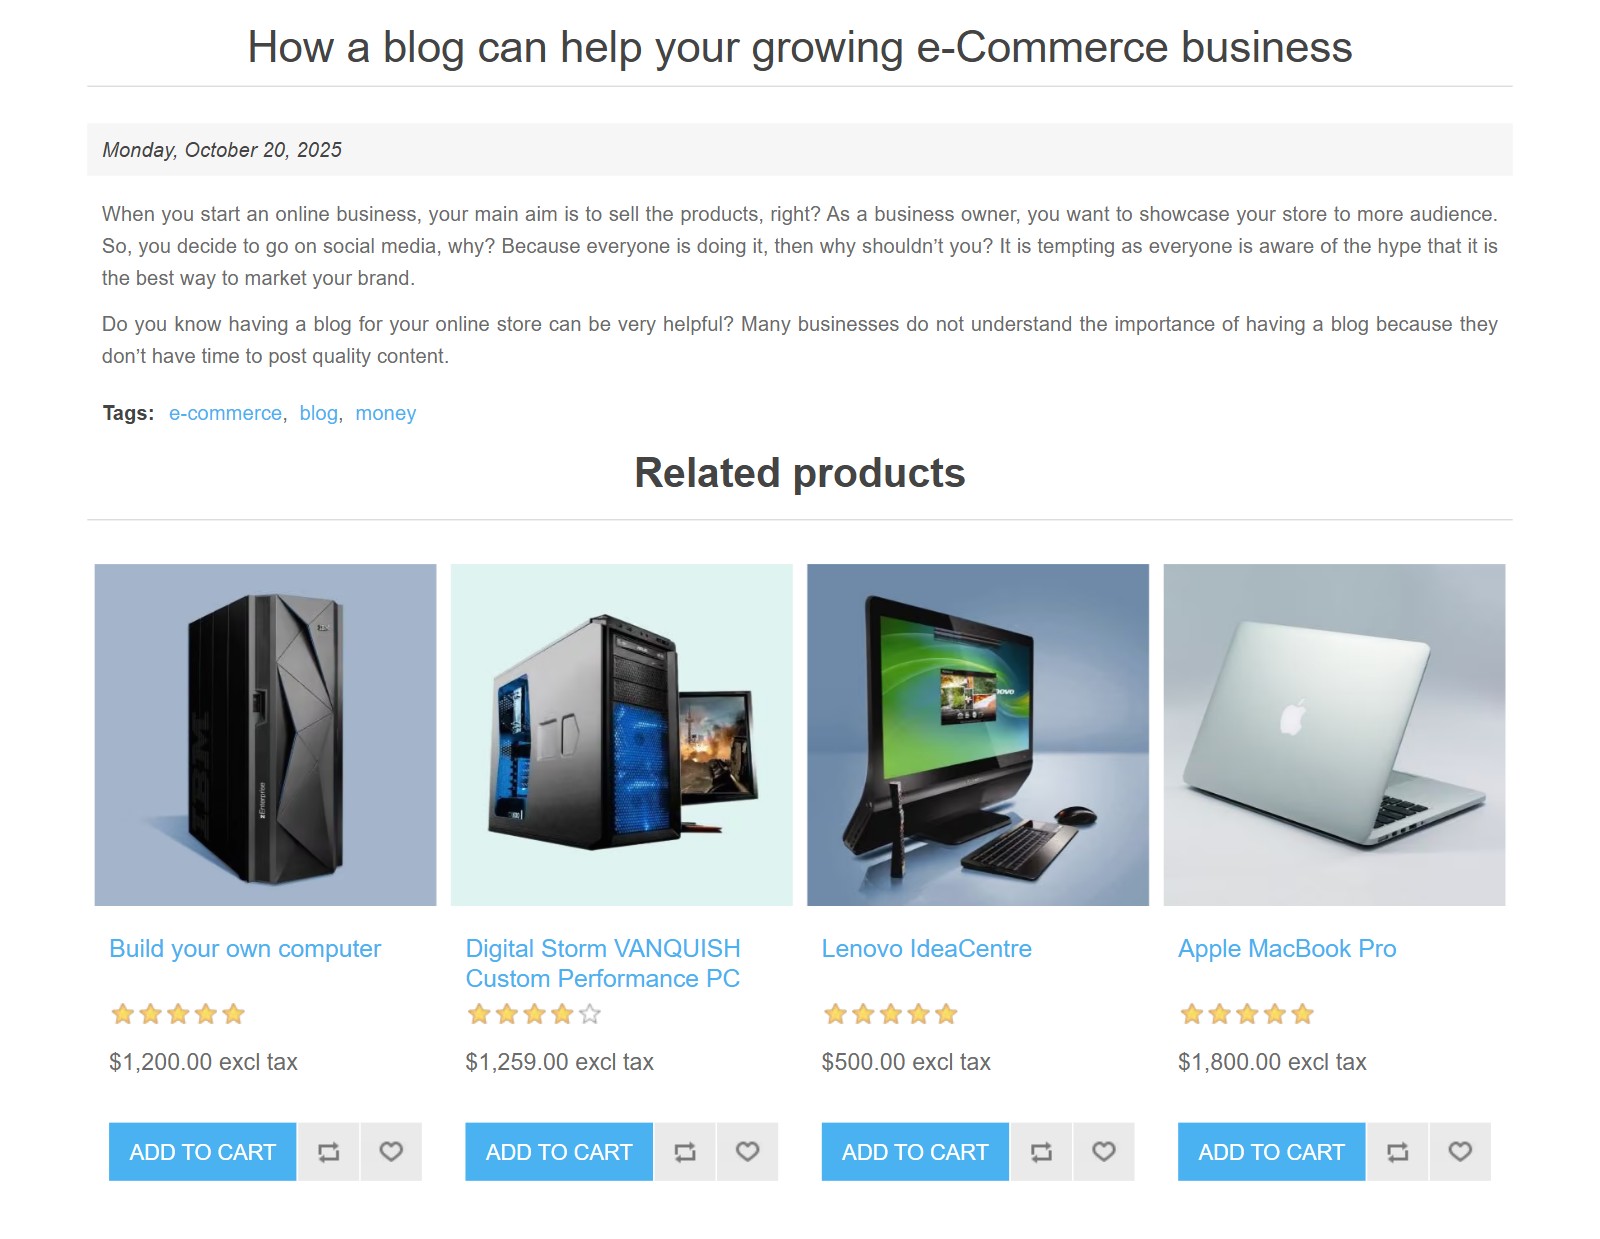
This is how the block 'Related products' looks on the blog post page.
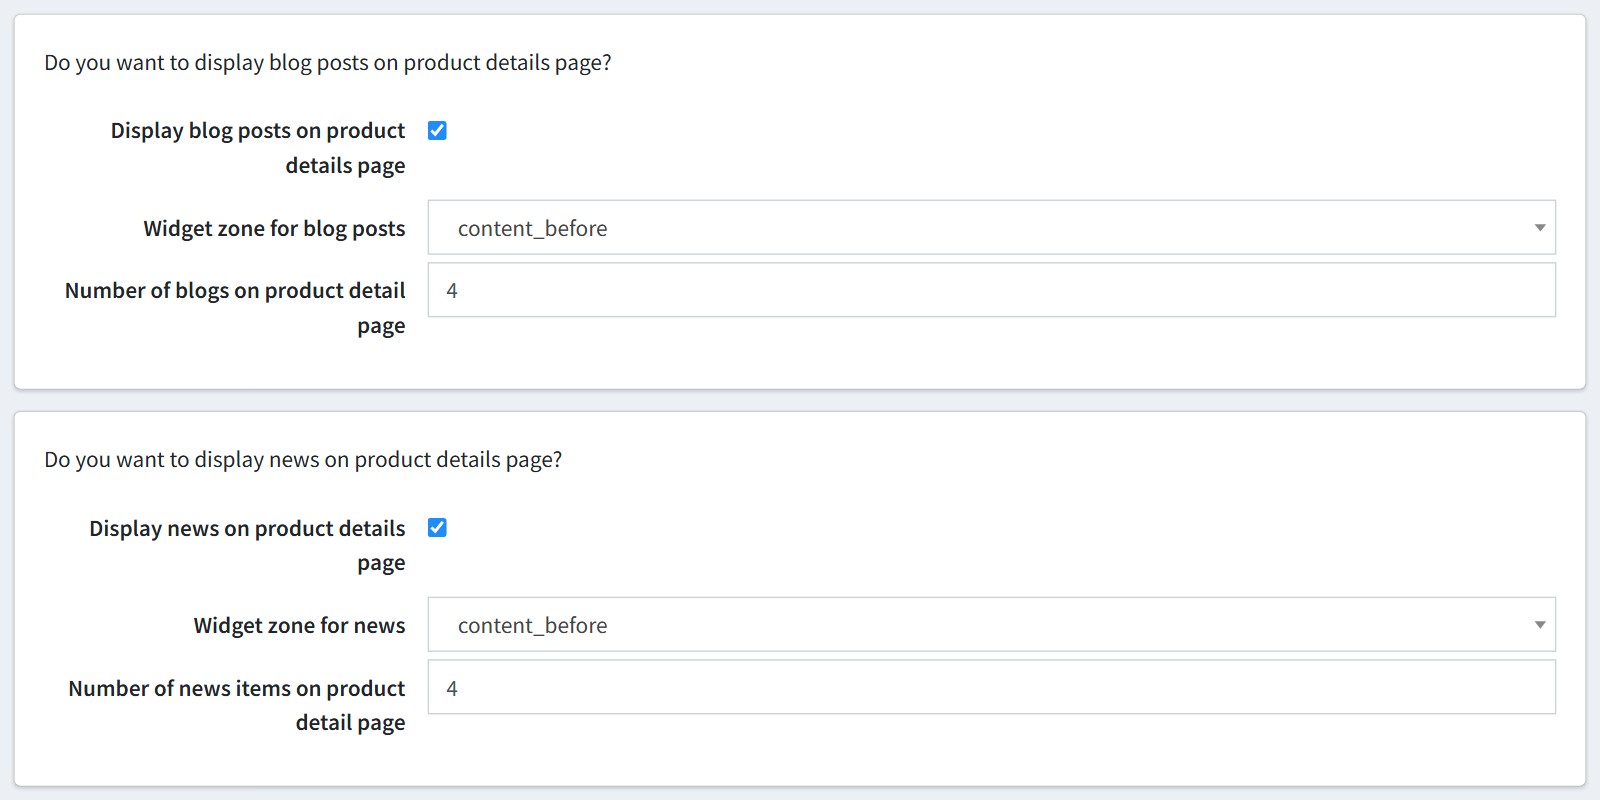
3. The plugin can show it the other way round too: the blog posts and news about the product on the product page.
Enable 'Display blog posts on product details page', select the 'Widget zone for blog posts' and set the 'Number of blogs on product detail page'.
The same for the news: 'Display news on product details page', 'Widget zone for news' and 'Number of news items on product detail page'.
By default both blocks are shown in 'productdetails_bottom'.
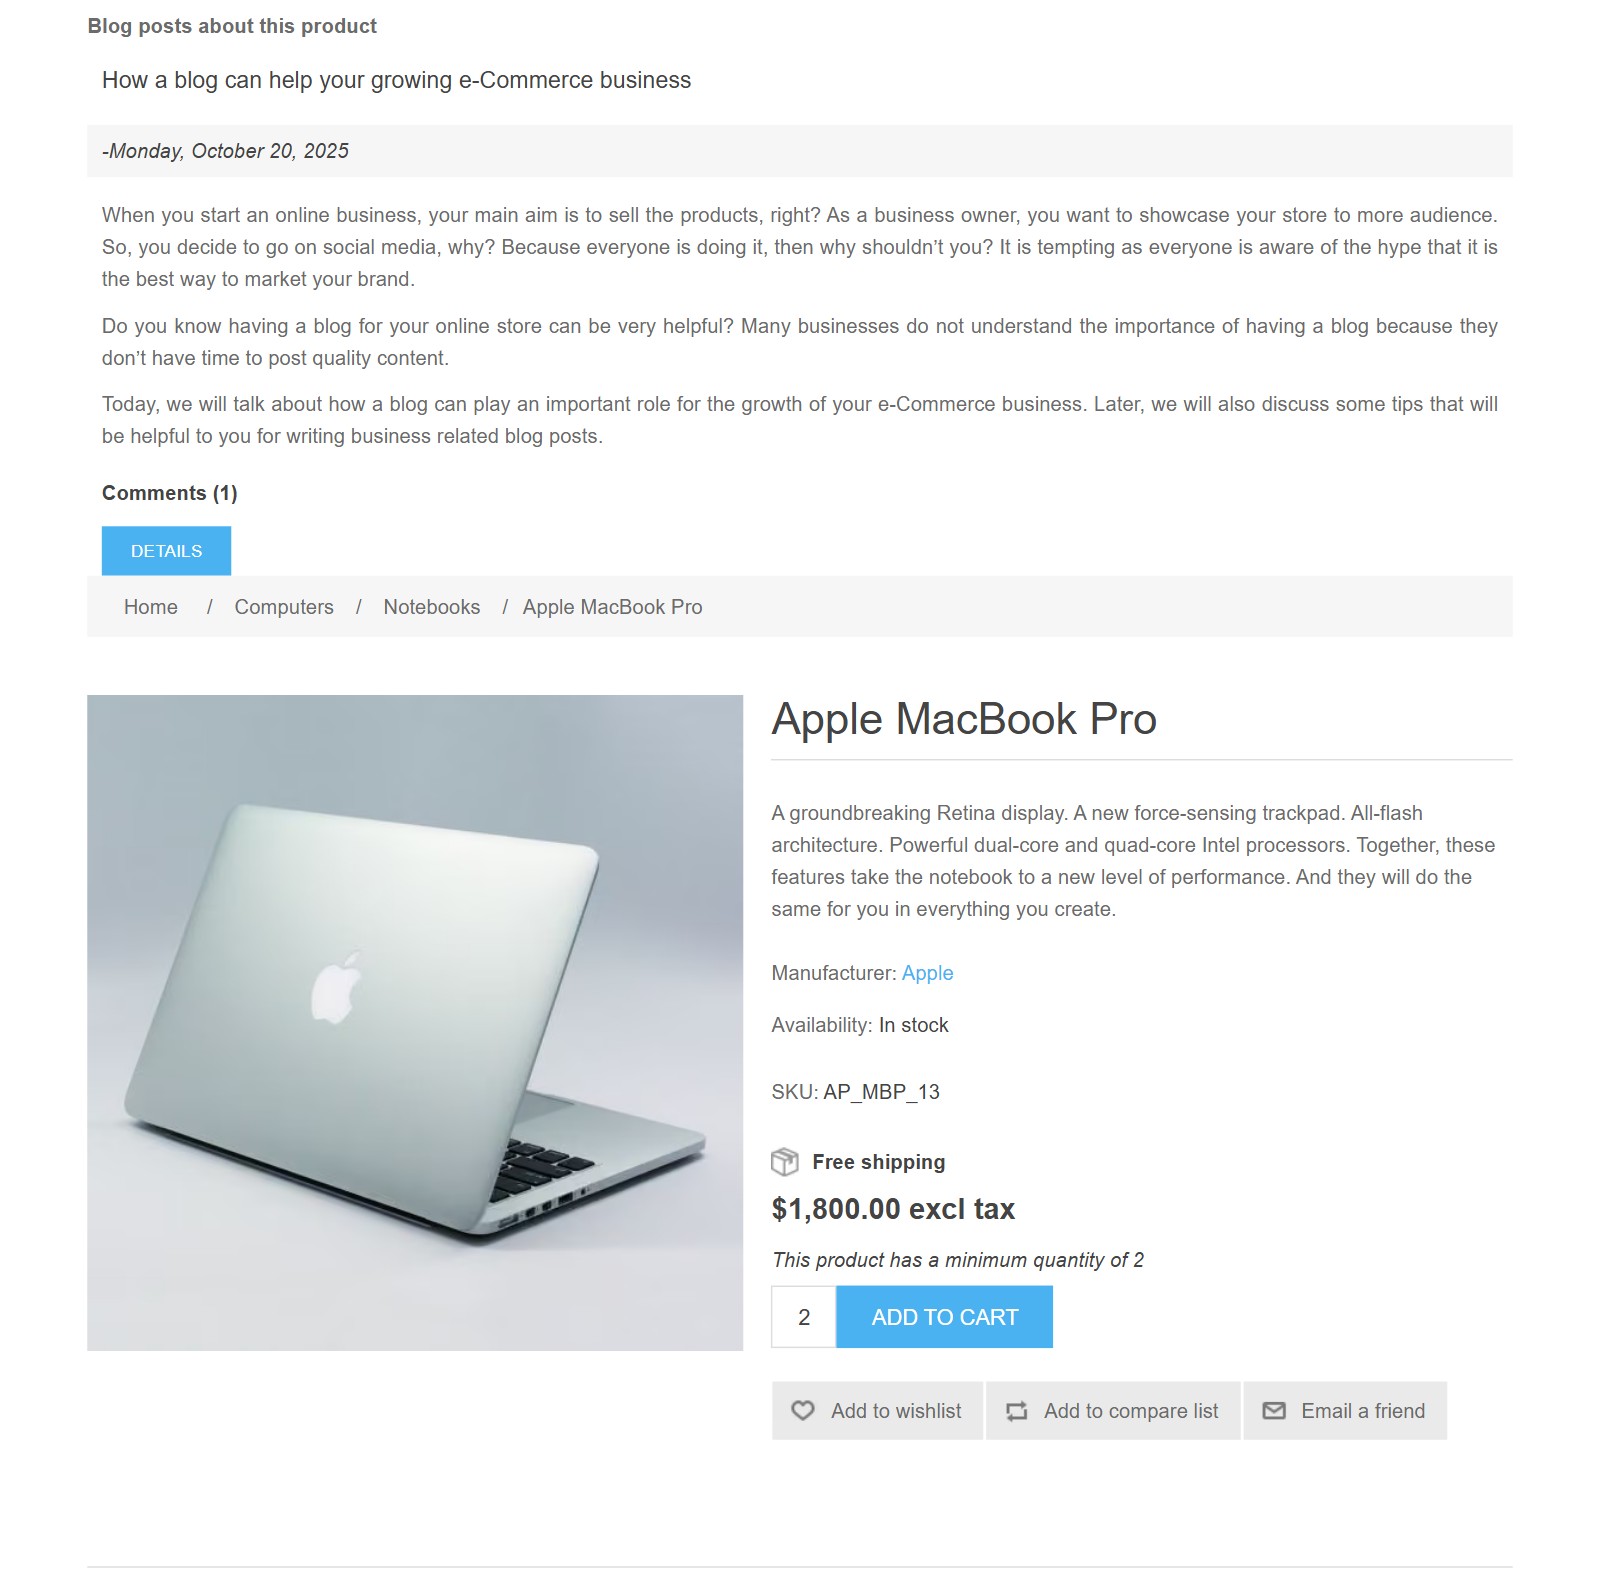
This is the product page. The block 'Blog posts about this product' shows the blog posts this product is attached to. The news appear the same way in the block 'News about this product'.
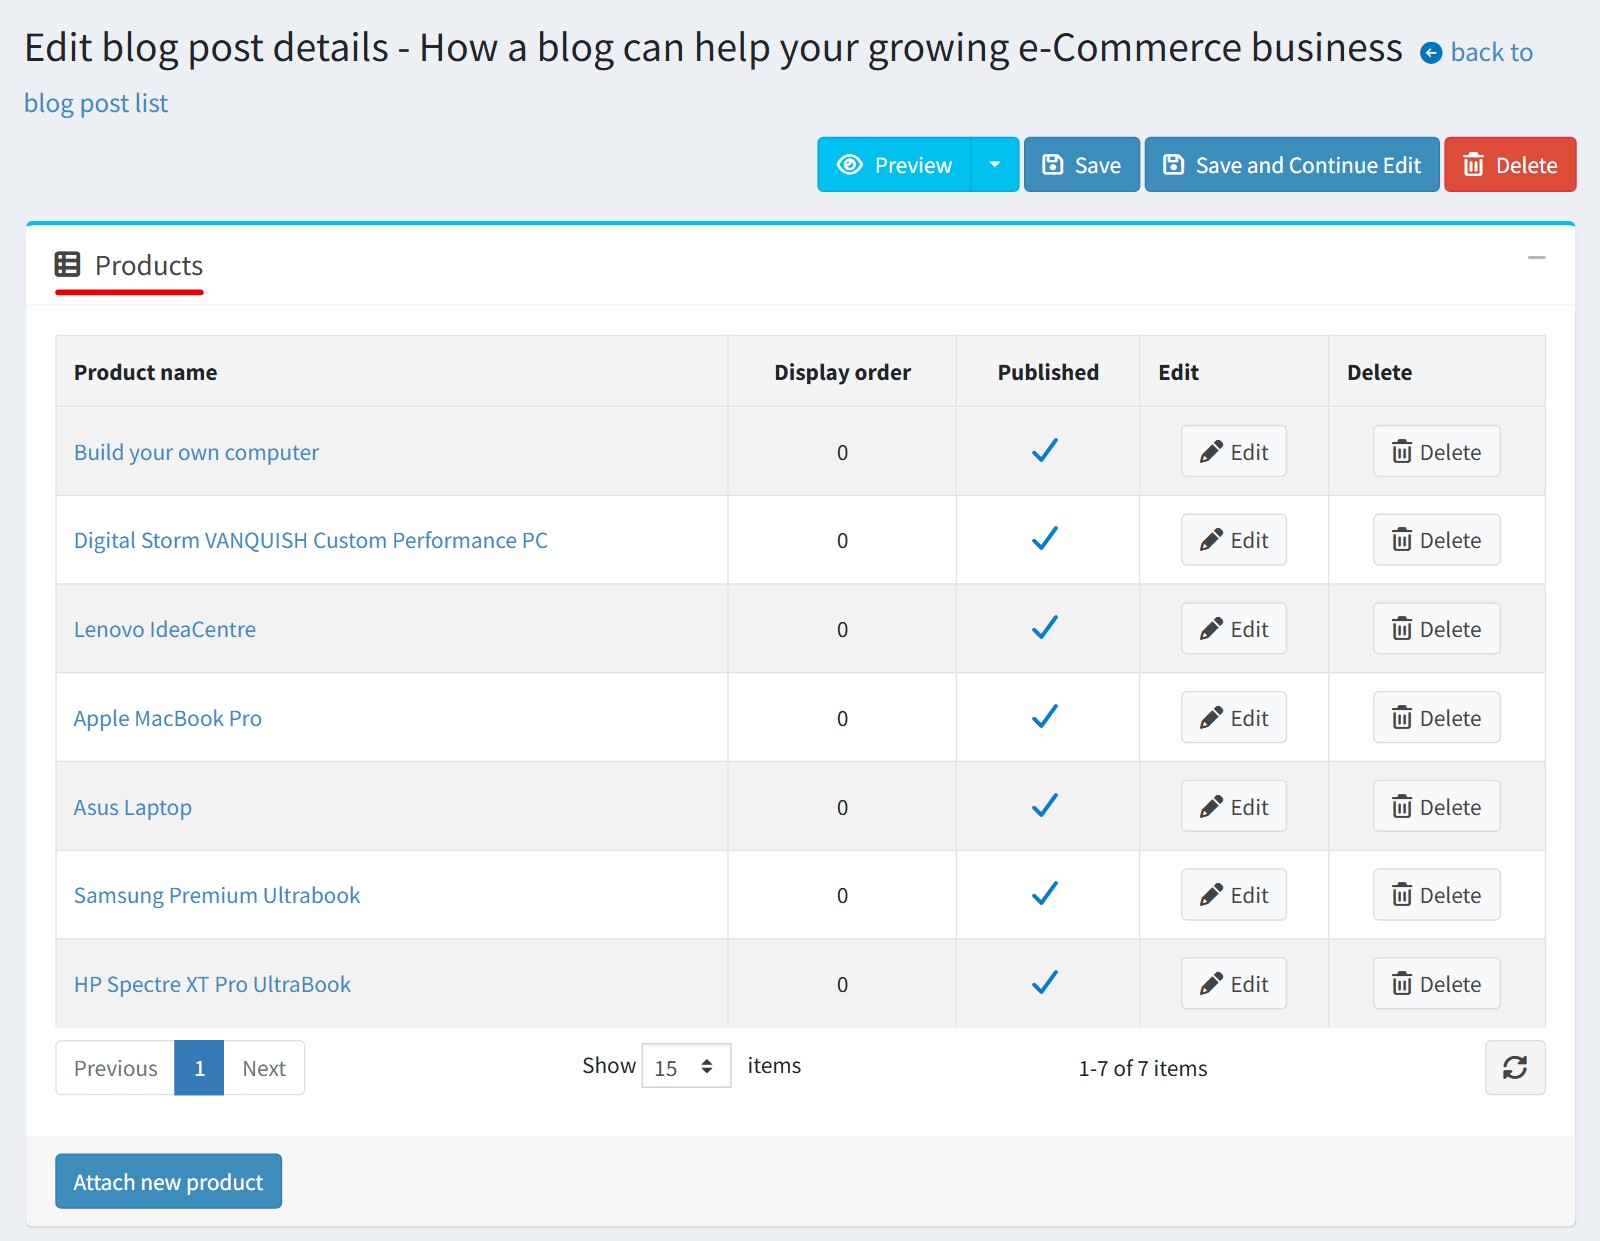
4. Attach the products. Open a blog post, a news item or a topic in the admin area (Content management). You will see the new block 'Products'.
You can change the 'Display order' of a product (Edit) or remove it from the page (Delete) right in this grid. Press 'Attach new product' to add more products.
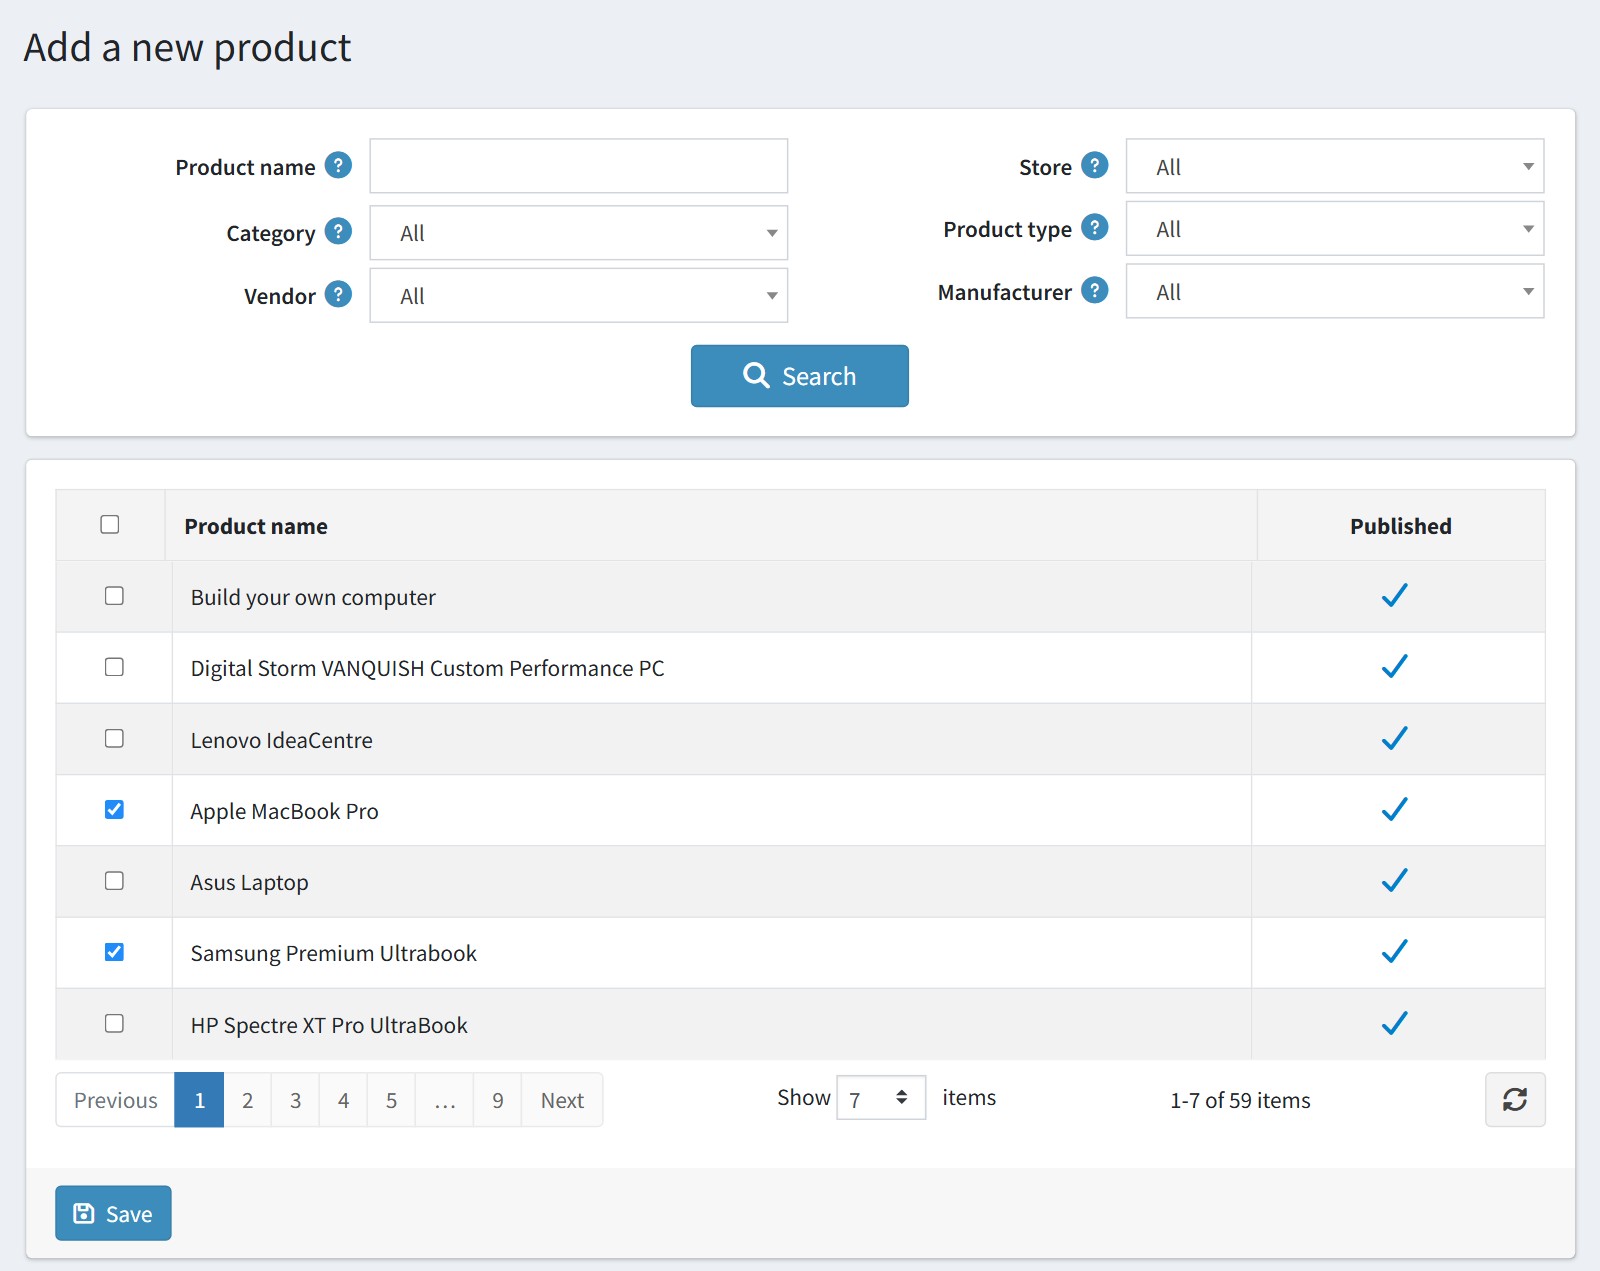
Search the products by name, category, vendor, store, product type or manufacturer, tick them and press 'Save'. A product that is already attached to this page is skipped.
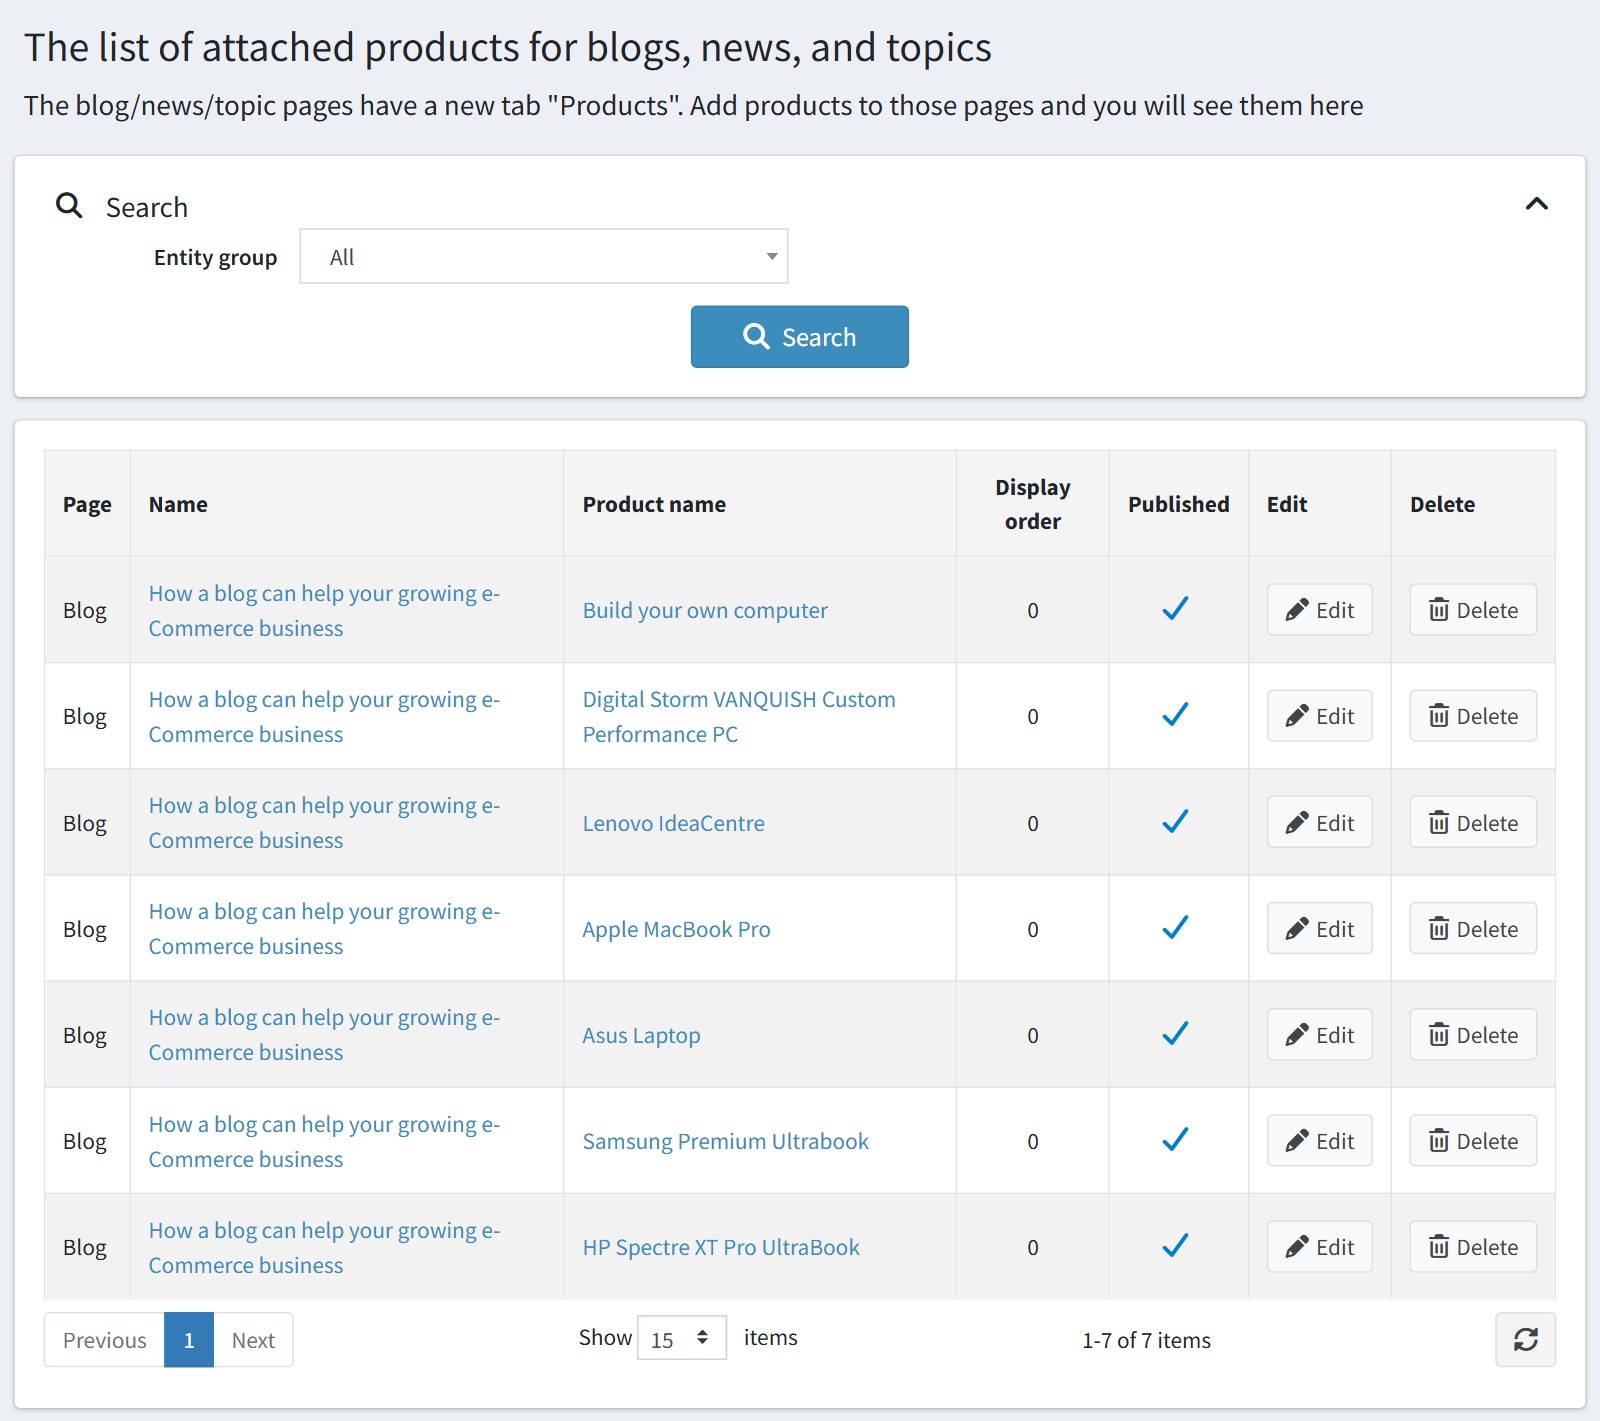
5. All attached products are on one page: 'FoxNetSoft' - 'Automatic Related Products' - 'List'. You can filter them by 'Entity group' (Blog, News, Topic), change the display order or delete a row.
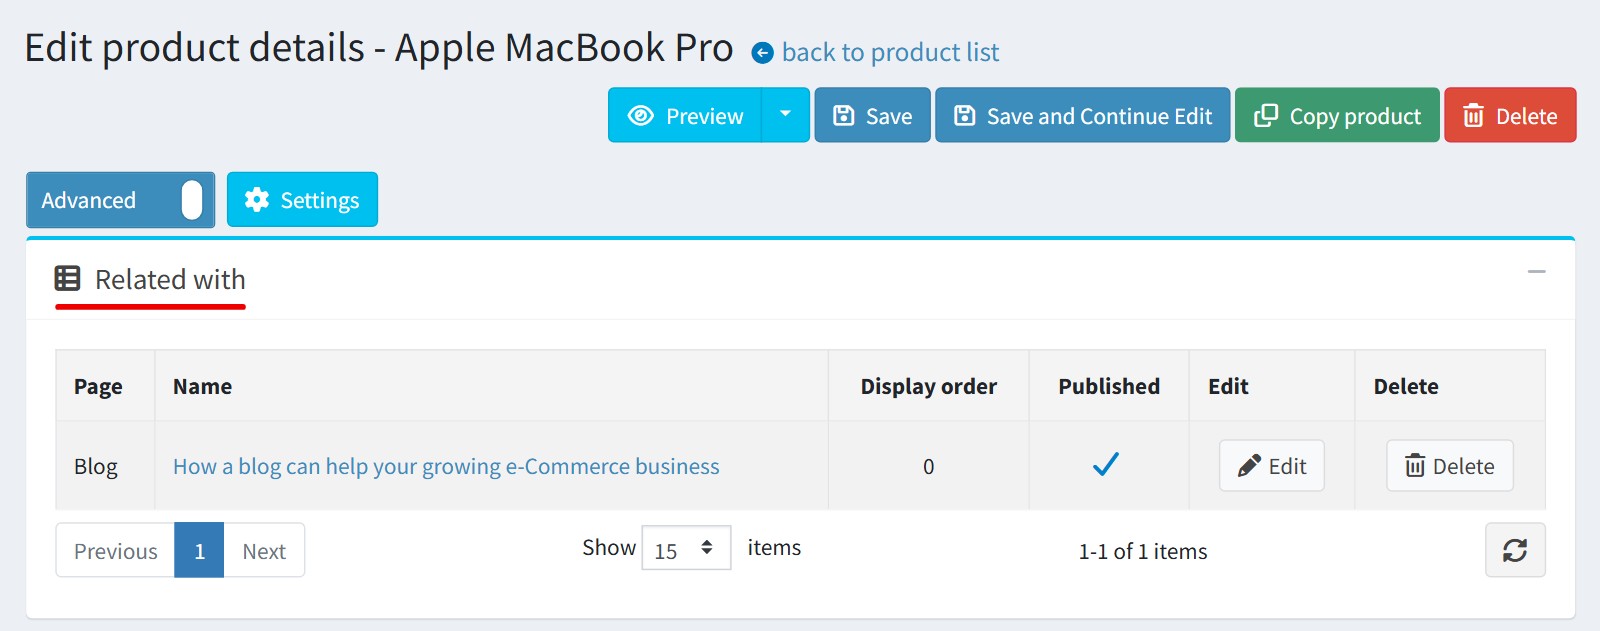
The product edit page has the block 'Related with' (switch the page to 'Advanced' mode). It shows the blog posts, news and topics this product is attached to.
6. The plugin does not pick the products itself. You attach them by hand, as in step 4.
The block is not shown when nothing is attached to the page. The customer sees only the products that are allowed for his customer role and the current store.
When you delete a blog post, a news item, a topic or a product, its rows stay in the list. Delete them on the 'List' page.
All settings could be set for each store separately. Select the store in 'Multi-store configuration for' and check the override checkboxes.