
Installation and configuring plug-in Address Autocomplete (Google)
The plugin adds the Google address autocomplete to the address forms of your store. The customer starts typing the street, picks a suggestion, and the plugin fills in the country, the state/province, the city, the street and the zip/postal code.
It's easy to configure the plugin. See pictures.
1. Enable the Google APIs. Open the Google Cloud Console, select your project and open 'Library'. Search for these APIs and press 'ENABLE':
'Maps JavaScript API' - always.
'Places API' if you will use the source 'Google', or 'Places API (New)' if you will use the source 'Google New API' (see steps 4 and 5). You could enable both.
'Geocoding API' - only if you will enable 'Use geolocation data'.
Your Google Cloud project must have a billing account. Google gives free usage every month, see Google Maps Platform pricing.
2. Create the API key. Select your project at the top of the page, open 'Credentials' and press 'CREATE CREDENTIALS'. Your new key appears in the list 'API Keys'. See also the official Google guide how to get an API key.
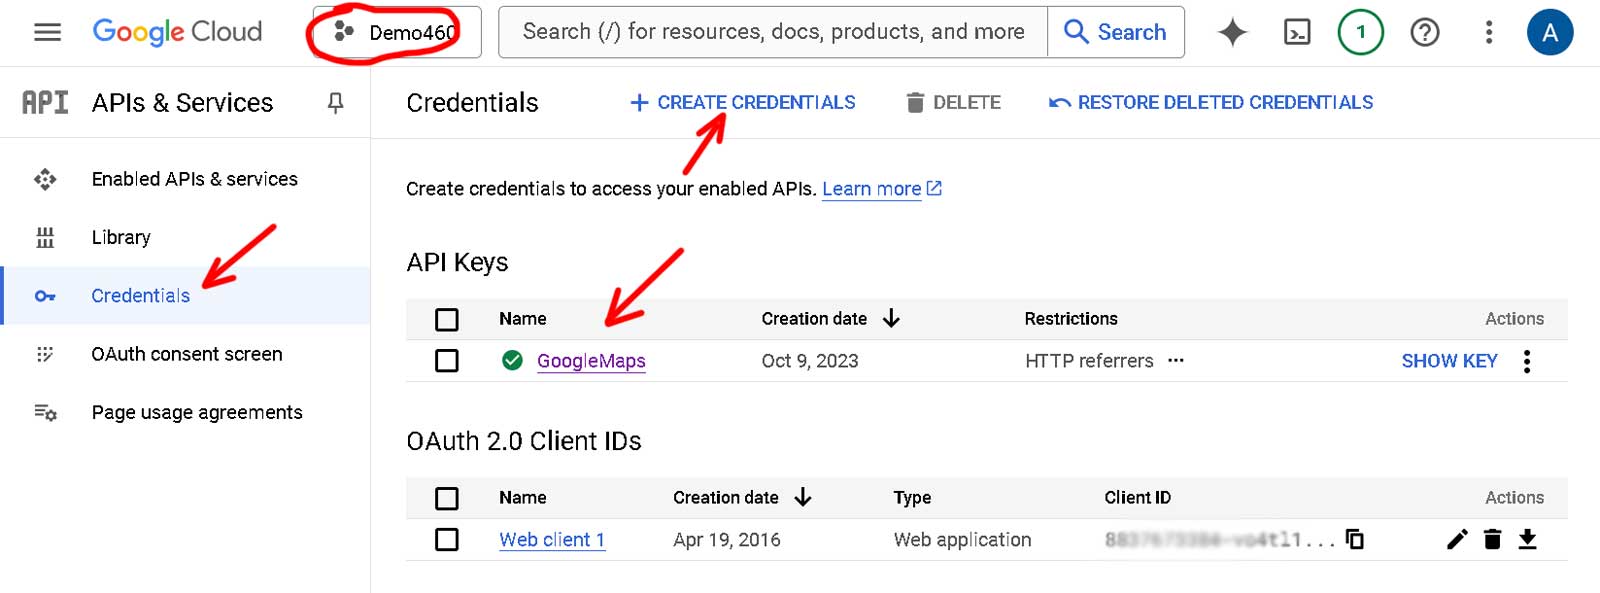
3. Restrict the API key. Customers can see the key in the code of your store pages, so it should work only for your site. Click the key name and select 'Websites' in 'Set an application restriction'. Press 'ADD' and add your store URL with the format *yourstore.com/*
If you have several stores add each domain. Google rejects requests from a domain which is not in this list, and the address field shows no suggestions.
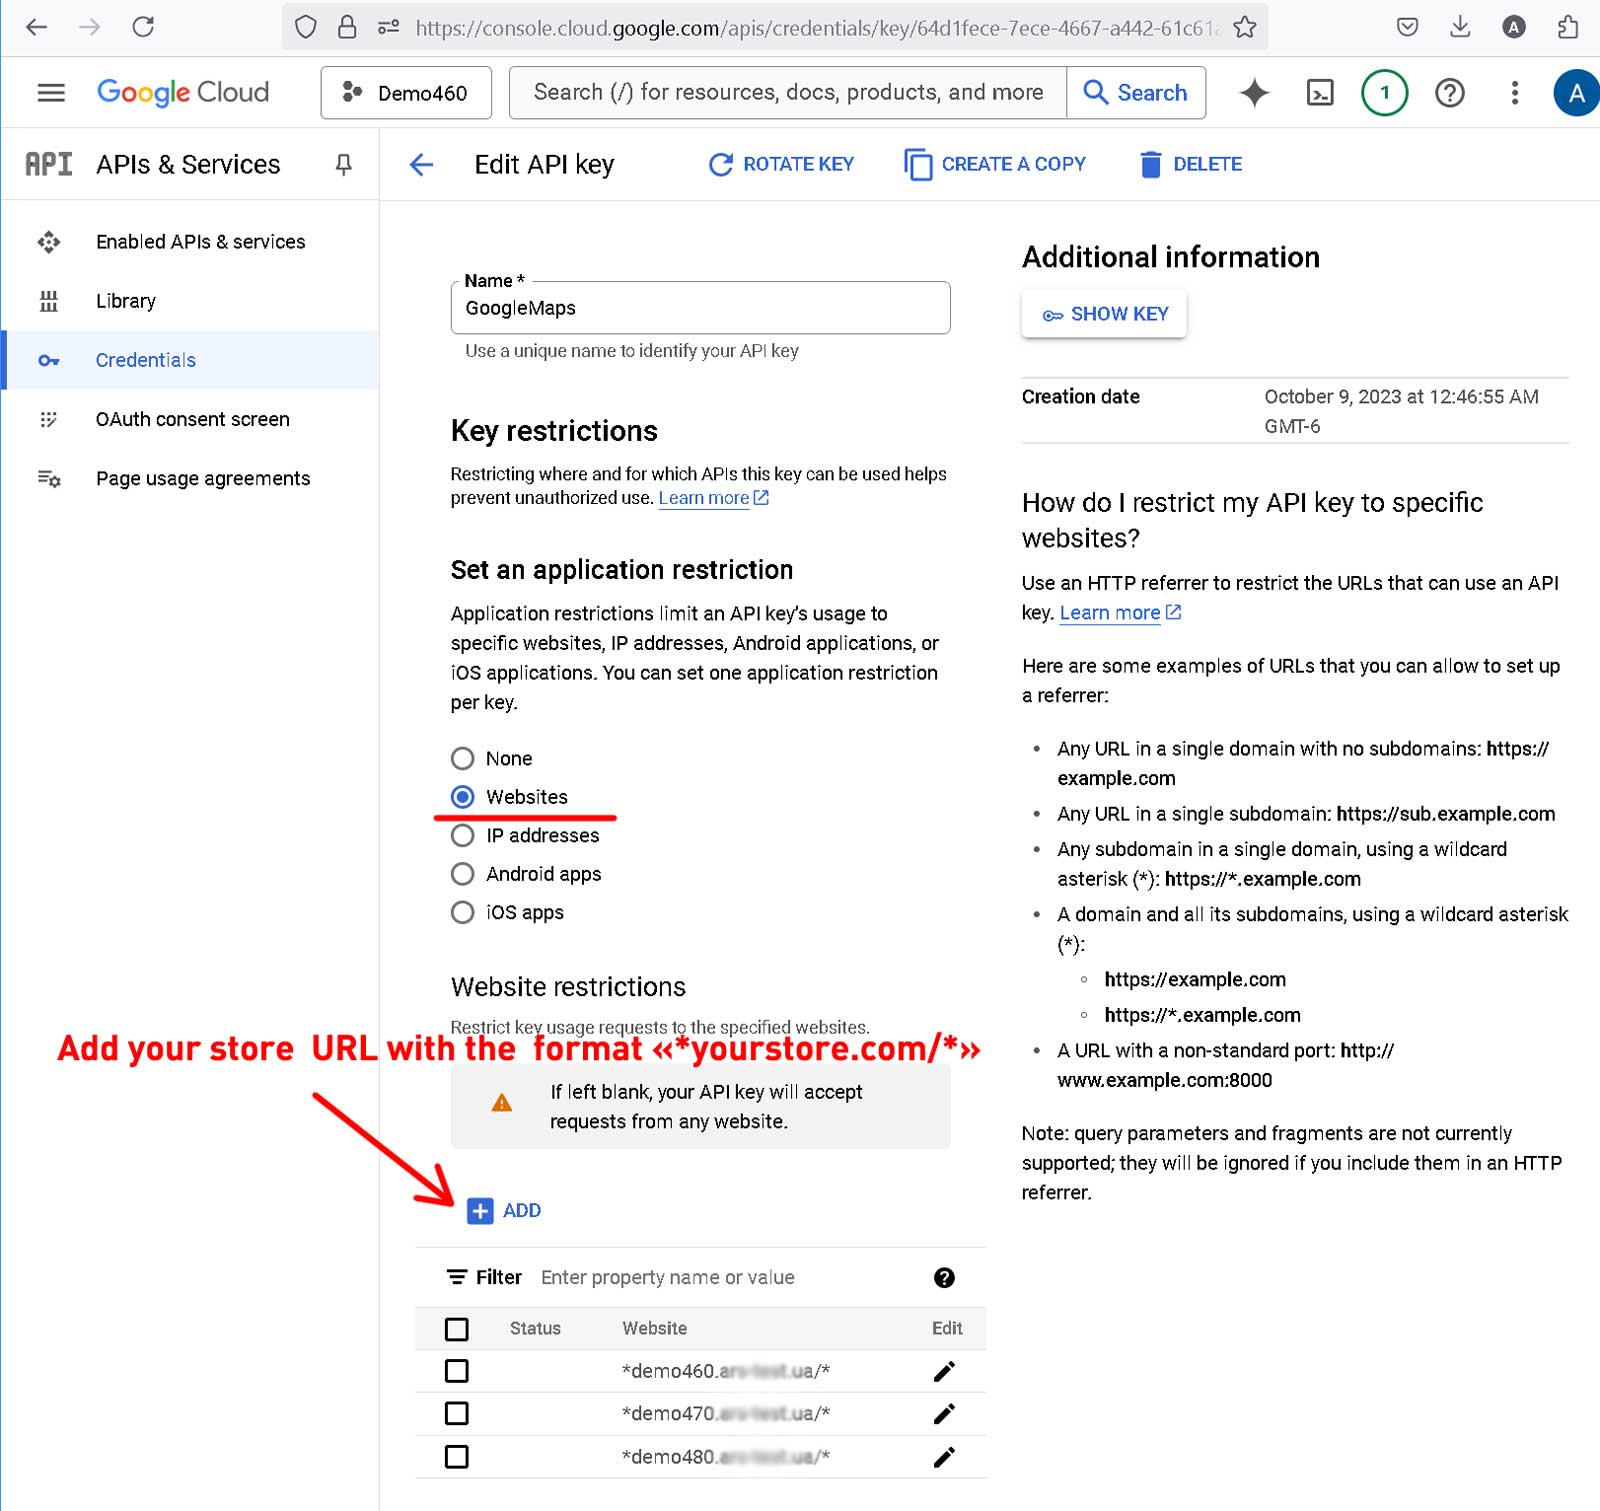
4. Open the plugin configure page, enable 'Enabled plugin' and copy your key to 'API Key'.
'Source of API' = 'Google' is the classic Places Autocomplete. The suggestions are attached to your theme's own Address field, so the field looks exactly like the other fields of your theme. Your key must have 'Places API' (the legacy one) enabled. If only 'Places API (New)' is enabled, the address field shows no suggestions at all. Google stopped offering the legacy Places API to new customers on March 1, 2025.
'Enable in backend (admin mode)' - the store owner gets the autocomplete on the order address and the customer address in the nop admin (see step 9).
'Use geolocation data (new customers)' - the plugin asks the browser for the location and fills in the address. It works only for a customer without a saved billing or shipping street address, and only if the customer allows the location in the browser.
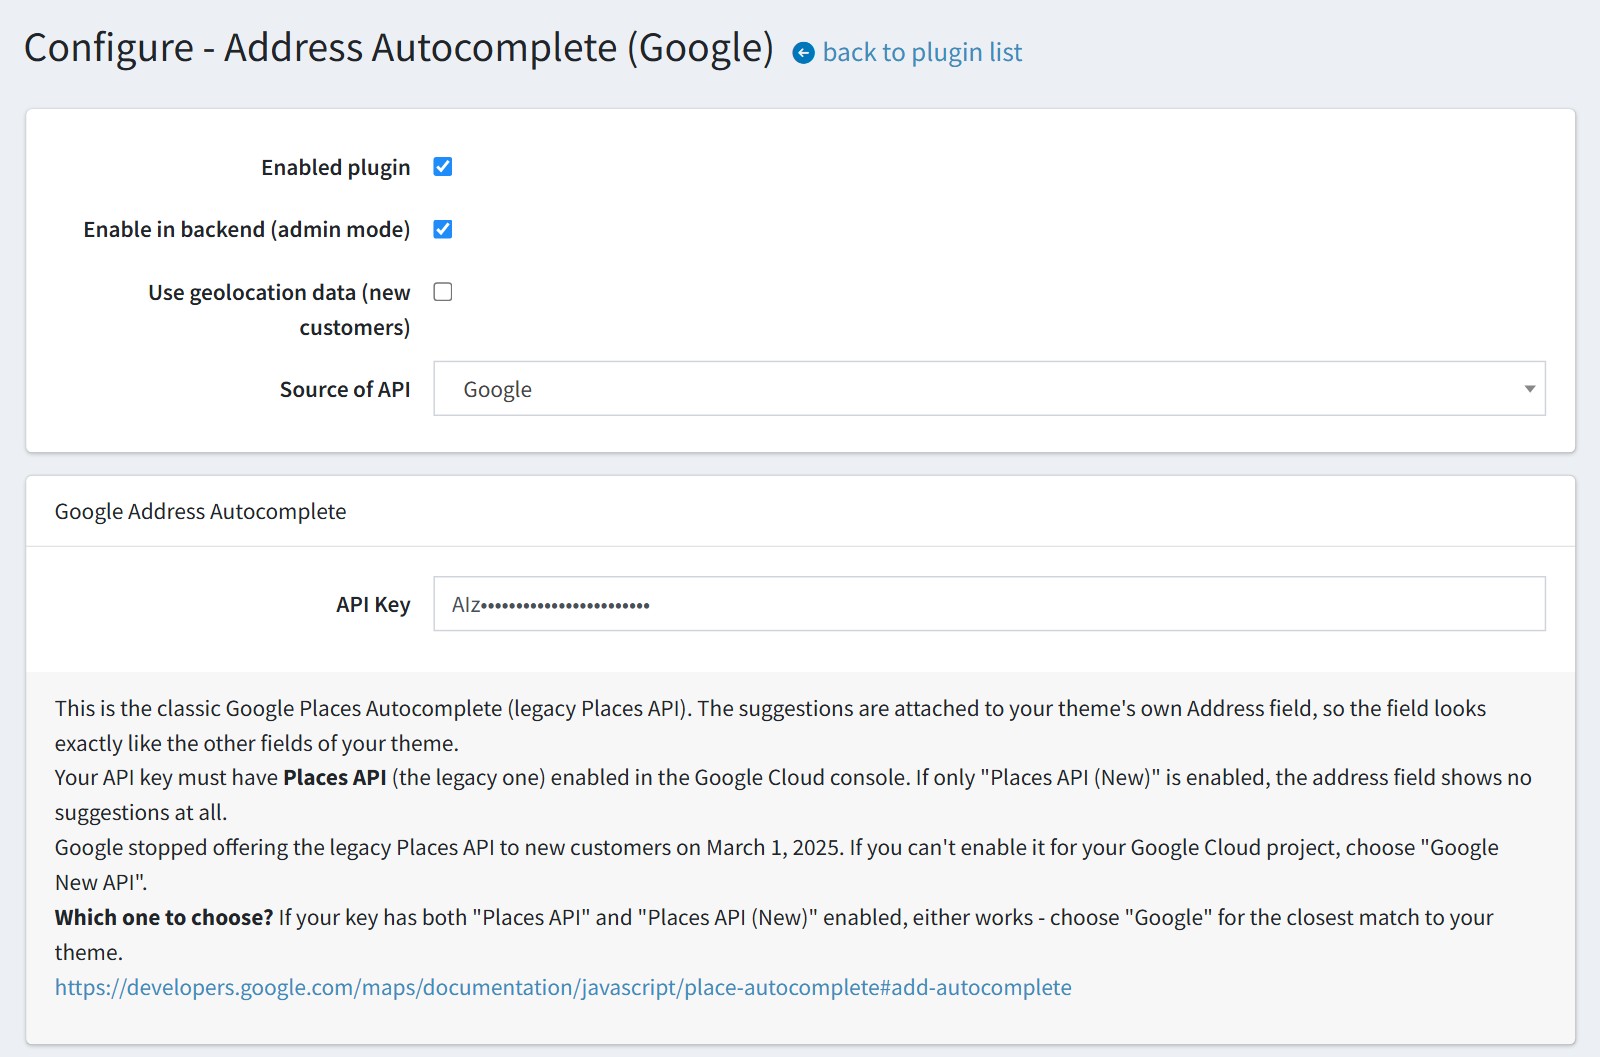
5. 'Source of API' = 'Google New API' is Google's new Place Autocomplete element. Google draws its own search box in place of the Address field, and the plugin copies your theme's colors, size and font onto it. Your key must have 'Places API (New)' enabled. If only the legacy 'Places API' is enabled, the address field shows no suggestions at all. It works for every Google Cloud project, including new ones.
Which one to choose? If your key has both 'Places API' and 'Places API (New)' enabled, either works - choose 'Google' for the closest match to your theme. If you can't enable the legacy 'Places API' for your project, choose 'Google New API'.
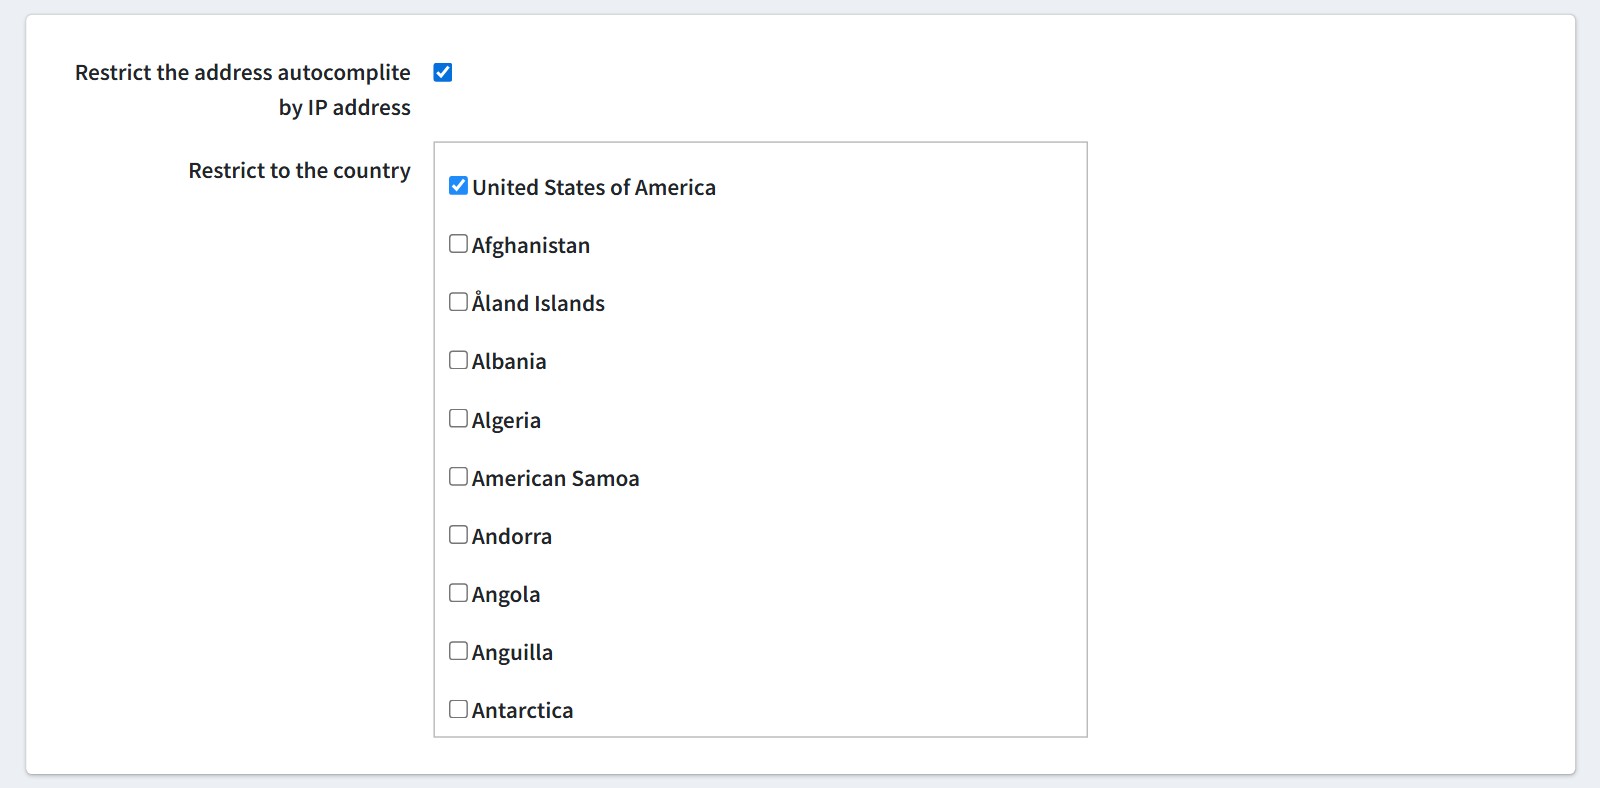
6. You could enable 'Restrict the address autocomplete by IP address' and select countries in 'Restrict to the country'.
The plugin checks the country of the customer's IP address. If this country is in your list, the customer gets suggestions only from the countries of your list. If it is not in your list, the customer gets no autocomplete and fills in the address by hand.
The check uses the GeoIP lookup of your nopCommerce store. If the country of the IP address is not found, the plugin does not restrict anything and the autocomplete works as usual.
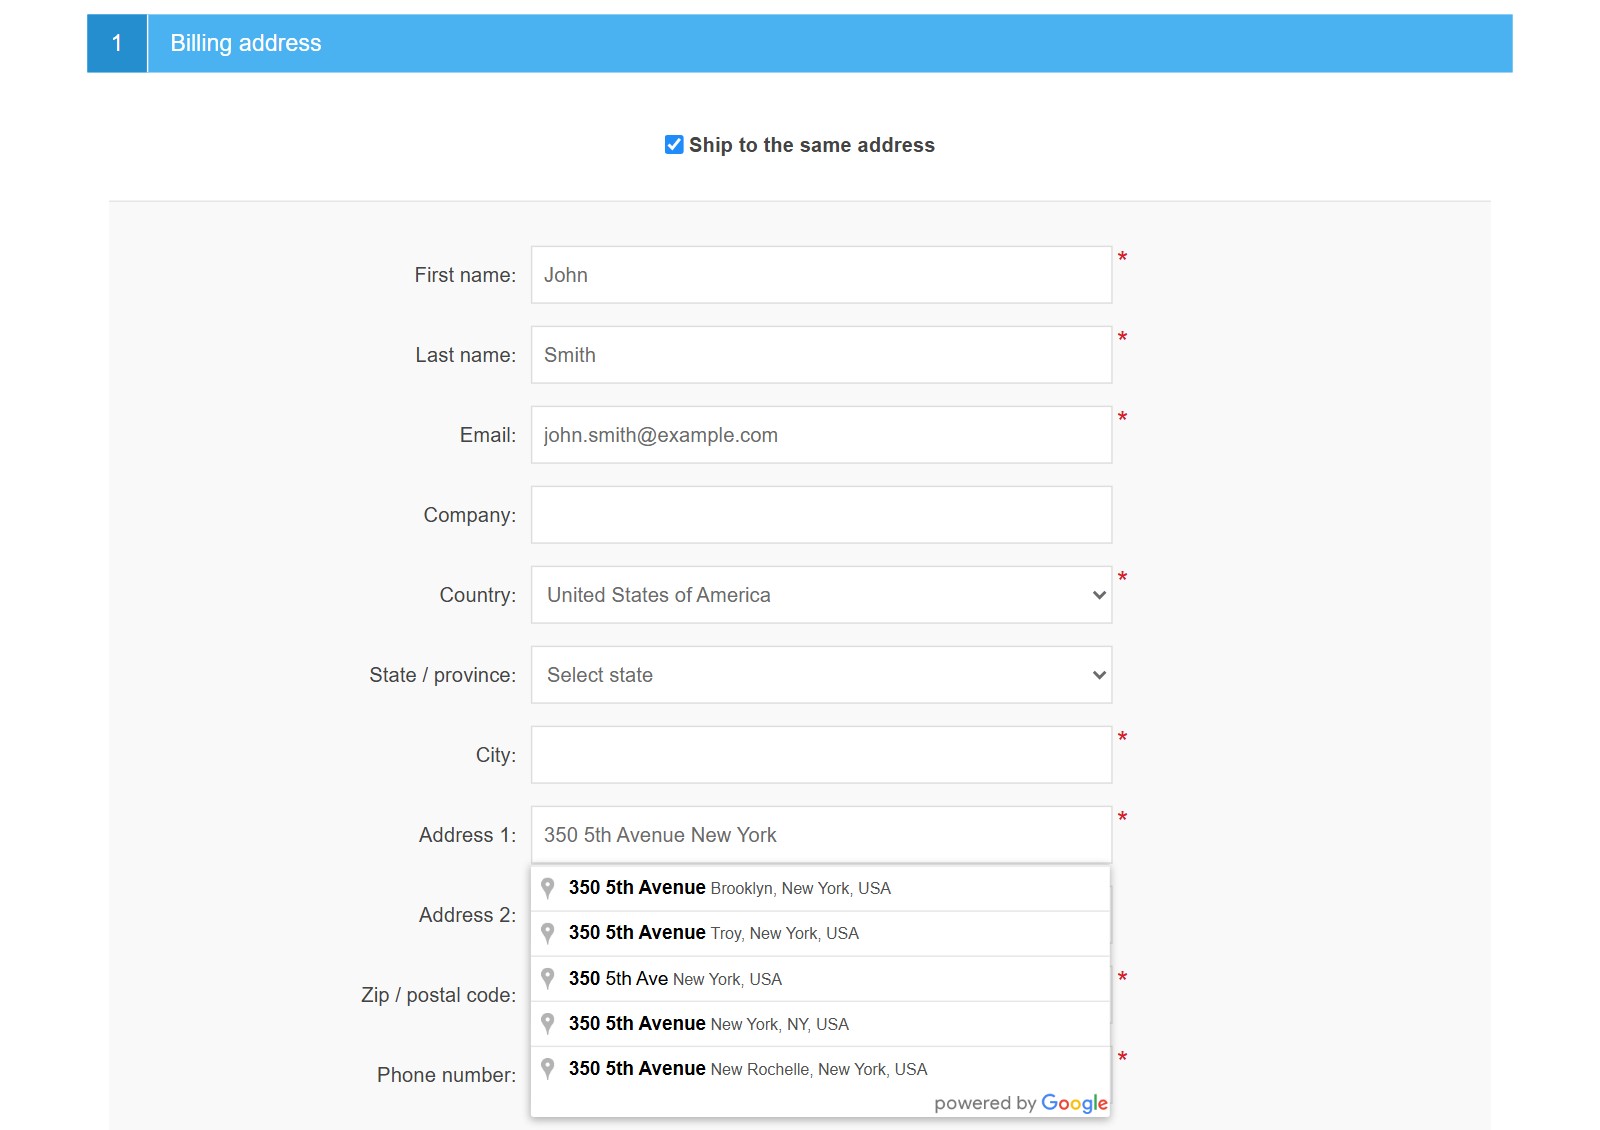
7. This is how it looks on the checkout page. The customer types the address in 'Address 1' and sees the suggestions. They are limited to the country selected in the form.
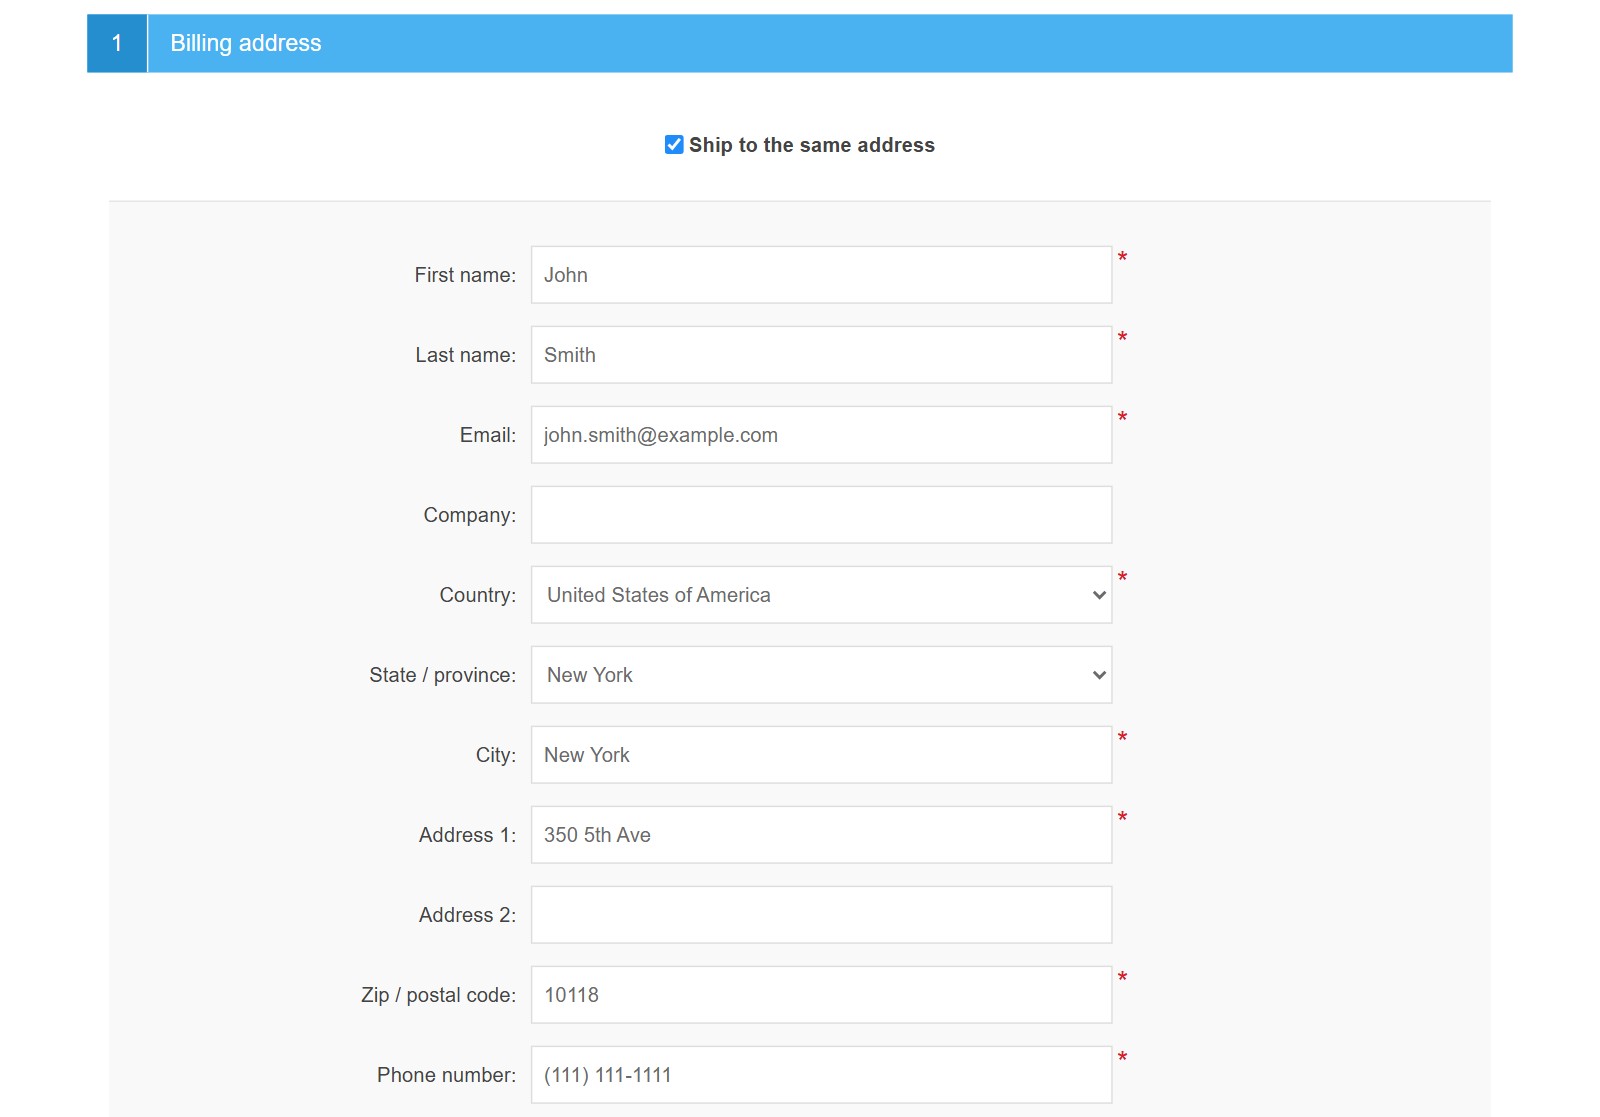
The customer picks a suggestion and the plugin fills in the state/province, the city, the street and the zip/postal code.
The plugin works on the standard checkout, the one page checkout, Simple Checkout and Modern Checkout.
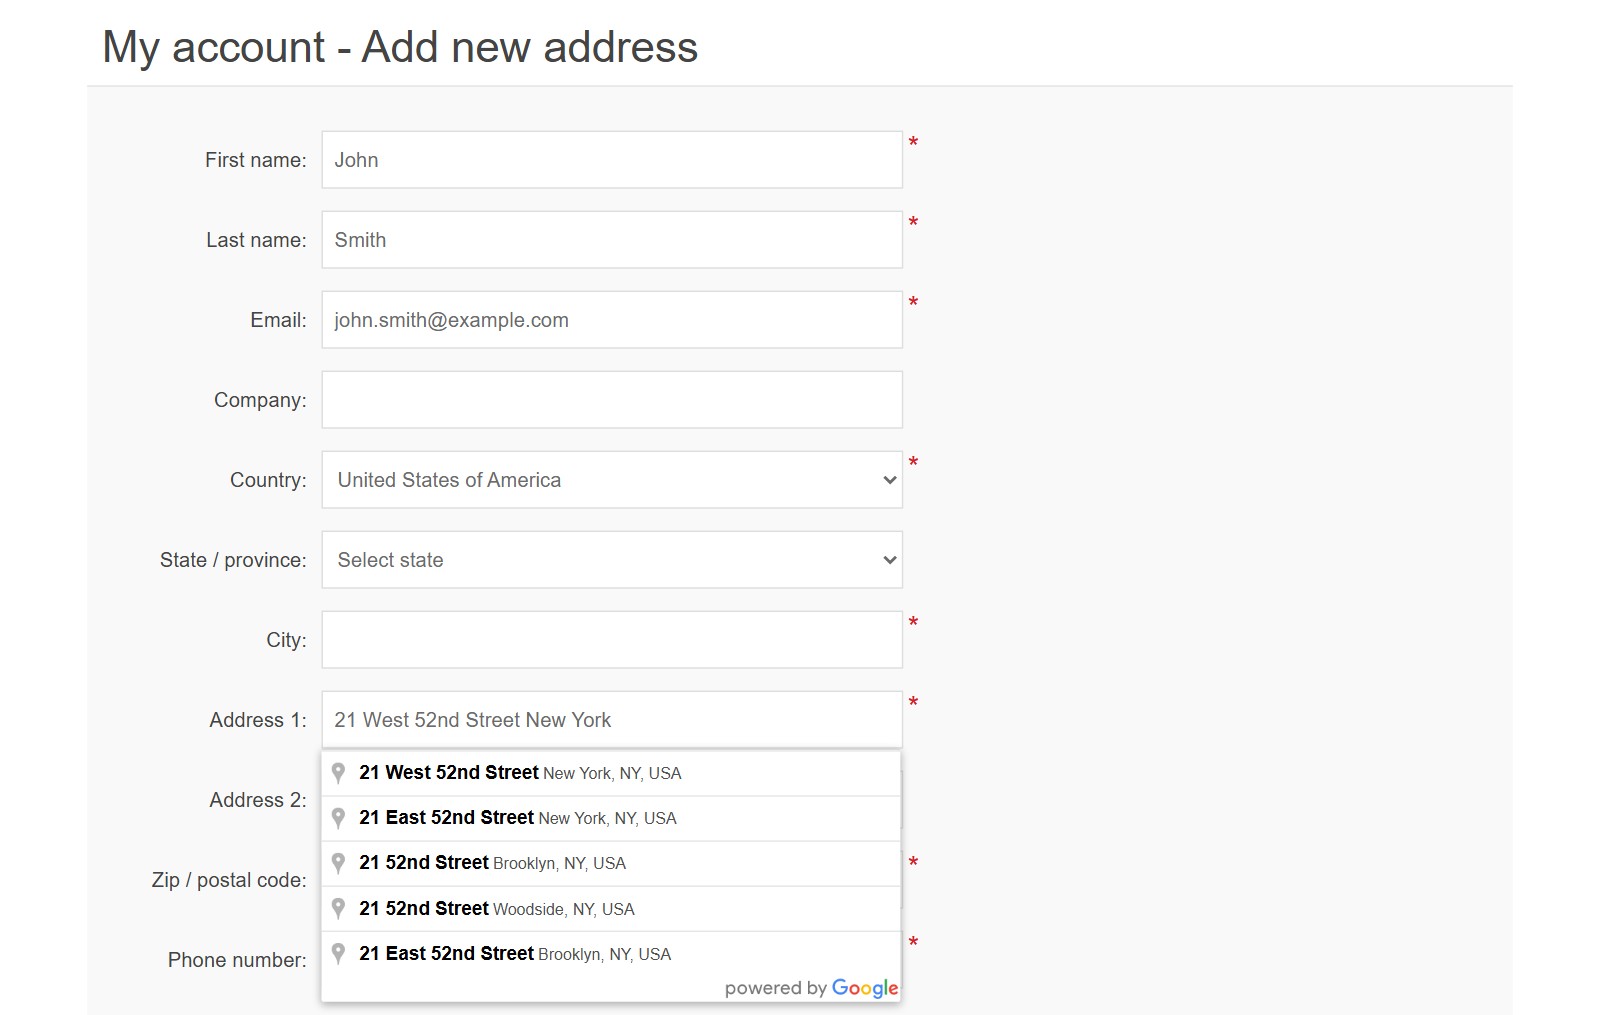
8. The same autocomplete works when the customer adds or edits an address in 'My account'.
It also works on the register page and on the customer info page if you enabled the street address field in the customer form fields of your store.
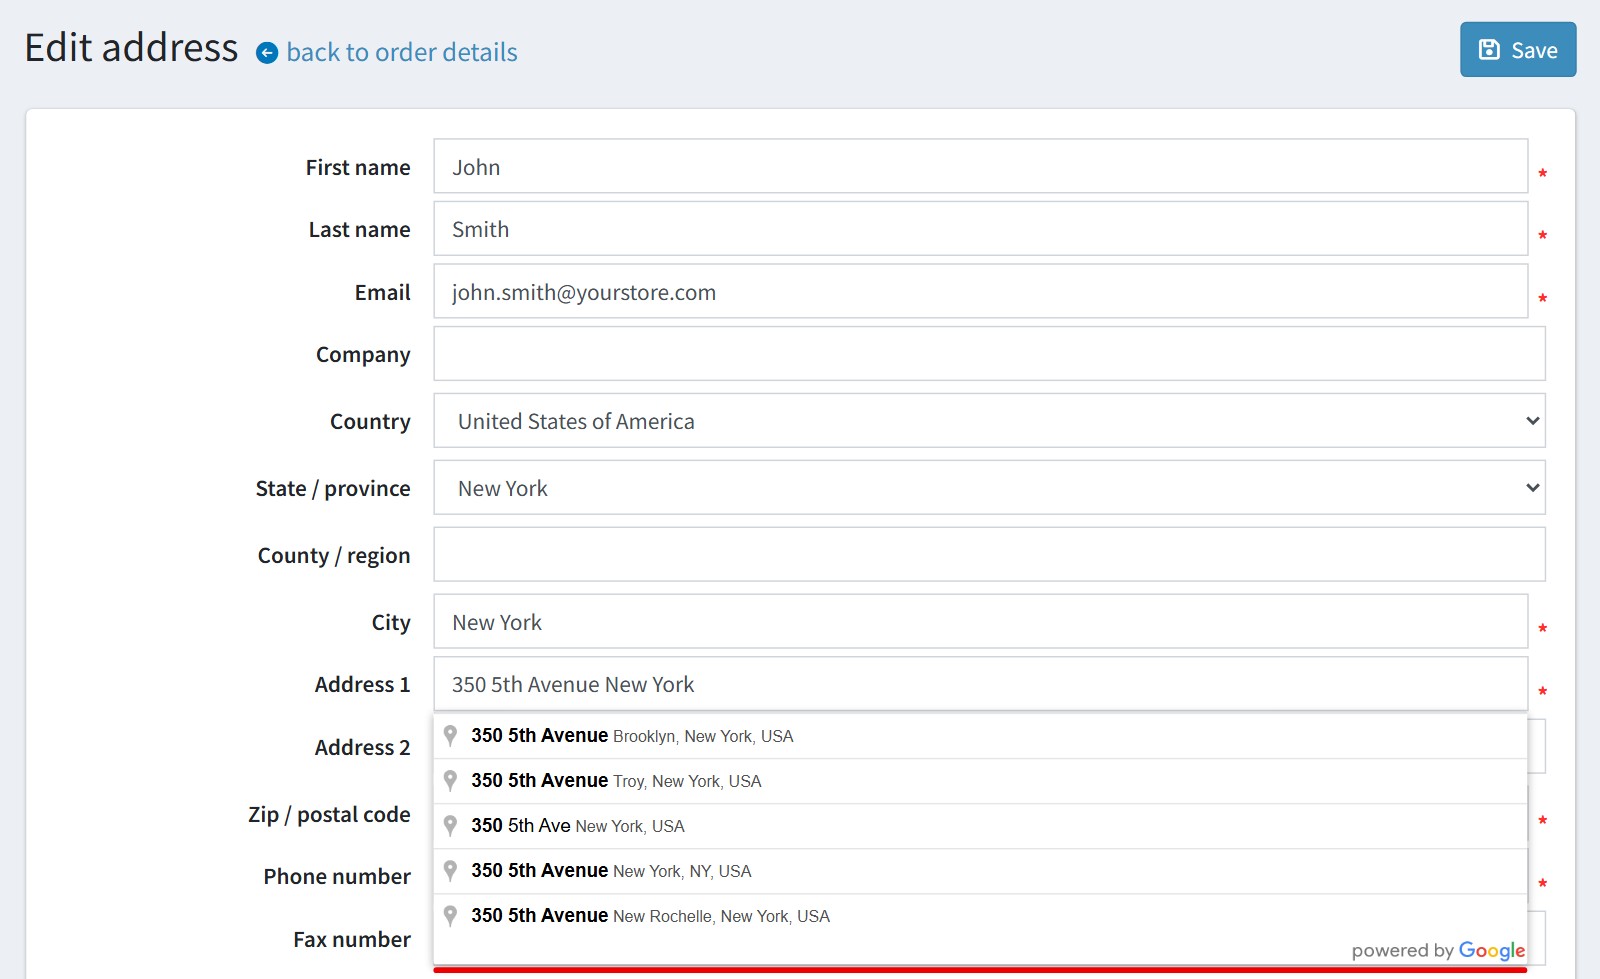
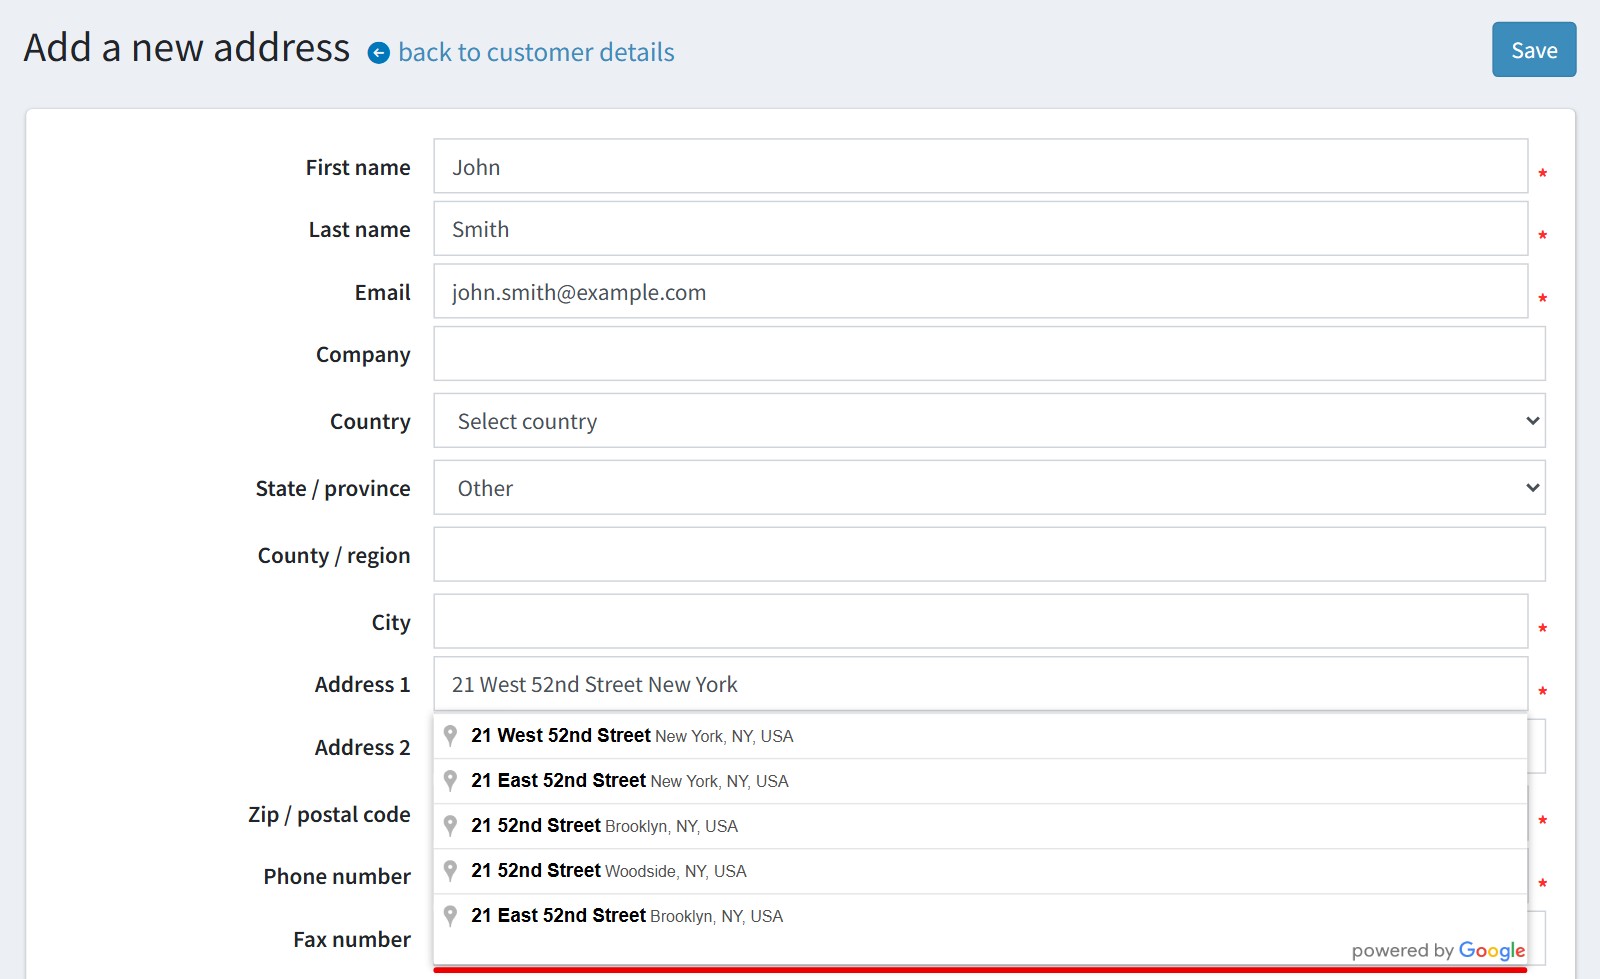
9. With 'Enable in backend (admin mode)' the store owner gets the same suggestions in the nop admin.
On the order address:
On the customer address:
10. Good to know.
The settings are common for all stores of your nopCommerce site, so all stores use the same API key.
The plugin does not work without a key. If the 'API Key' is empty, the address forms stay as usual.
If you see no suggestions, check the 3 things on the Google side: the Places API for your 'Source of API' is enabled (step 1), the billing account is active (step 1), your domain is in the list of the key (step 3).