
Installation and configuring plug-in ConstantContact.com Connector
The plugin sends the customers of your nopCommerce store to Constant Contact - registered customers, newsletter subscribers and guest buyers - and keeps them in your Constant Contact lists.
It's easy to configure the plugin. See pictures.
1. Create an application in Constant Contact.
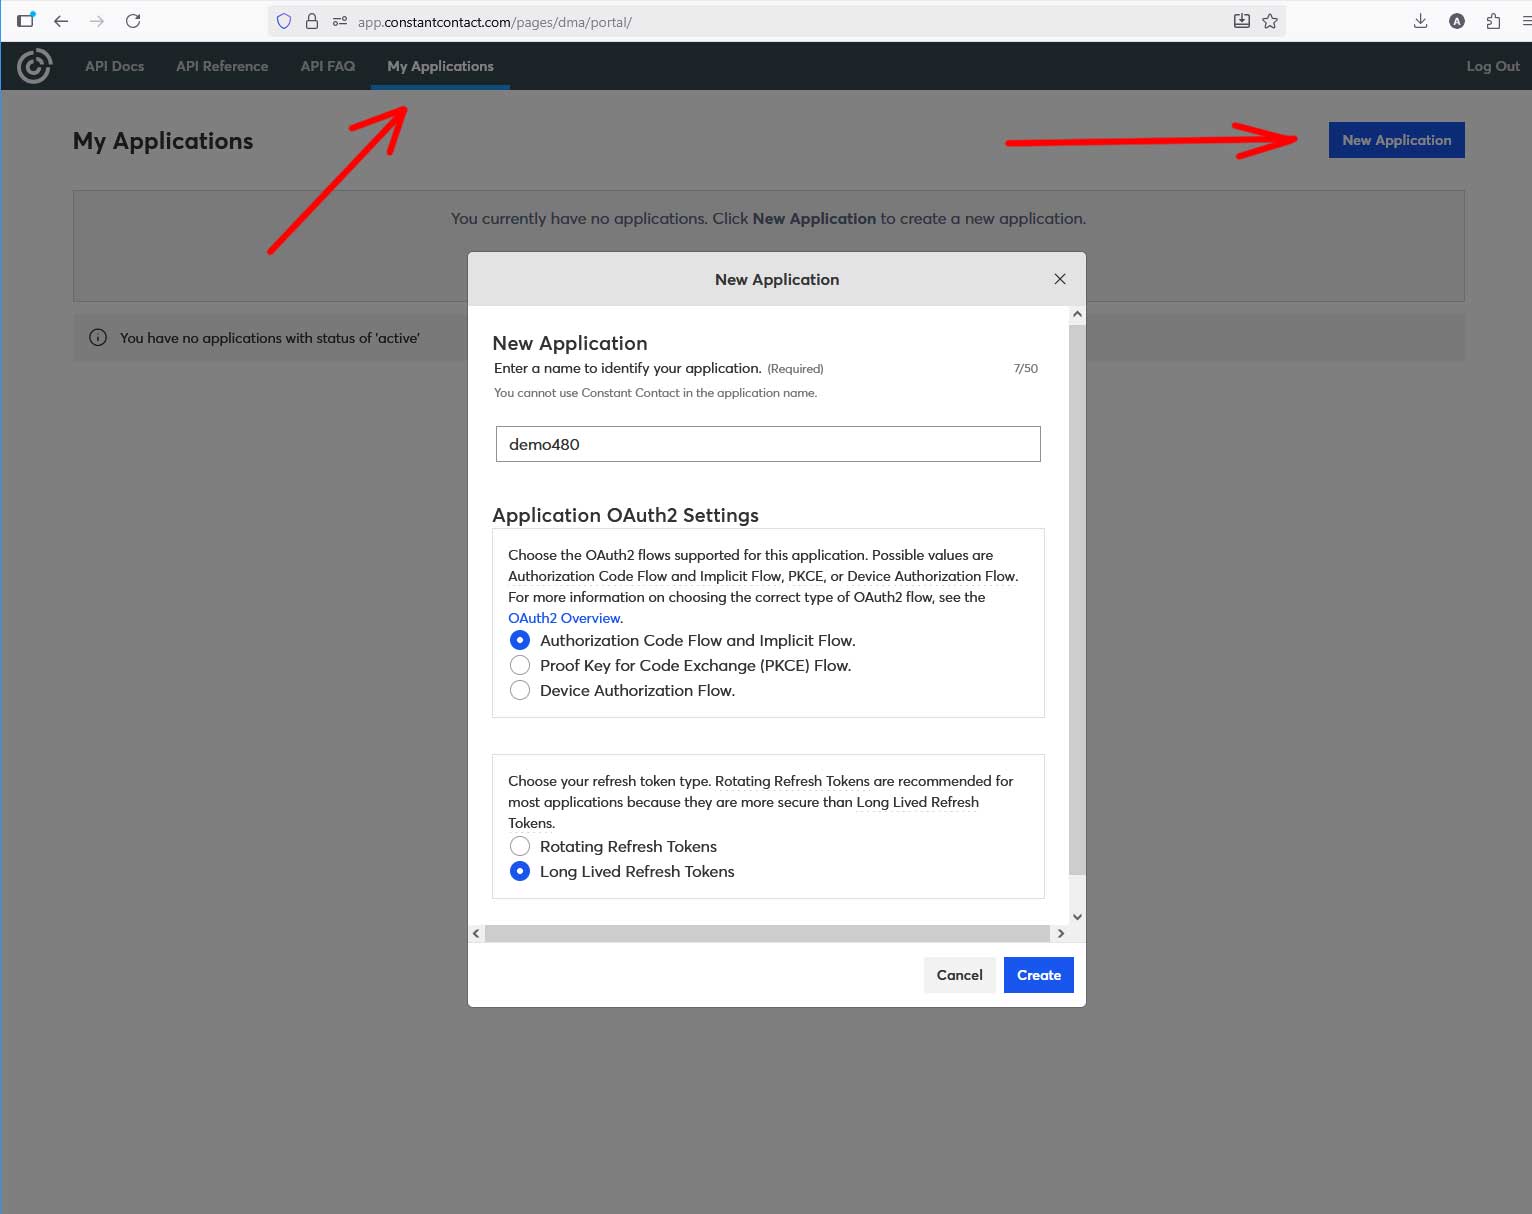
Open 'My Applications' in the Constant Contact developer portal https://app.constantcontact.com/pages/dma/portal/ and press 'New Application'.
Enter the name of the application. You cannot use Constant Contact in the application name.
Select 'Authorization Code Flow and Implicit Flow' and 'Long Lived Refresh Tokens', then press 'Create'.
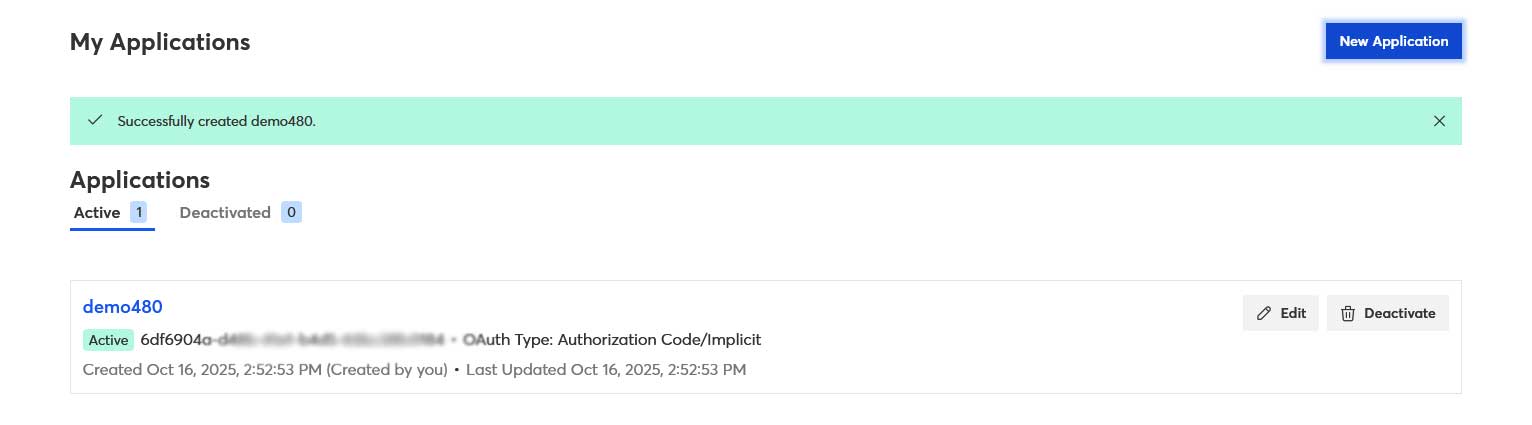
The new application is in the 'Active' list. Press 'Edit' to open it.
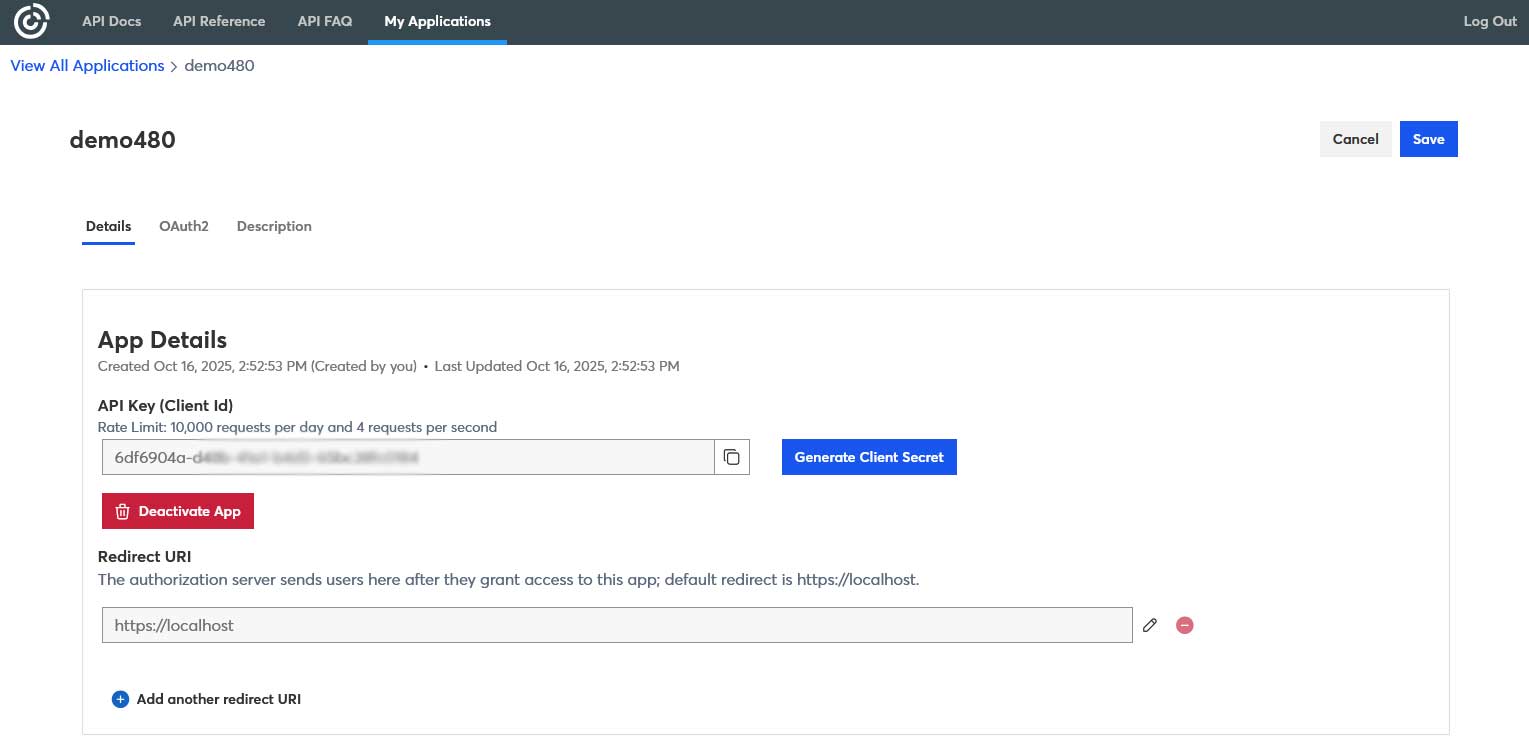
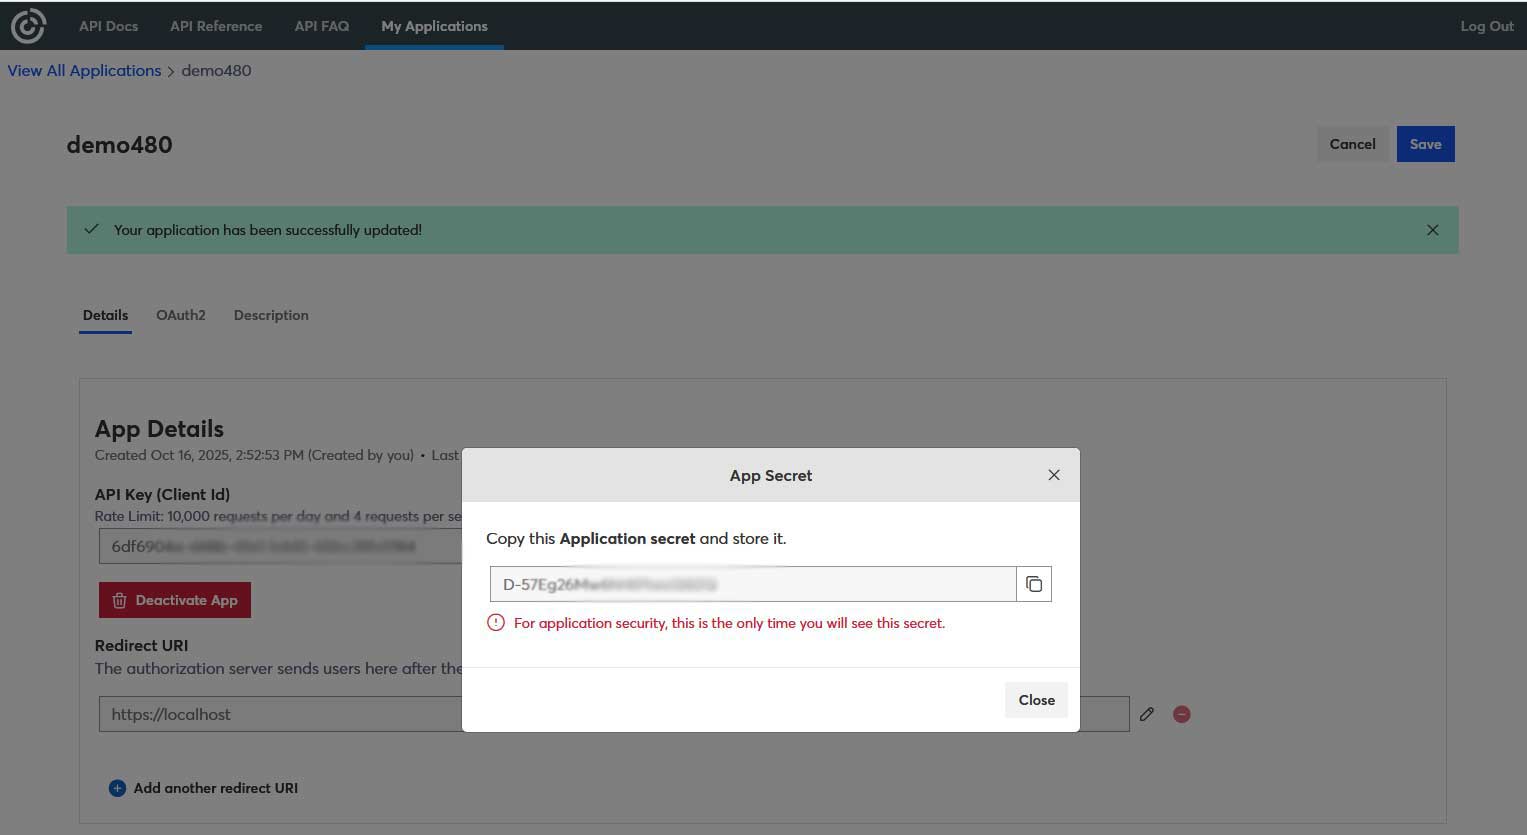
2. Copy the 'API Key (Client Id)'. Press 'Generate Client Secret' and copy the Application secret.
Constant Contact shows the secret only once, so save it.
3. Open the plugin configure page. Enable the plugin, paste the 'API Key (Client Id)' and the 'Client Secret' and press 'Save'.
Copy the 'Redirect URI'. The plugin builds it from the address of your admin area, so open the admin with the live URL with https, not localhost.
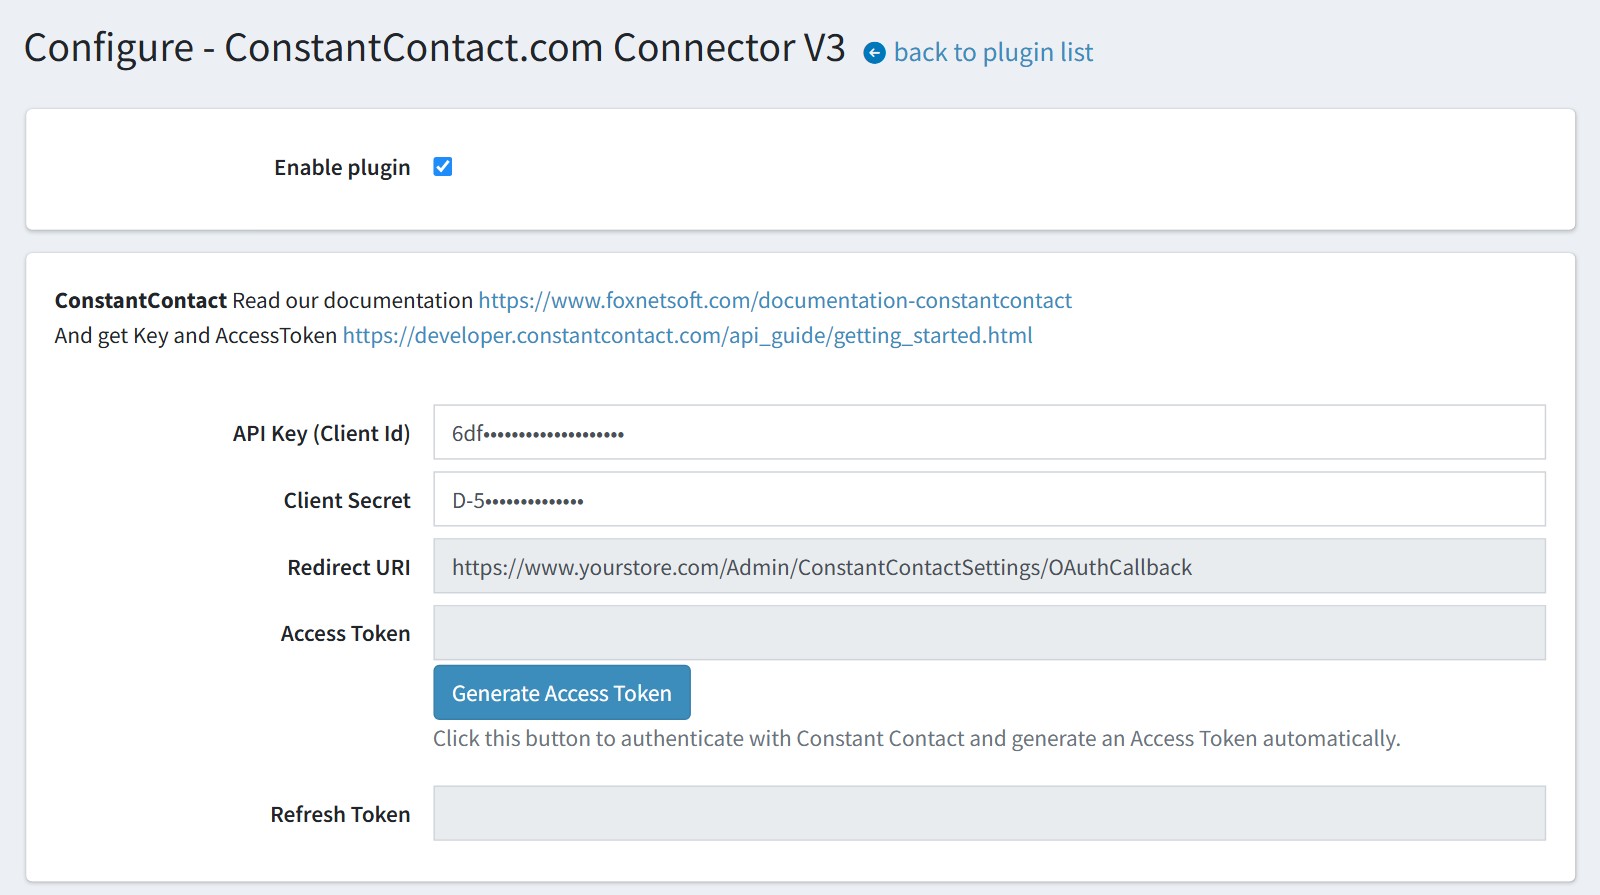
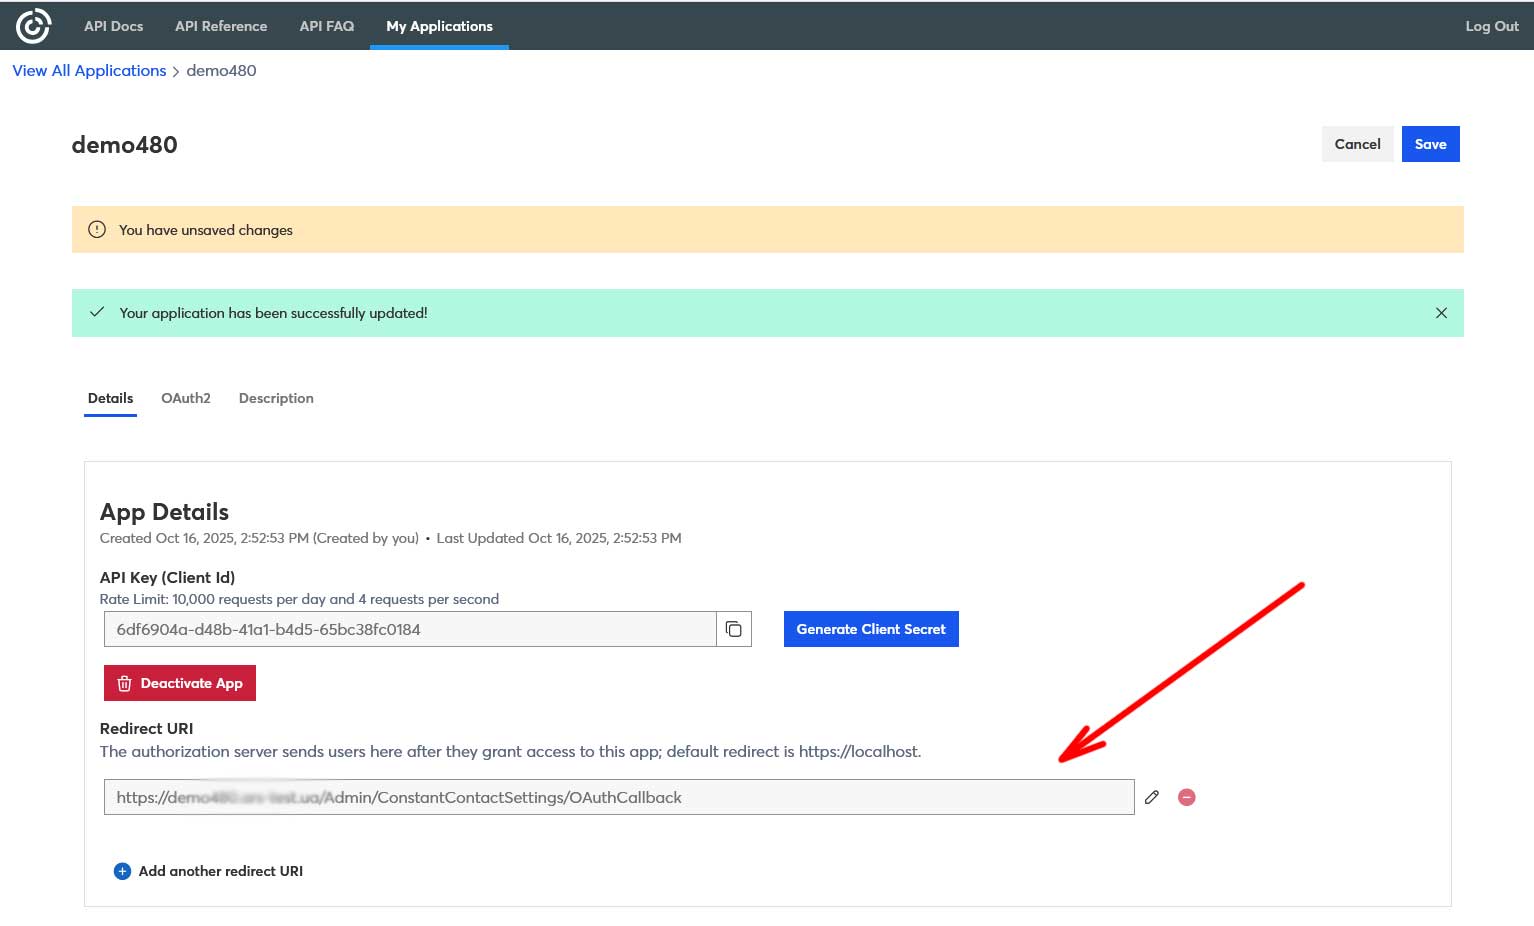
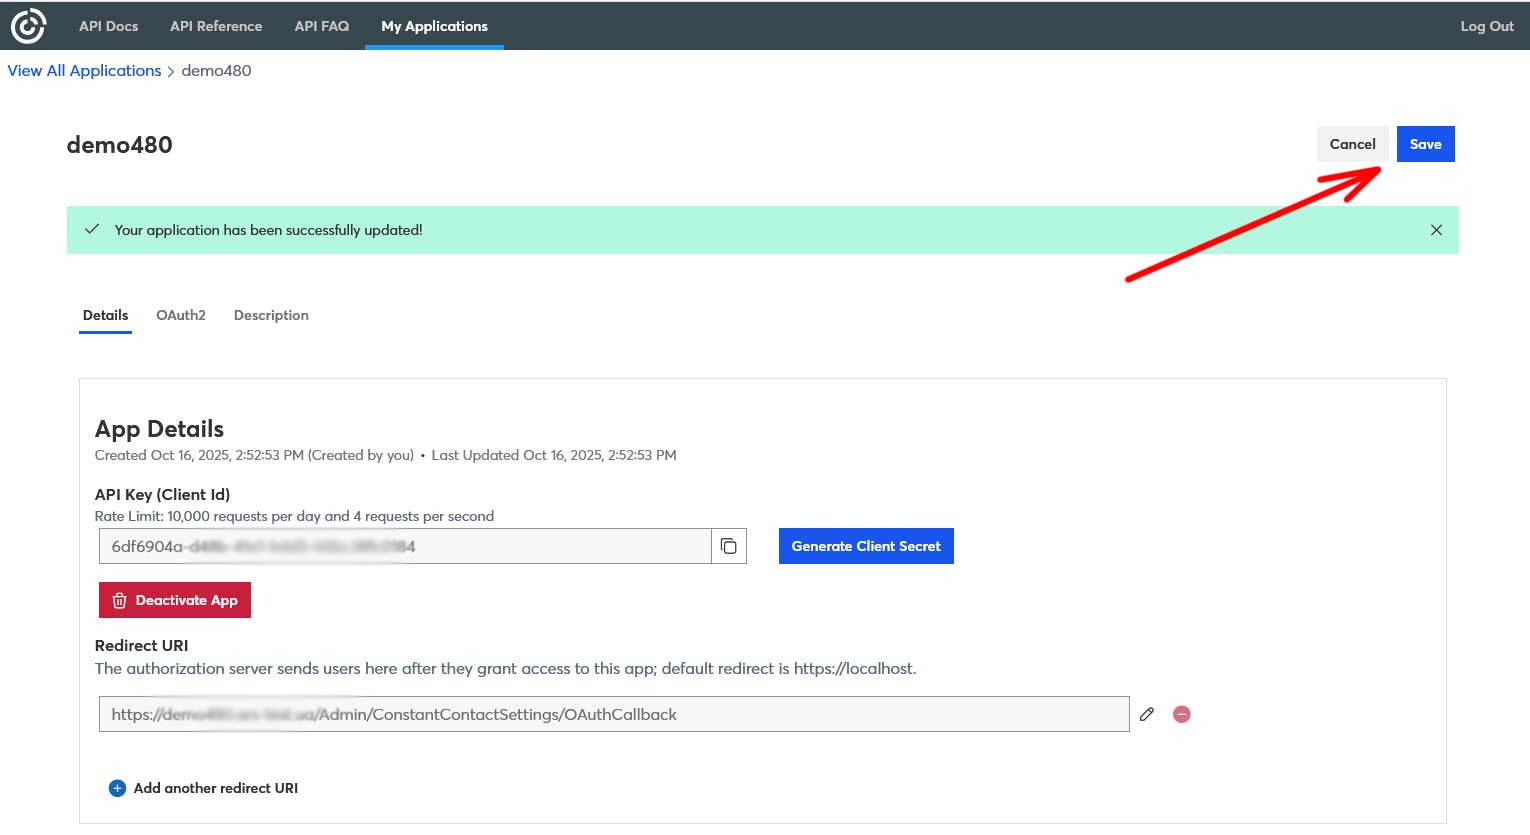
4. Go back to your application in Constant Contact. Replace the default redirect 'https://localhost' with the 'Redirect URI' from the plugin configure page and press 'Save'.
5. On the plugin configure page press 'Generate Access Token'. Constant Contact asks you to log in and to allow the access. After it you come back to the configure page, and the plugin fills the 'Access Token' and the 'Refresh Token'.
'Token expires' shows when the access token expires. Press 'Refresh Access Token' to renew it. The plugin uses the saved 'API Key (Client Id)' and 'Client Secret' for it, so don't forget to save them in step 3.
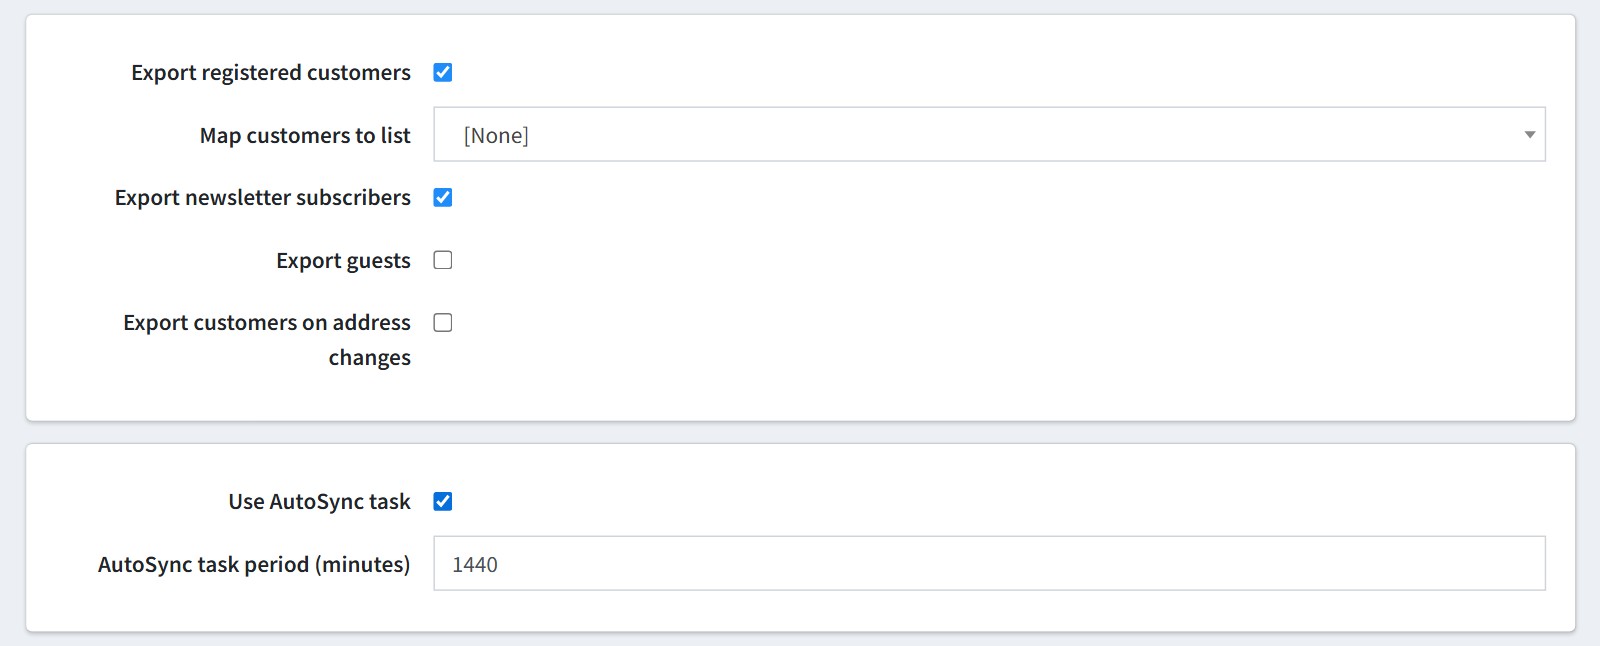
6. Choose what the plugin sends to Constant Contact.
'Export registered customers'. Select the Constant Contact list for them in 'Map customers to list'. The plugin reads the lists from your Constant Contact account, so they appear only after the access token is generated.
'Export newsletter subscribers'. The plugin creates the list 'NewsSubscribers-{store name}' for each store. A customer who unsubscribes from your newsletter is removed from this list.
'Export guests'. The guest buyers go to the list 'Guests' after their order is paid. The plugin creates this list too.
'Export customers on address changes'. The customer is sent again when he adds, changes or deletes an address, or when his account is activated. Disable it if you edit many addresses in the admin area and the queue grows.
'Use AutoSync task' sends the queue to Constant Contact every 'AutoSync task period (minutes)'. Restart the application after you change the period.
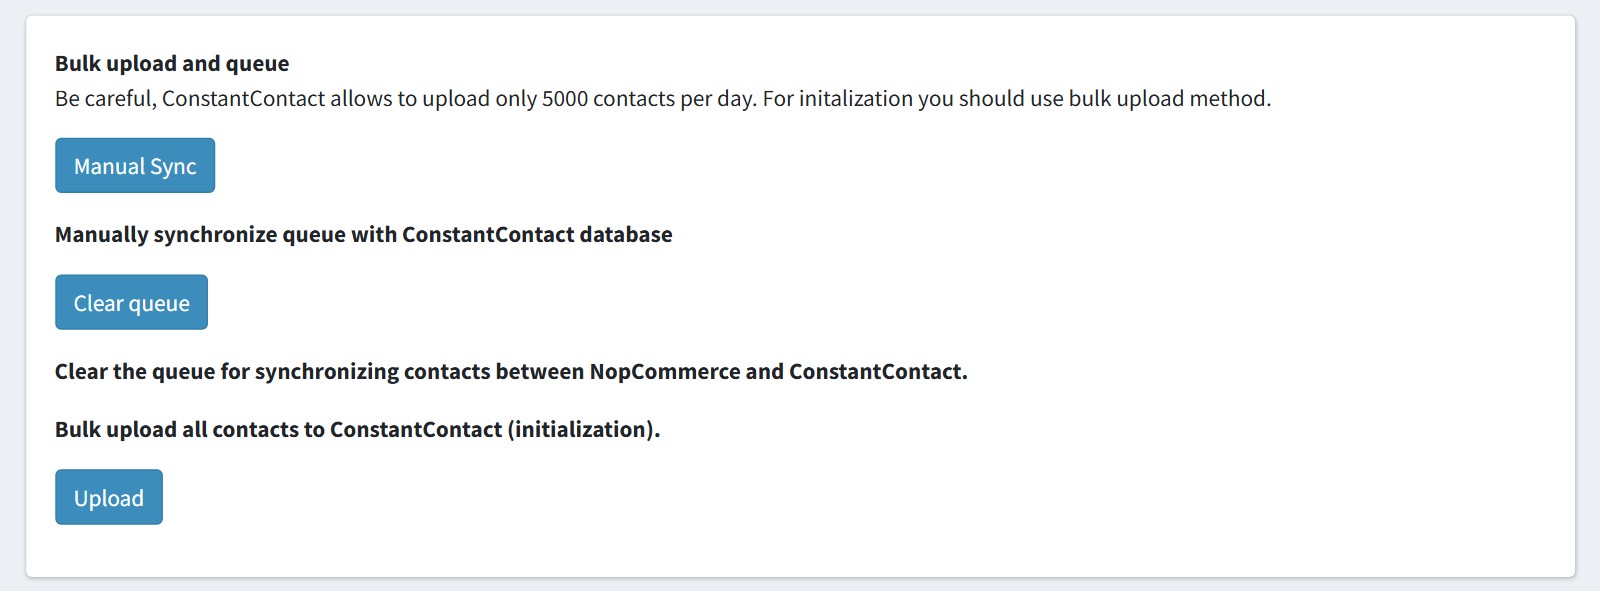
7. The first upload. If your Constant Contact account is empty, press 'Upload' to send all your customers at once (initialization). Constant Contact allows to upload only 5000 contacts per day, so use the bulk upload for the first load, not the queue.
The bulk upload does not send the street address, the regular sync does. For guests it takes only the orders which are Complete and Paid.
'Manual Sync' sends the queue now, without waiting for the AutoSync task. 'Clear queue' deletes all records waiting in the queue.
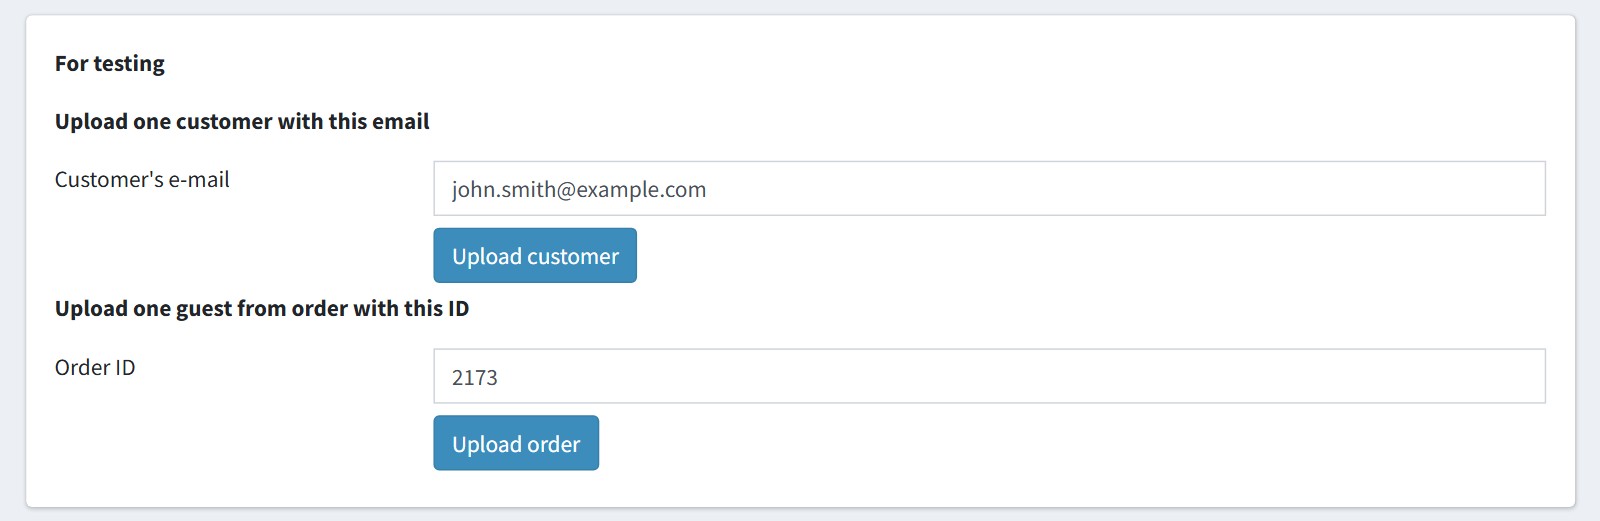
8. Test the connection before the first upload. Enter the e-mail of one customer and press 'Upload customer', or enter the ID of one order and press 'Upload order' to send its buyer as a guest. Then find the contact in your Constant Contact account.
9. How does the plugin work?
The plugin puts the customer in the queue when he subscribes to your newsletter or unsubscribes, when his order is paid, and, with 'Export customers on address changes', when he adds, changes or deletes an address. The AutoSync task sends the queue to Constant Contact.
When the order is paid the plugin adds the note 'Guest has been sent to ConstantContact.com.' to the order.
One customer can be in several lists. Example. A registered customer can be in the list for registered customers and in the list for newsletter subscribers. A guest can be in the list 'Guests' and in the list for newsletter subscribers.
The plugin sends the customer's name, phone and address too. You can use them in Constant Contact to send e-mails to the customers from a selected city or state.
The data goes one way, from your store to Constant Contact. Unsubscribes made in Constant Contact do not come back to your store.