
Installation and configuring plug-in NopRFQ
The plugin adds a 'Request For Quotation' button to the product page and to the shopping cart page. The customer fills in a short form in a popup window or on a separate page, and you get an email with the product, the selected attributes and the customer's message.
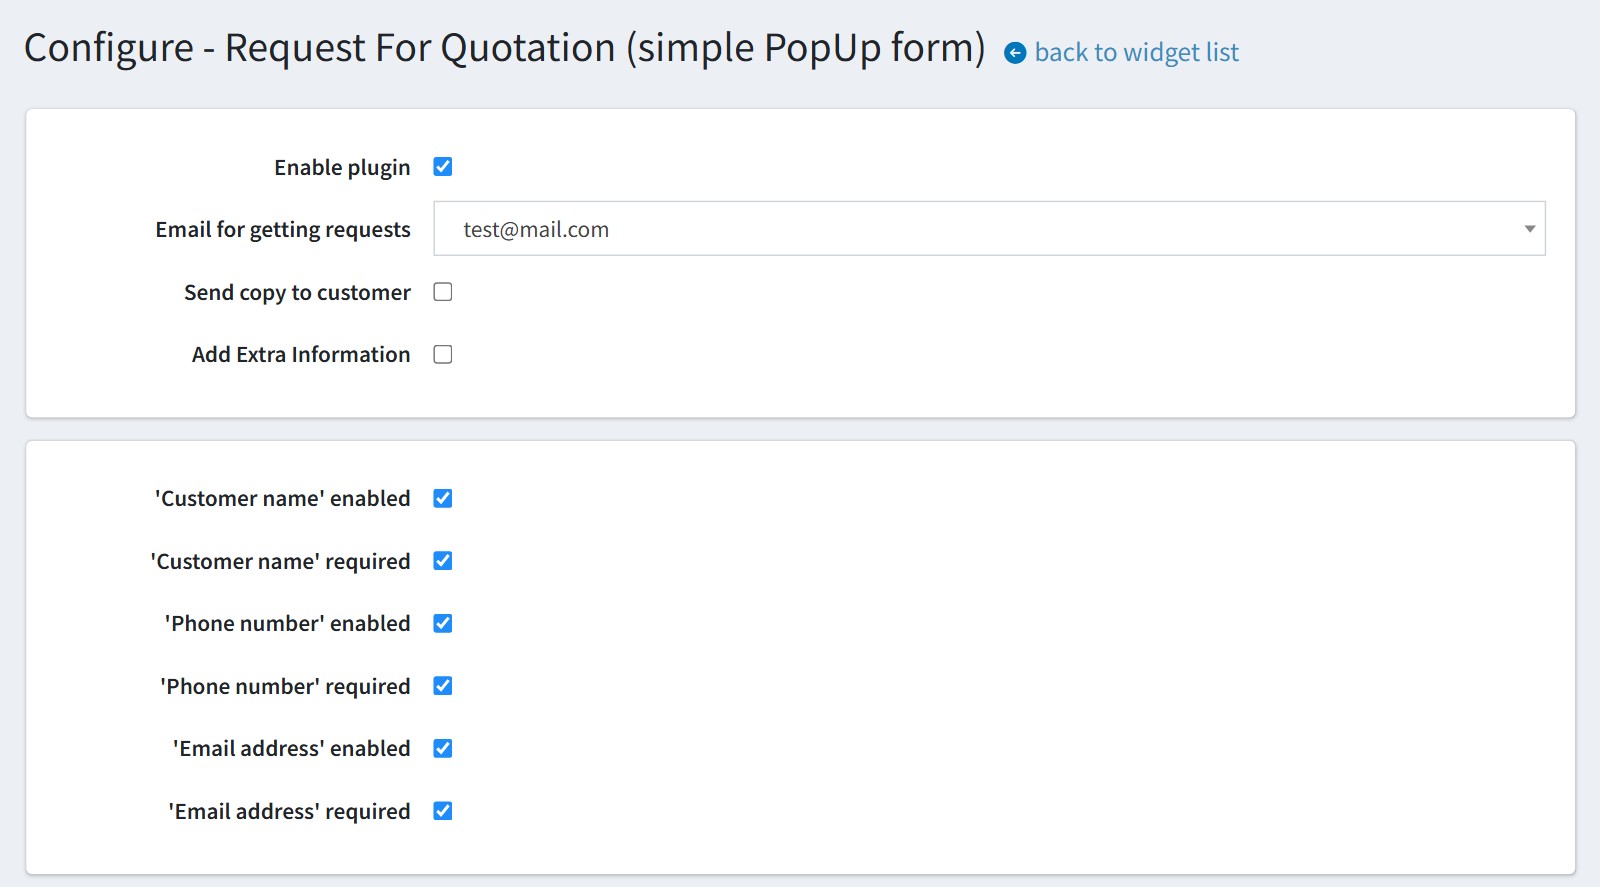
It's easy to configure the plugin. See pictures.
1. Enable the plugin and select the email account in 'Email for getting requests'. The requests come to the address of this account.
Enable 'Send copy to customer' if a registered customer should get a copy of the request. The copy goes to the email of the customer account. Guests do not get a copy, and the address typed in the form is never used for it.
Enable 'Add Extra Information' if you would like to get the link to the customer in the admin area and the customer's current shopping cart in the email. The copy to the customer never has this information.
'Customer name', 'Phone number', 'Email address' - choose which fields the form shows and which of them the customer must fill in. Keep 'Email address' enabled if you would like to answer by email.
The setting 'Enable Captcha' appears on the configure page only when CAPTCHA is enabled in nopCommerce (Configuration - Settings - General settings).
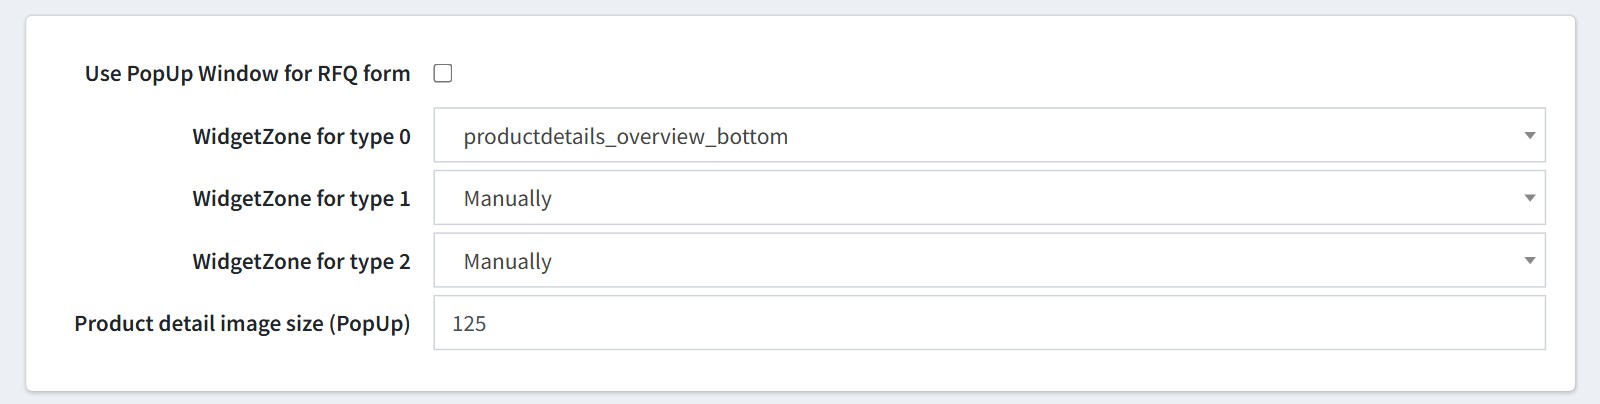
2. 'Use PopUp Window for RFQ form'. Enabled - the form opens in a popup window over the product page. Disabled - the button opens a separate page with the form.
The plugin has 3 types of buttons, each with its own text: type 0 'Request For Quotation', type 1 'Match the price', type 2 'Request For Quotation2'. Select the place of each button in 'WidgetZone for type 0', 'WidgetZone for type 1' and 'WidgetZone for type 2'. The productdetails_... places are on the product page, the order_summary_... places are on the shopping cart page. 'Manually' - the button does not appear automatically (see step 6).
The button on the shopping cart page appears only when the cart is not empty.
'Product detail image size (PopUp)' - the size in pixels of the product picture in the popup window. The separate page shows the picture in the size of your product page ('Product detail image size' in Configuration - Settings - Media settings).
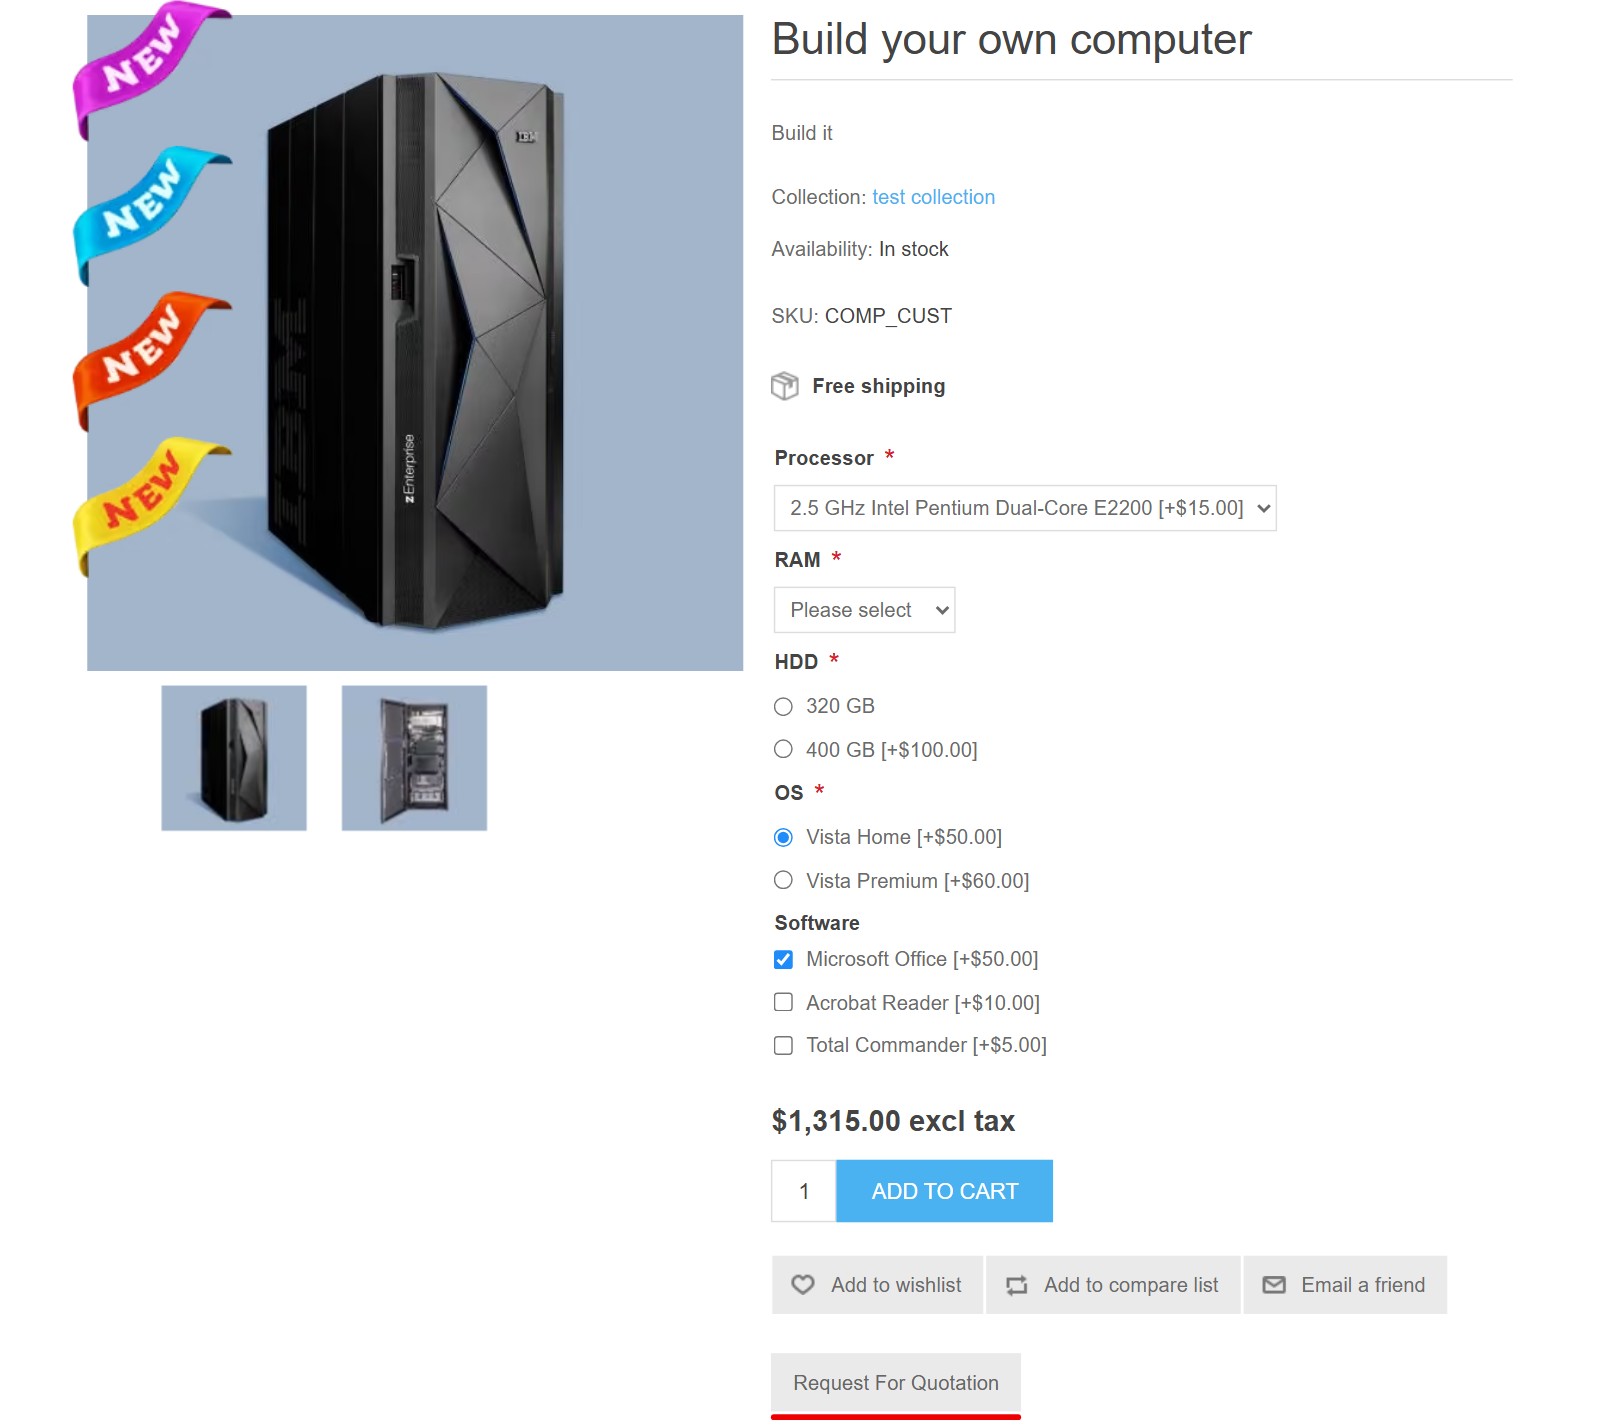
This is how the button looks on the product page.
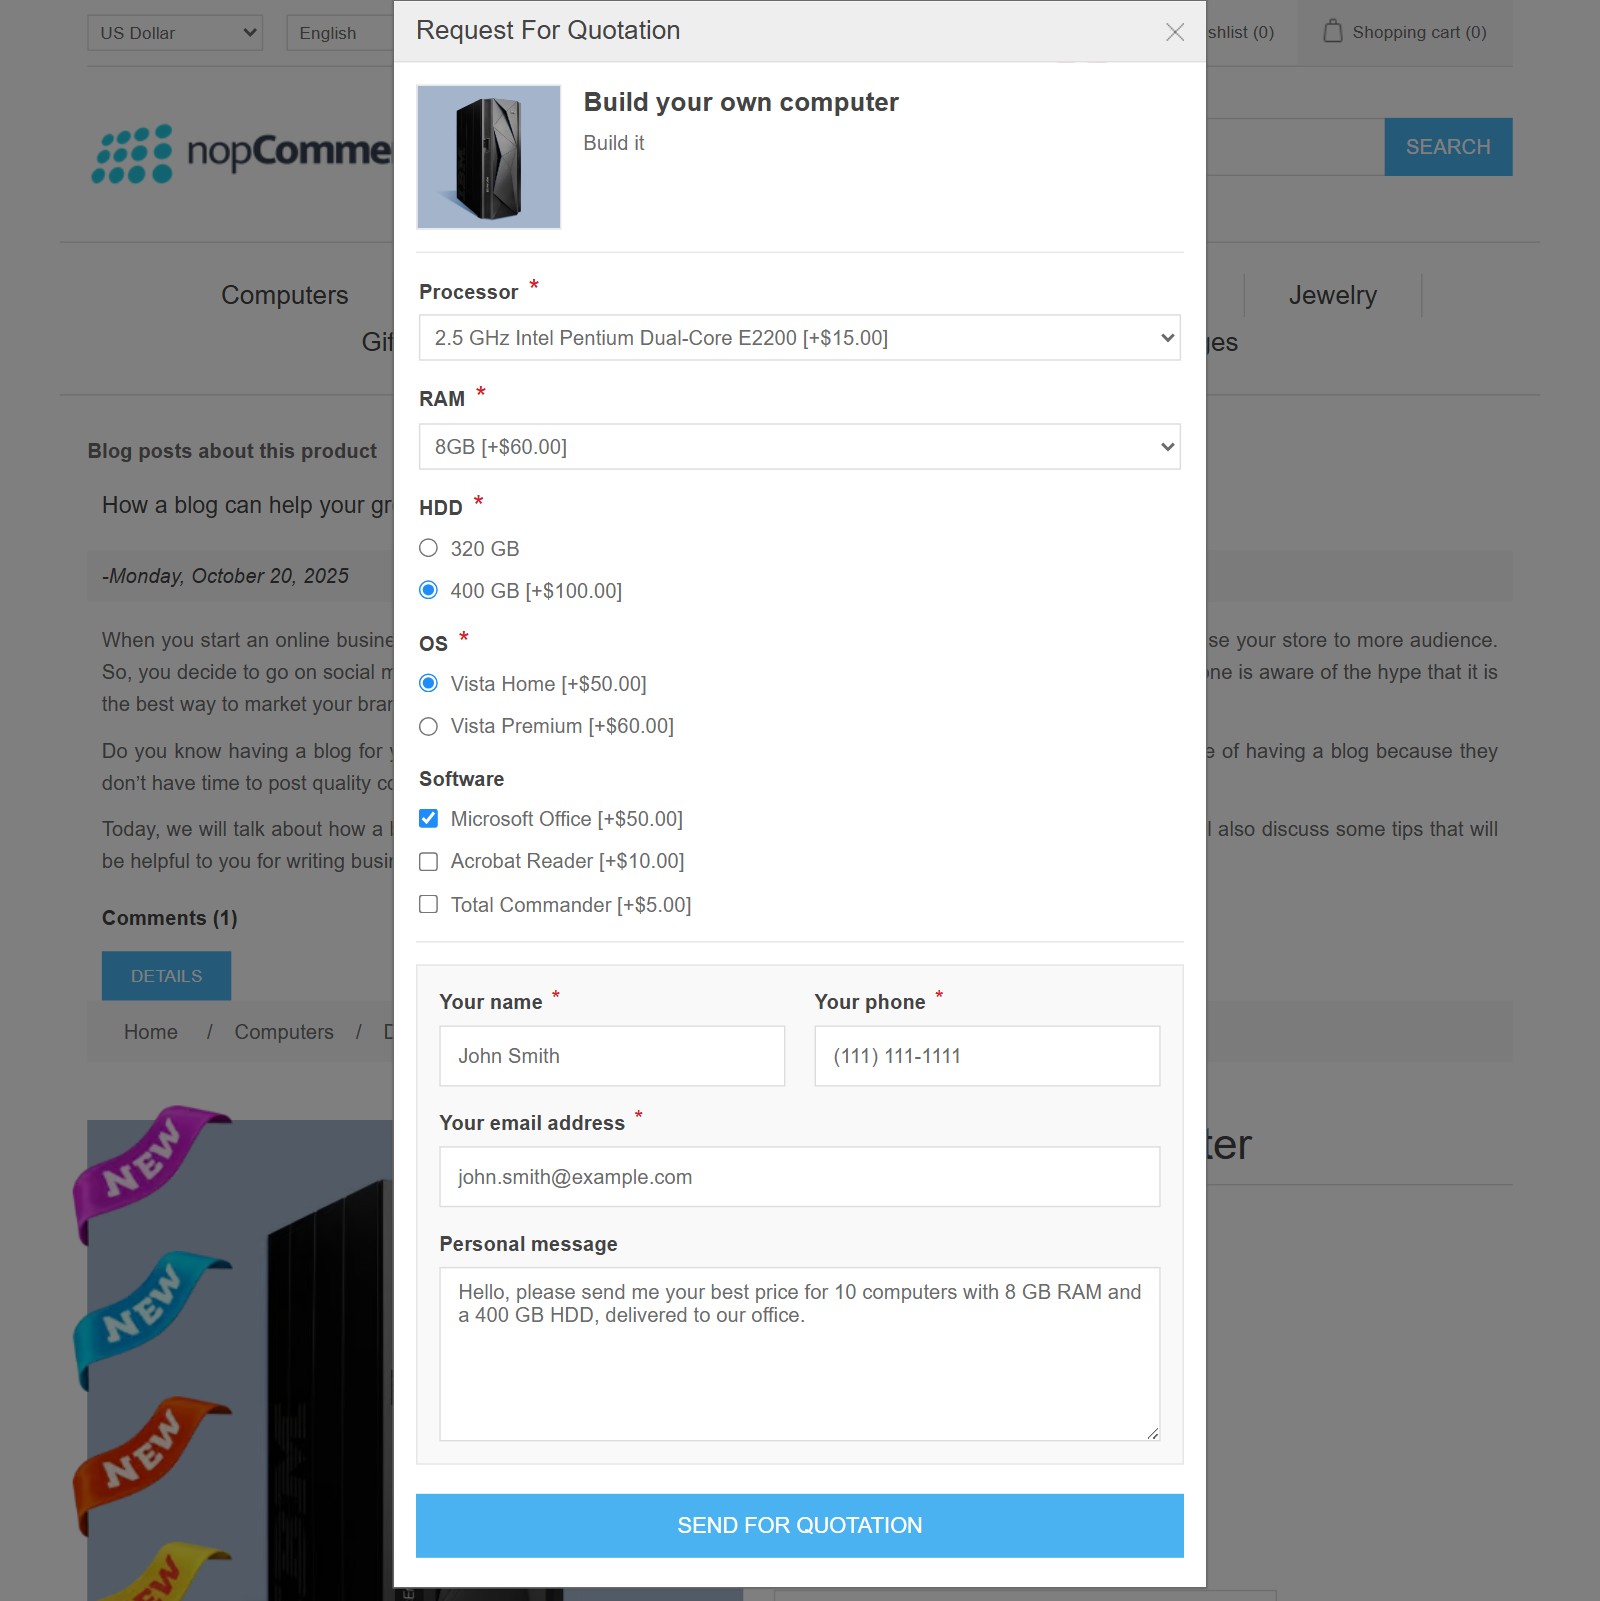
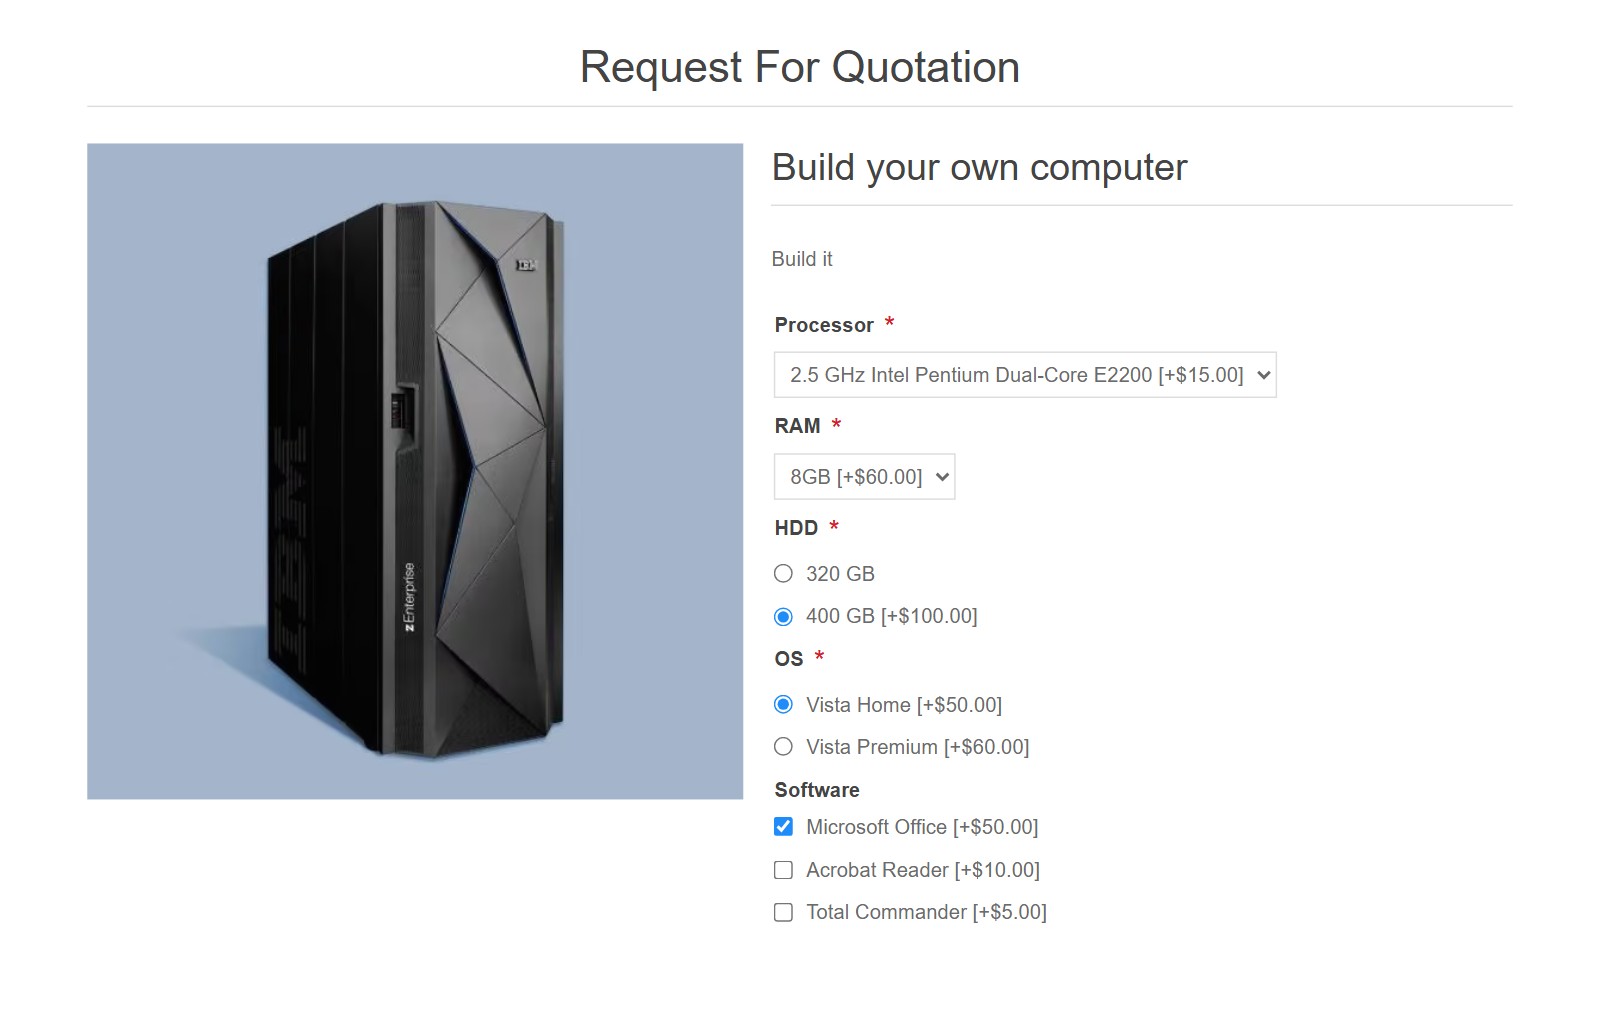
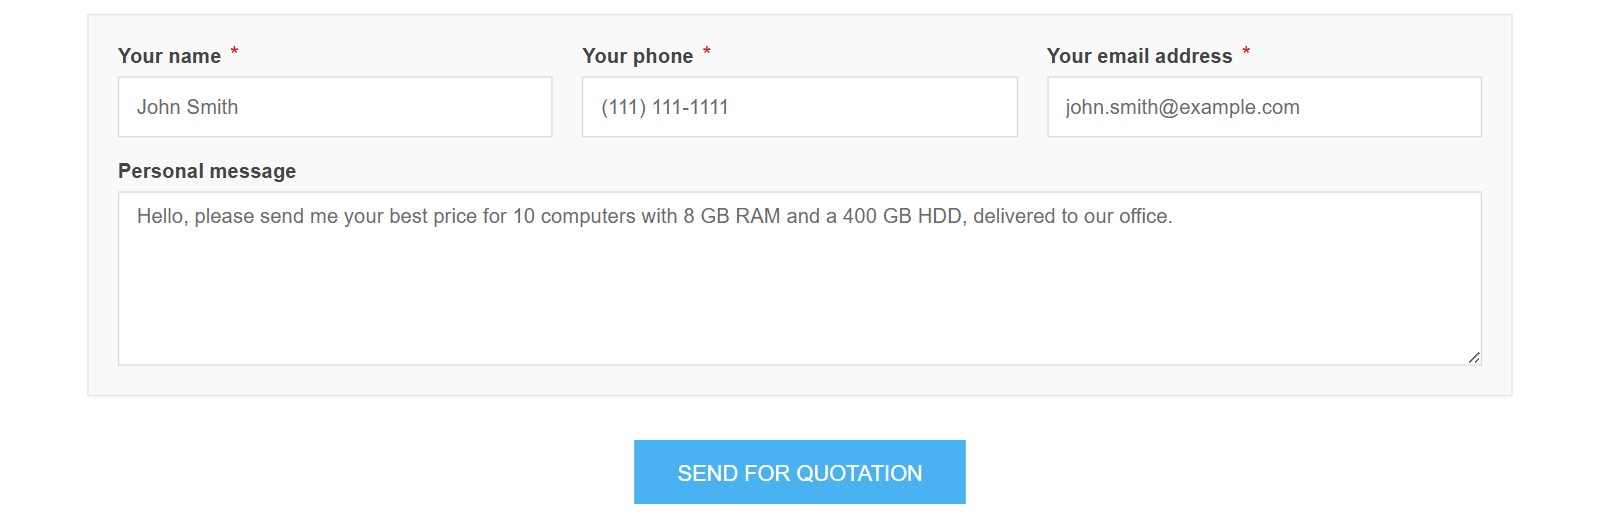
3. The customer clicks the button and fills in the form. The form shows the product with its picture and attributes, so the customer can choose the attributes right in the form. For a registered customer the name, the phone and the email are filled in automatically.
This is the form in the popup window.
This is the form on the separate page, when 'Use PopUp Window for RFQ form' is disabled.
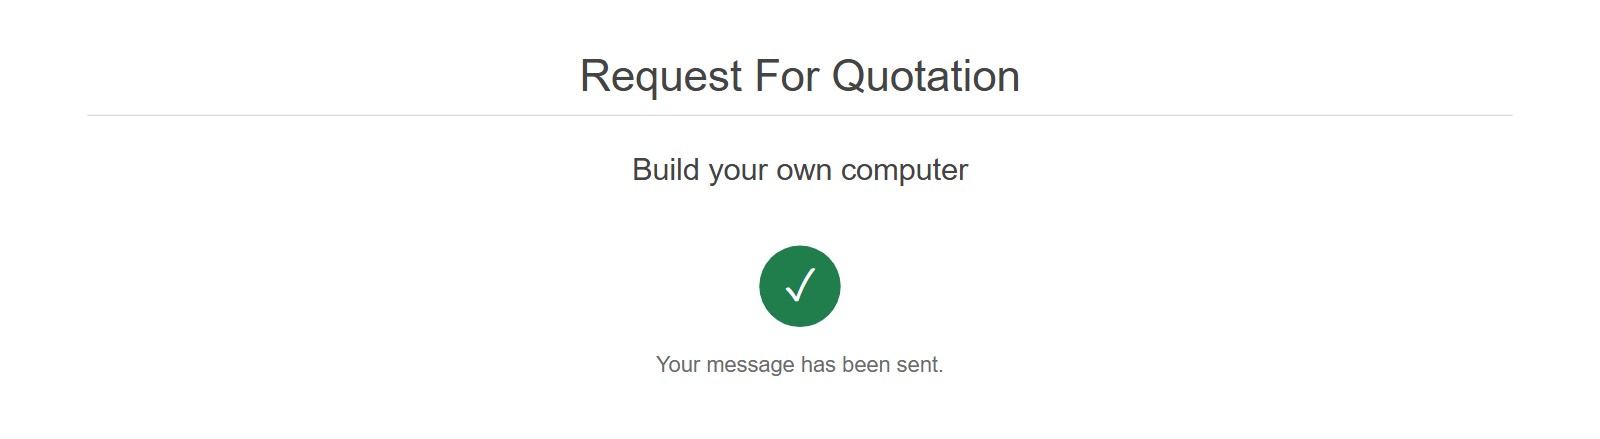
After sending the customer sees the confirmation.
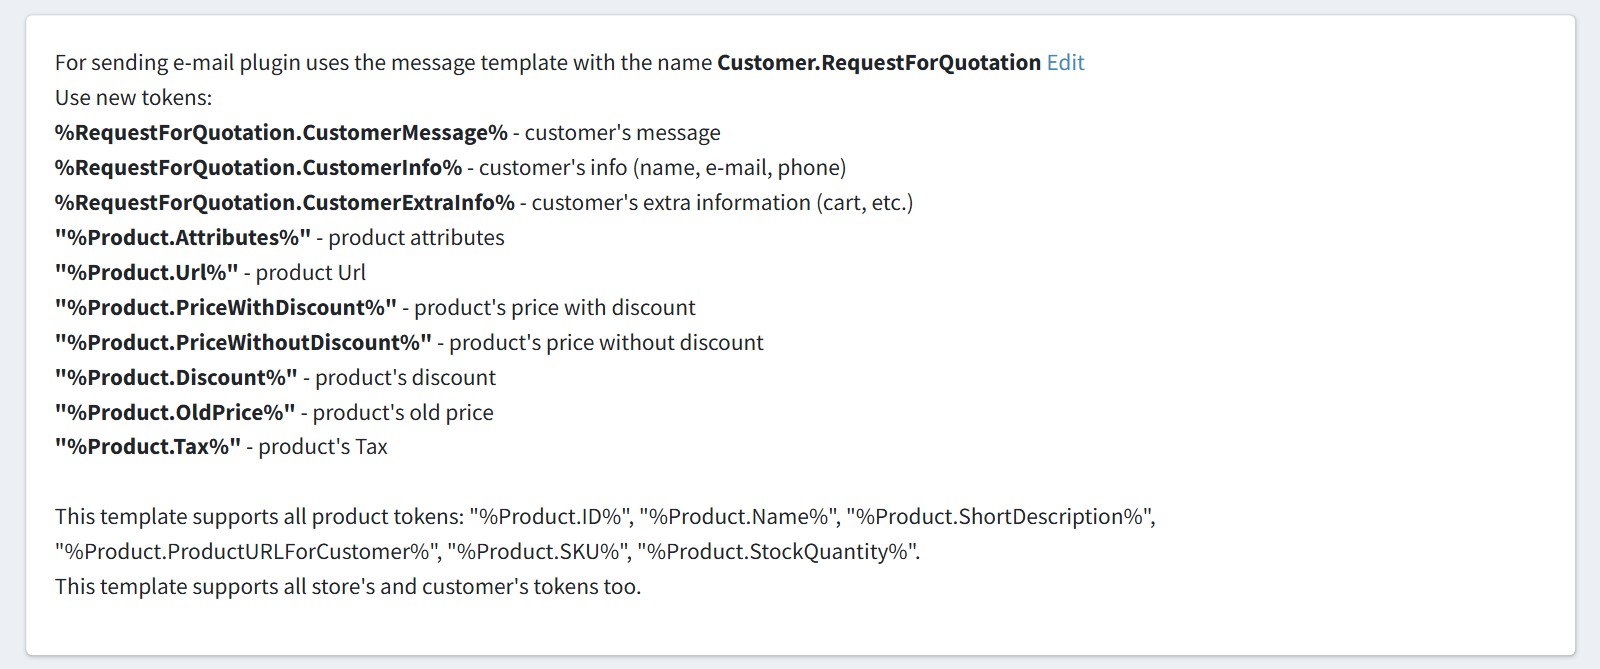
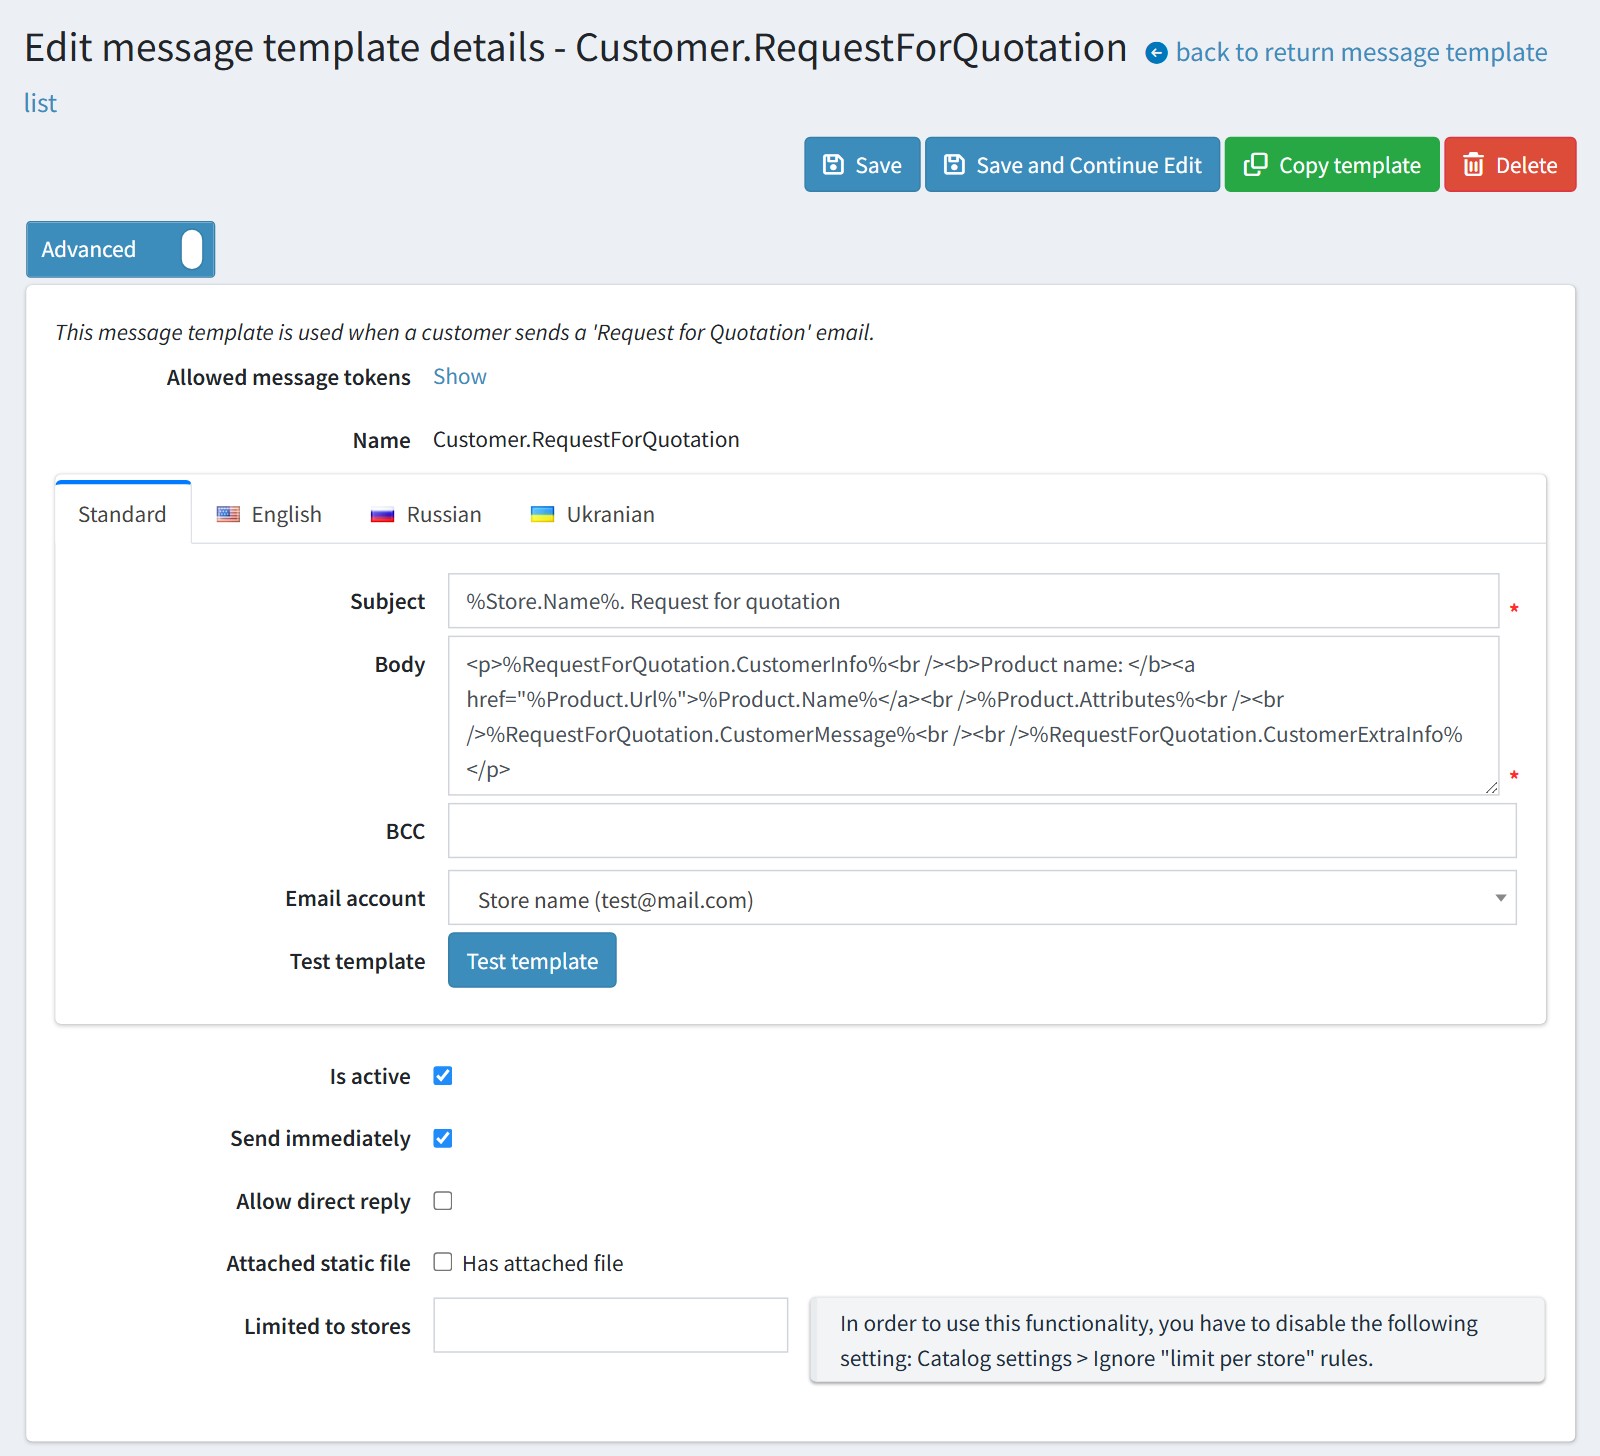
4. The plugin sends the request with the message template 'Customer.RequestForQuotation'. The plugin creates this template when you install it. Click 'Edit' on the configure page to change the subject and the text of the email. You can use the new tokens of the plugin and all product, store and customer tokens.
Each language has its own tab. The plugin uses the tab of the customer's language, and the 'Standard' tab when it is empty. Keep 'Is active' enabled, otherwise the plugin does not send the requests.
Add addresses to 'BCC' if more people (ex. your sales team) should get the requests too.
The 'Email account' of the template is used only for the copy to the customer. The request itself is sent with the account from 'Email for getting requests'.
5. You can change the texts of the buttons and the forms in the language resources. Open Configuration - Languages, edit the language and filter the string resources by 'FoxNetSoft.RequestForQuotation.'. The number in the resource name is the type of the button:
'FoxNetSoft.RequestForQuotation.0.Button' - the text of the button,
'FoxNetSoft.RequestForQuotation.0.Title' and 'FoxNetSoft.RequestForQuotation.0.PageTitle' - the titles of the form,
'FoxNetSoft.RequestForQuotation.0.ButtonSend' - the text of the send button.
Change the texts of type 2 before you use it. By default its button says 'Request For Quotation2'.
6. Select 'Manually' if you would like to put the button in another place of your theme. Add this code to the *.cshtml file:
@await Component.InvokeAsync("RequestForQuotation", new { typeButton = 0, productId = Model.Id })
typeButton - the type of the button, productId - the ID of the product. Use productId = 0 for the form without a product.
This way you can have more than 3 types. Use typeButton = 3, 4 ... and add the 4 resources with this number, ex. 'FoxNetSoft.RequestForQuotation.3.Button'.
7. The plugin does not save the requests in the database. The email is the only record, so check your email account before you go live: send a test email from Configuration - Email accounts.
The request comes from your email account when 'Contact us page. Use system email' is enabled in Configuration - Settings - General settings (the nopCommerce default). When it is disabled, the request comes from the customer's address, and some mail servers refuse to send such emails.
The settings of the plugin are common for all stores.