
Installation and configuring plug-in QuickBooks Online Connector
The plugin uploads the paid orders of your nopCommerce store to QuickBooks Online as Sales Receipts or Invoices - with the customers, the products, the taxes, the shipping, the discounts and the payments. It can also download the stock quantities and the prices from QuickBooks Online back to your store.
It's easy to configure the plugin. See pictures.
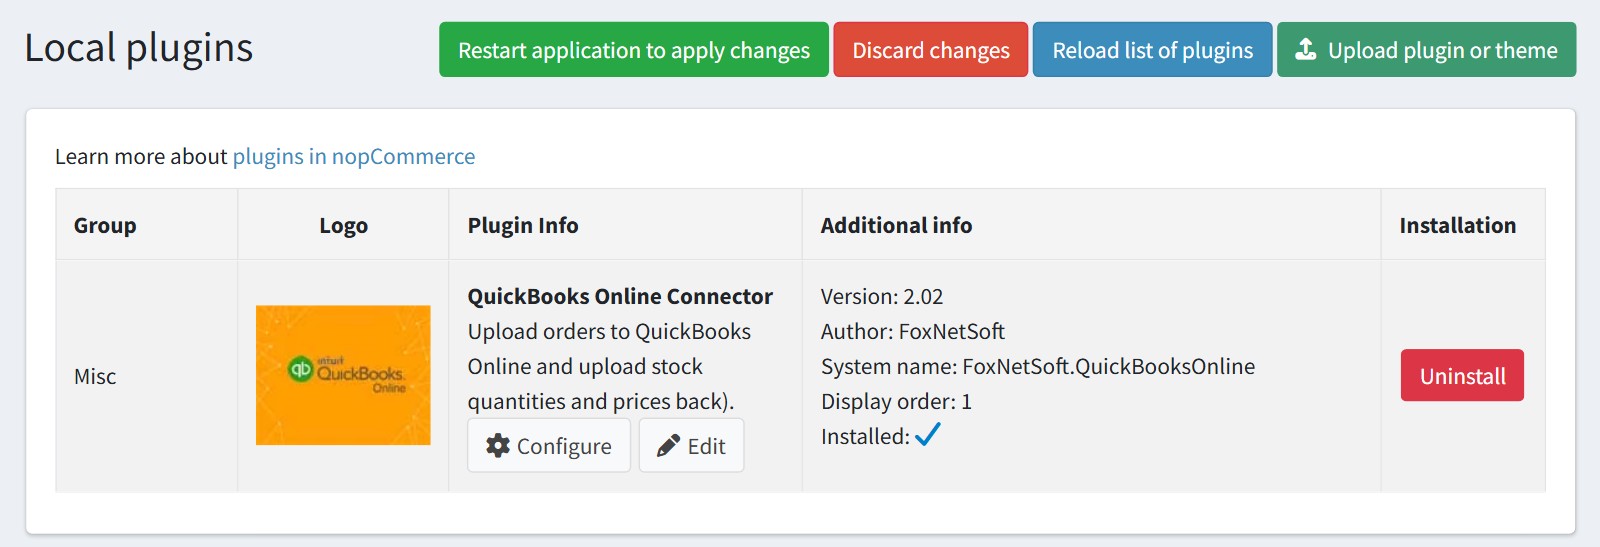
1. Upload the plugin in 'Configuration - Local plugins', install it and press 'Configure'.
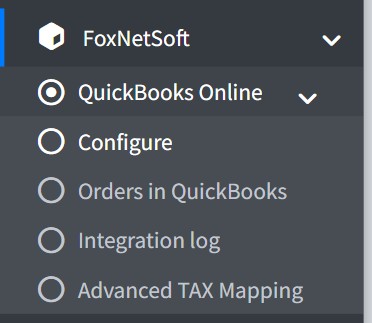
The plugin adds its pages to the admin menu 'FoxNetSoft - QuickBooks Online': 'Configure', 'Orders in QuickBooks', 'Integration log' and 'Advanced TAX Mapping'.
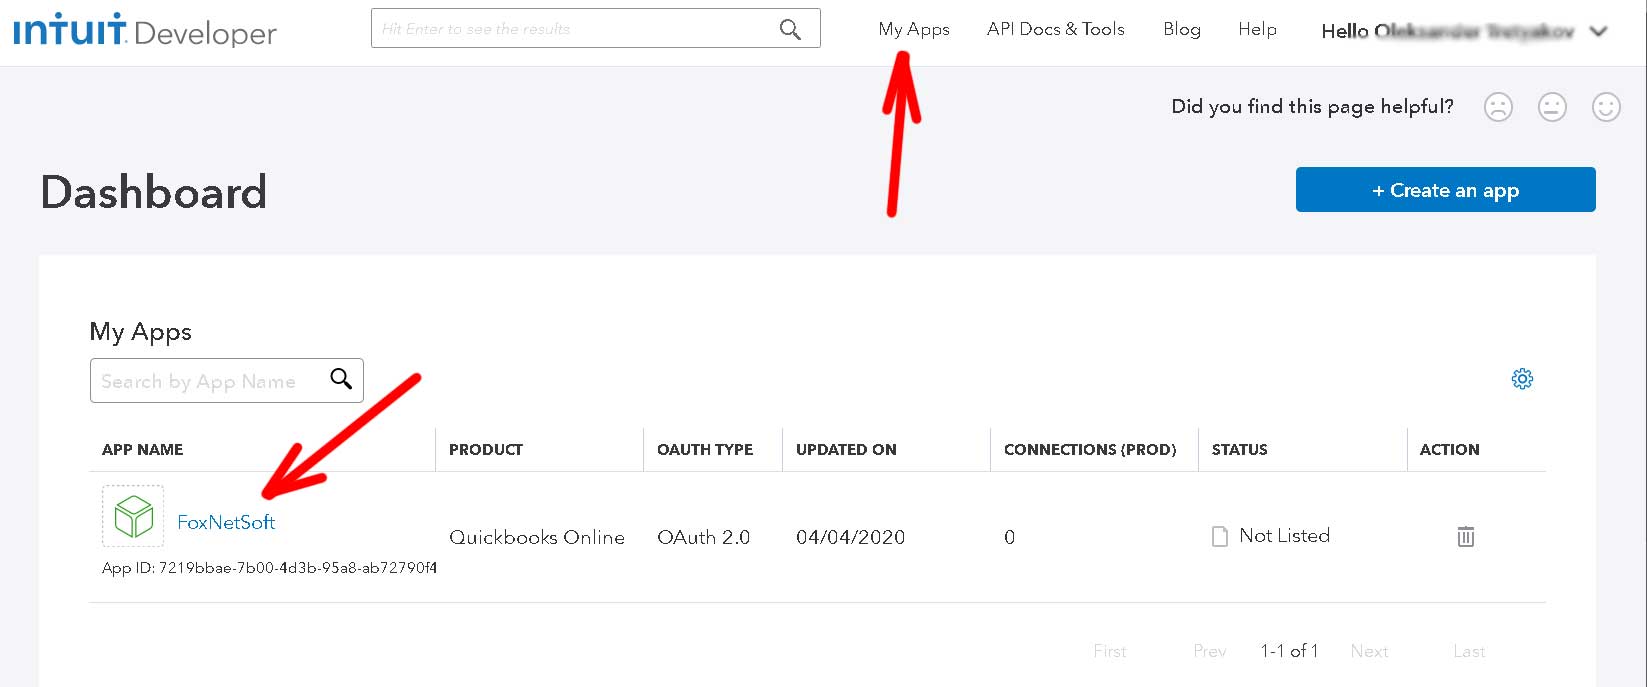
2. Create the credentials 'Client ID' and 'Client Secret' in the QuickBooks Online dashboard https://developer.intuit.com.
Open 'My Apps' and create an app for QuickBooks Online, or open the app you already have.
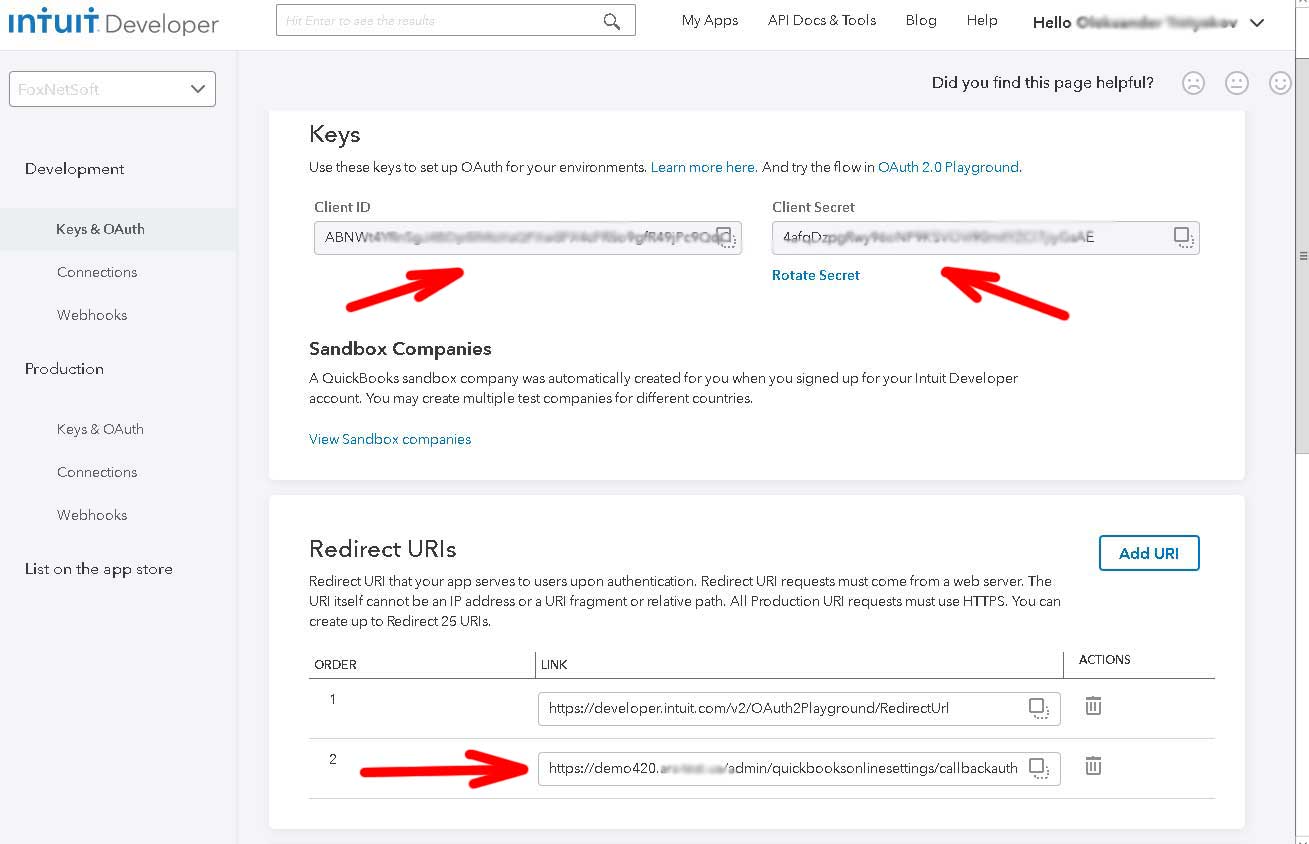
Open 'Keys & OAuth' and copy 'Client ID' and 'Client Secret'. Use the keys from 'Development' for a sandbox company and the keys from 'Production' for your real QuickBooks company.
Press 'Add URI' in 'Redirect URIs' and add the 'Redirect URI' from the plugin configure page (see step 4). It looks like https://www.yourstore.com/admin/quickbooksonlinesettings/callbackauth. You should use the live URL with https, not localhost and not an IP address.
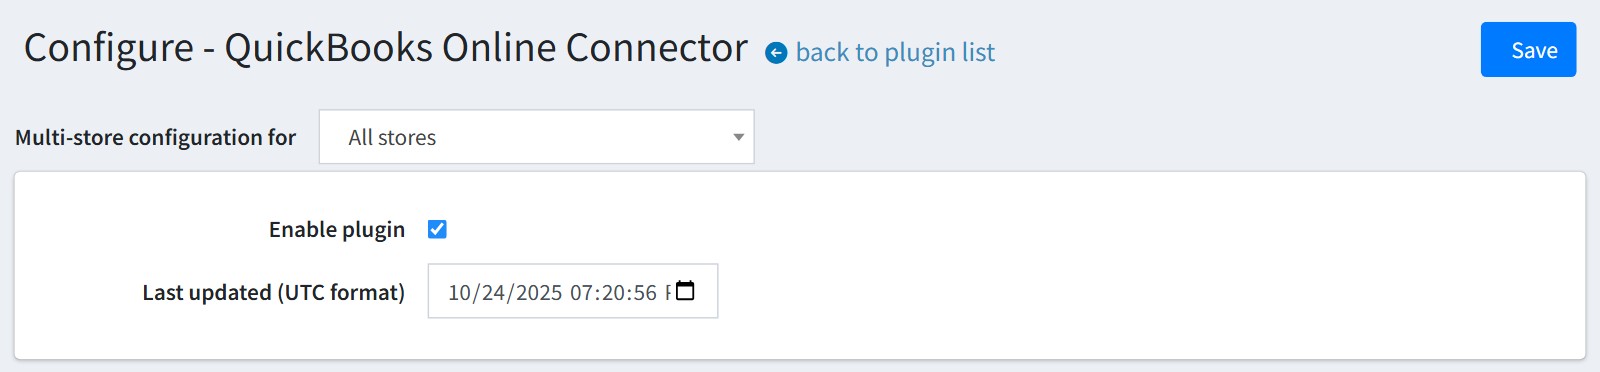
3. Open the plugin configure page and check 'Enable plugin'.
'Last updated (UTC format)' is the date from which the plugin looks for the paid orders in the 'Automatic' mode. The plugin moves it forward itself after each run.
Pay attention! In the 'Automatic' mode the plugin always checks the paid orders of the last 30 days too, even when 'Last updated' is today. So when you switch to 'Automatic', the paid orders of the last 30 days that are not in QuickBooks yet will be uploaded.
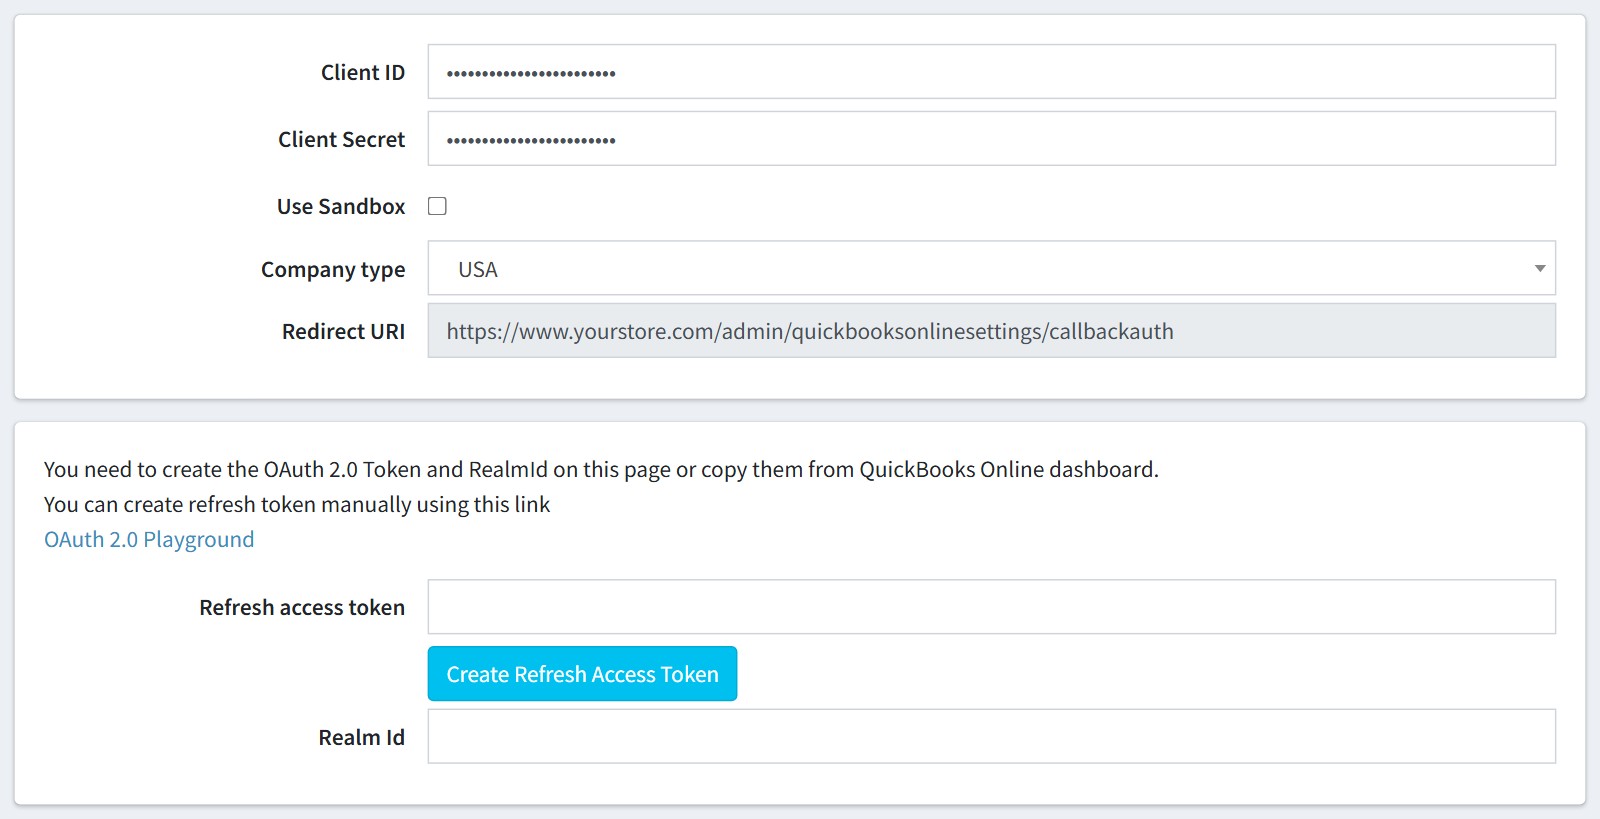
4. Set 'Client ID' and 'Client Secret' from step 2.
Enable 'Use Sandbox' when you use the Development keys and a sandbox company. Disable it for the Production keys.
'Company type'. 'USA' for a US QuickBooks company, 'Global company' for a company from any other country.
Copy 'Redirect URI' to 'Redirect URIs' of your app in the QuickBooks Online dashboard (step 2). They must be exactly the same.
Press 'Save' first. Then press 'Create Refresh Access Token'. QuickBooks asks you to sign in and to select your company. After it you come back to the configure page, and the plugin saves 'Refresh access token' and 'Realm Id' itself.
Press 'Test API' at the bottom of the configure page to check the connection.
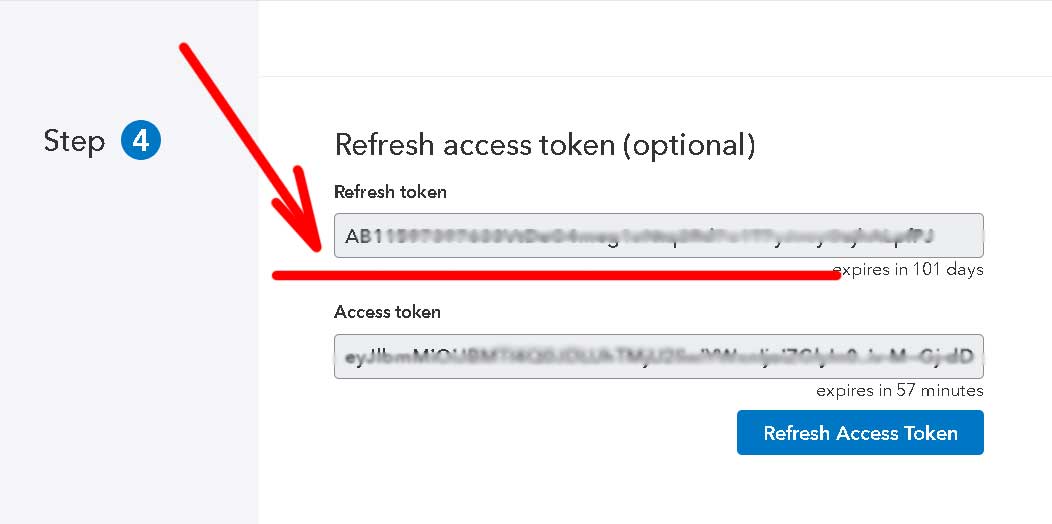
5. Pay attention! Refresh access token != Access token.
You can also create the refresh token yourself using this link OAuth 2.0 Playground. Select your app and the 'Accounting' scope, get the authorization code and the tokens. The Playground uses its own redirect URI https://developer.intuit.com/v2/OAuth2Playground/RedirectUrl, so it must be in 'Redirect URIs' of your app too (see the picture in step 2).
Copy 'Refresh token' (not 'Access token') to 'Refresh access token' and the Realm ID to 'Realm Id' on the plugin configure page, then press 'Save'.
The plugin refreshes the token itself while it works. If QuickBooks says that the token is not valid any more, create it again.
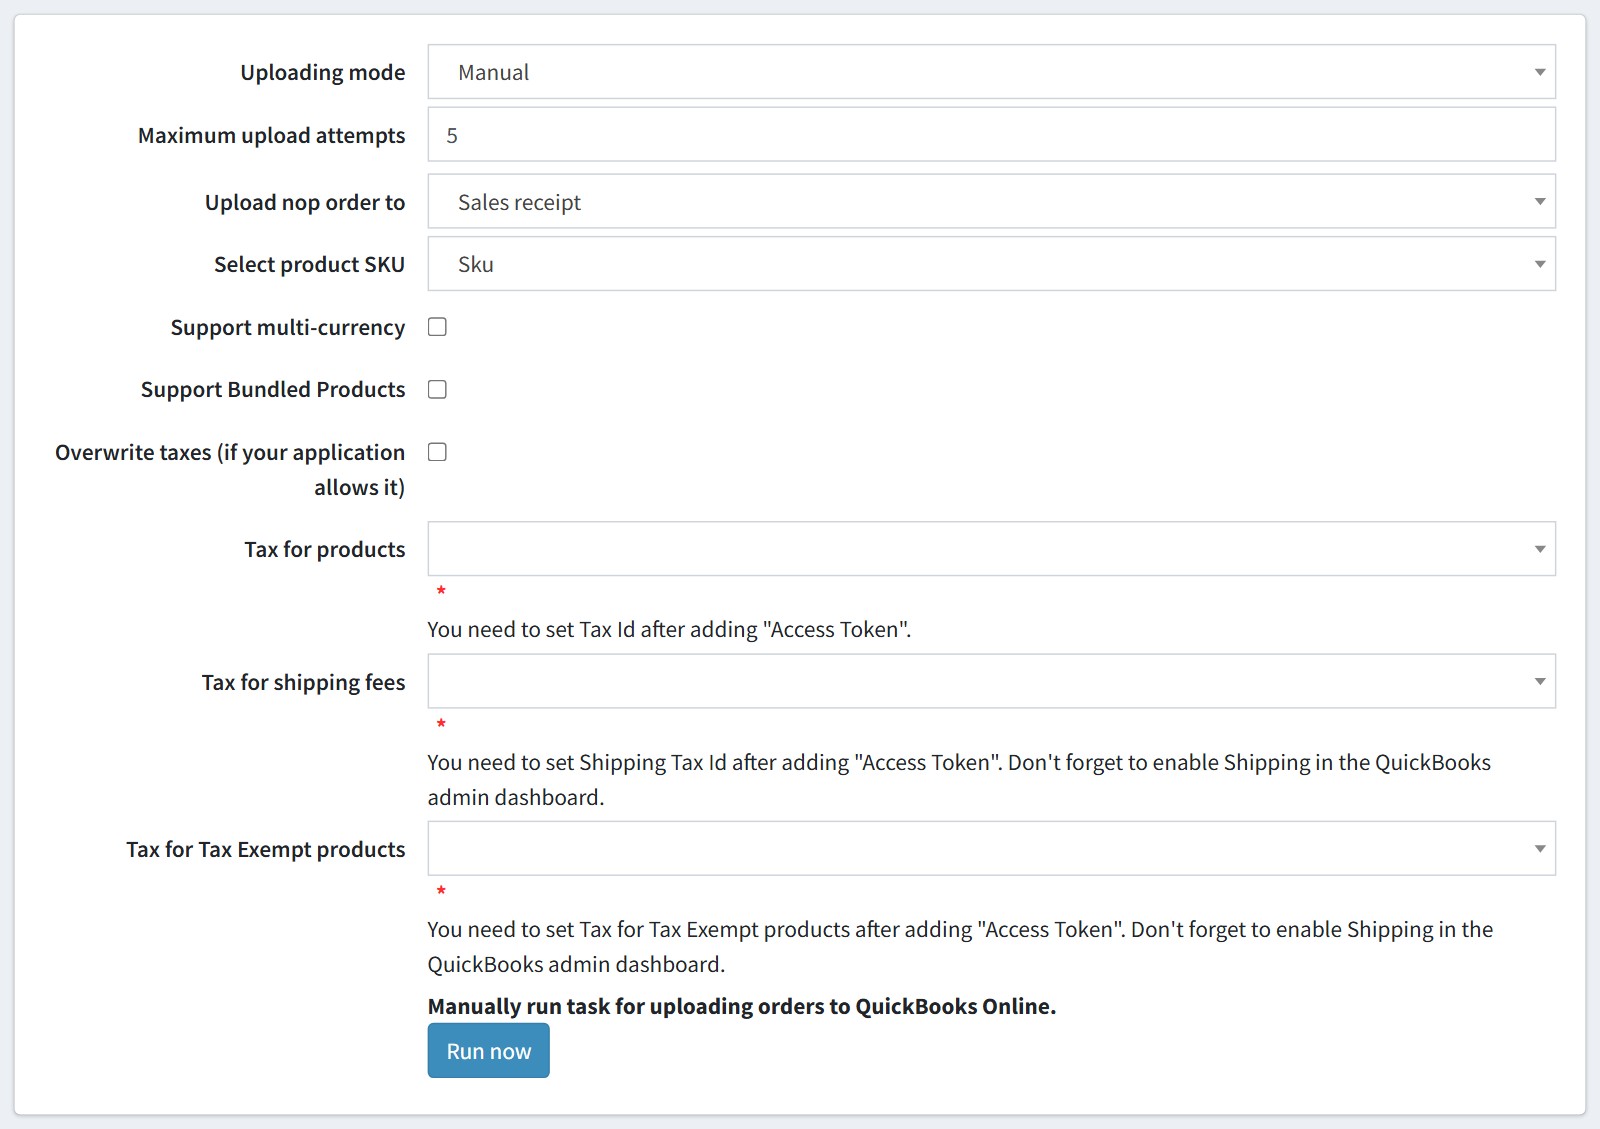
6. Choose how the orders are uploaded.
'Uploading mode'. 'Manual' - you upload the orders yourself from the order list or the order page. 'Automatic' - the plugin uploads each paid order by the scheduled task.
'Maximum upload attempts'. A failed upload is tried again after 5, 15, 30 minutes, 1, 2, 4, 8, 12 and 24 hours. After the last attempt the order stays 'Failed' and you upload it again yourself.
'Upload nop order to'. 'Sales receipt' or 'Invoice'. For an invoice the plugin creates a separate QuickBooks payment too (see step 10).
Only paid orders are sent to QuickBooks. An unpaid or cancelled order is never uploaded.
'Select product SKU'. Which product field is the SKU of the QuickBooks item: 'Sku', 'Id', 'Gtin' or 'Manufacturer part number'. The plugin creates the missing customers and items in QuickBooks itself.
'Support Bundled Products'. The plugin looks for the QuickBooks bundle (group item) with the same SKU and uses it for the order.
'Overwrite taxes (if your application allows it)'. By default QuickBooks calculates the taxes itself. When it is enabled the plugin tries to upload the nopCommerce taxes. Sometimes QuickBooks doesn't allow it.
'Tax for products', 'Tax for shipping fees' and 'Tax for Tax Exempt products'. These lists are loaded from your QuickBooks company, so they are empty until the refresh token is created (step 4). Select them after it and press 'Save'.
'Run now' uploads the waiting orders at once, you don't need to wait for the scheduled task.
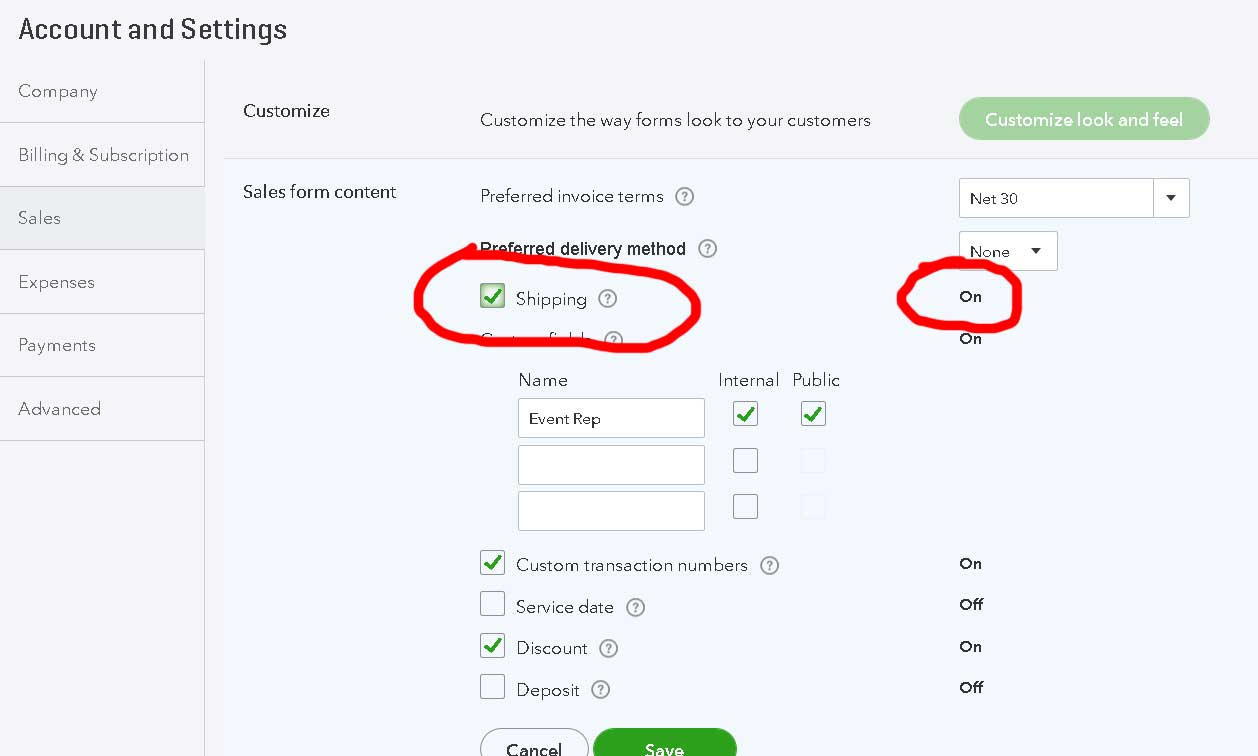
7. You need to configure Shipping and Discounts in QuickBooks Online. Open 'Account and Settings - Sales' and enable 'Shipping' and 'Discount' in 'Sales form content'.
The plugin uploads the shipping fee and the order discount as separate lines. QuickBooks refuses these lines when the options are off, and the order is not uploaded.
8. Advanced TAX Mapping. Use it when the tax depends on the address of the customer.
Map a QuickBooks Tax to a billing address (Store / Country / State) from the order. When an order is uploaded, the plugin uses the most specific matching row. Use '*' for all stores or any state. If the billing address is not listed here, the plugin uses 'Tax for products' from the configure page.
The shipping always uses 'Tax for shipping fees', a mapping row does not change it.
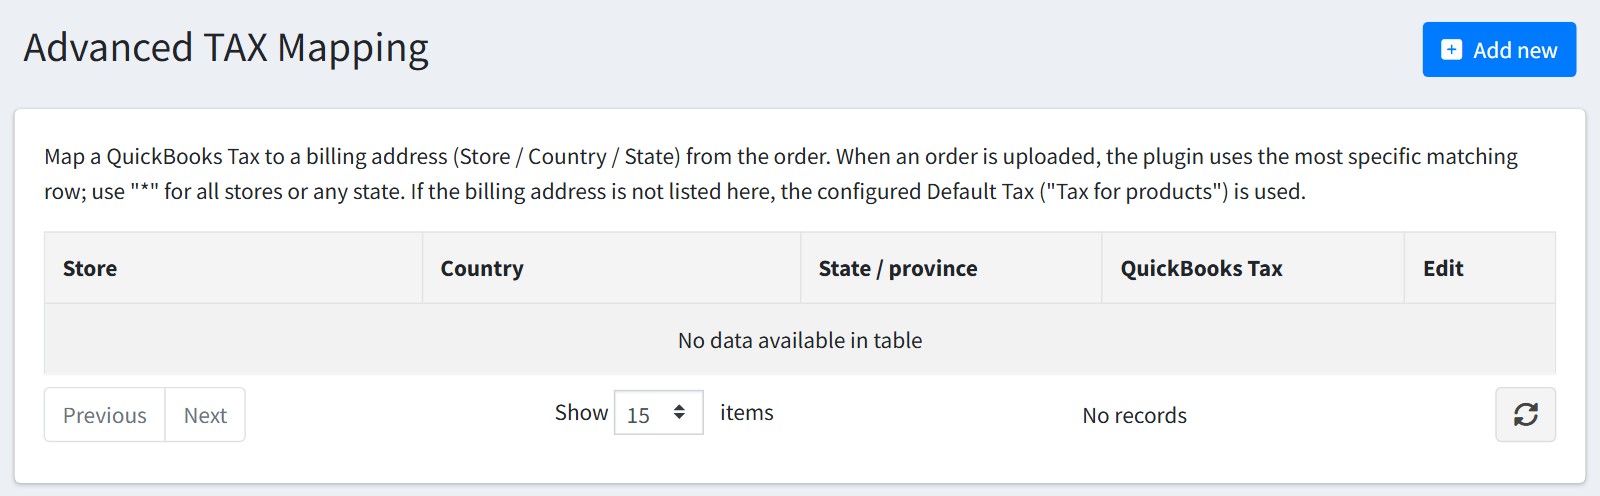
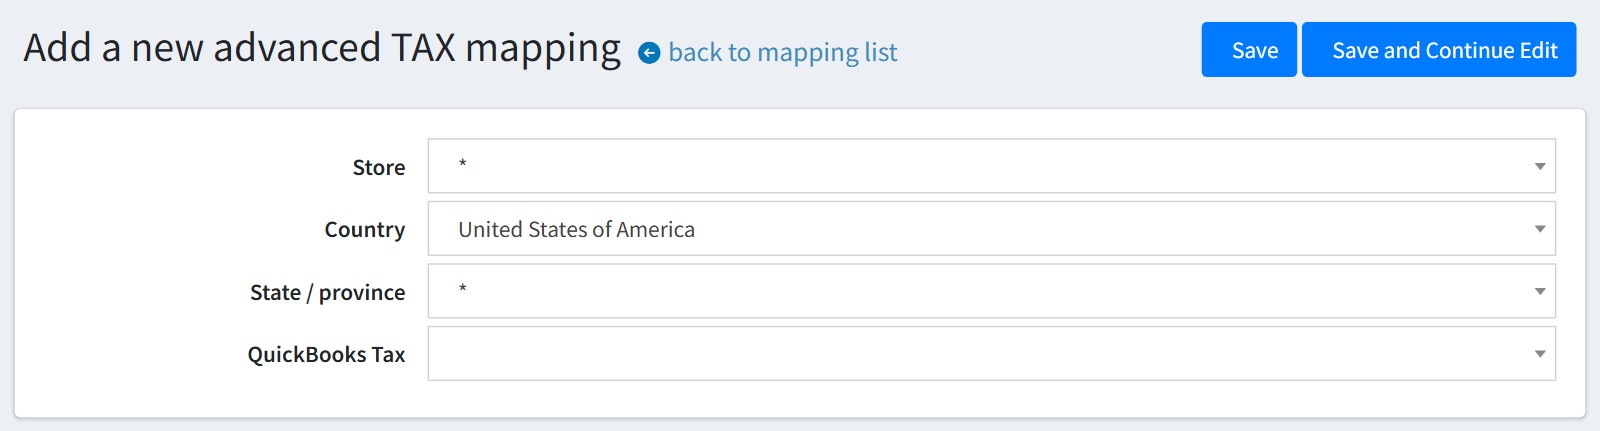
Press 'Add new', select 'Store', 'Country', 'State / province' and 'QuickBooks Tax', and press 'Save'.
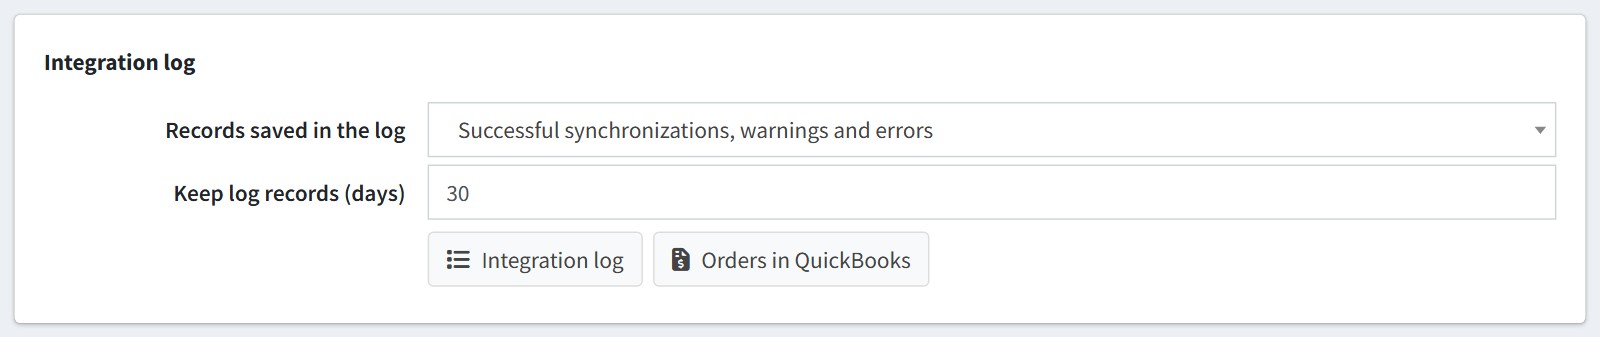
9. Integration log. The plugin writes every upload, payment, customer, item and connection event in its own log.
'Records saved in the log'. 'Successful synchronizations, warnings and errors', 'Warnings and errors' or 'Errors only'.
'Keep log records (days)'. The older records are deleted by the upload task. 0 - keep them forever.
The buttons 'Integration log' and 'Orders in QuickBooks' open these pages (see steps 14 and 15).
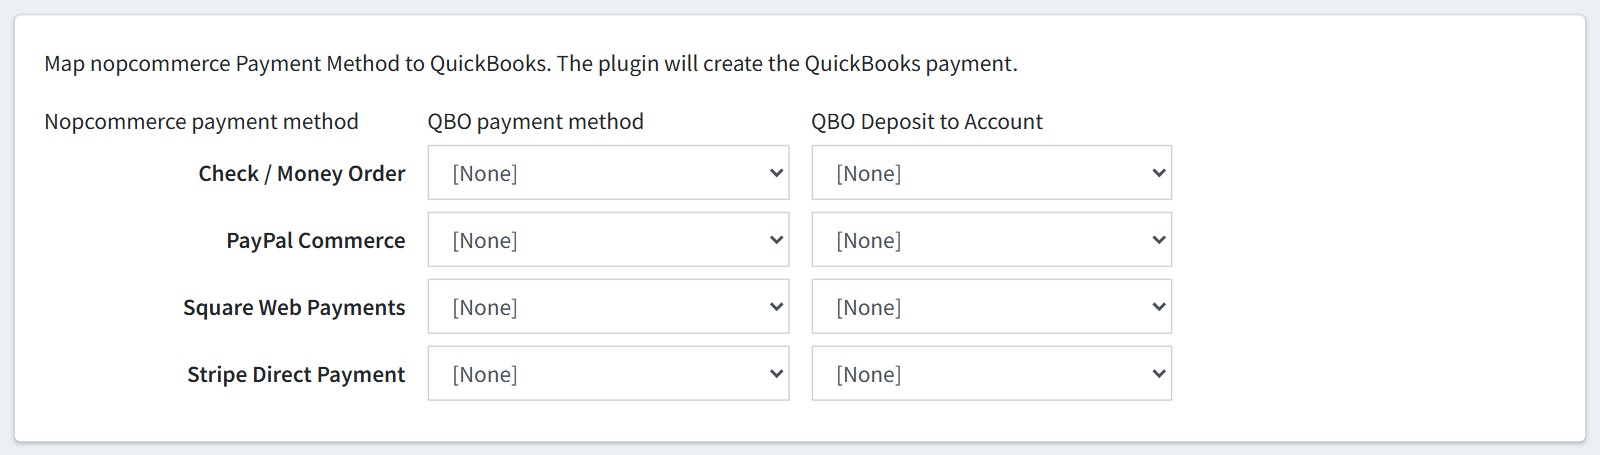
10. Map the nopCommerce payment methods to QuickBooks. Select 'QBO payment method' and 'QBO Deposit to Account' for each payment method of your store. The plugin will create the QuickBooks payment.
Pay attention! If 'Upload nop order to' is 'Invoice' and the payment method is not mapped, the plugin uploads the invoice without the payment. The order shows 'Payment method not mapped' and a warning appears in the integration log. Map the method and press 'Create payment' on the order page.
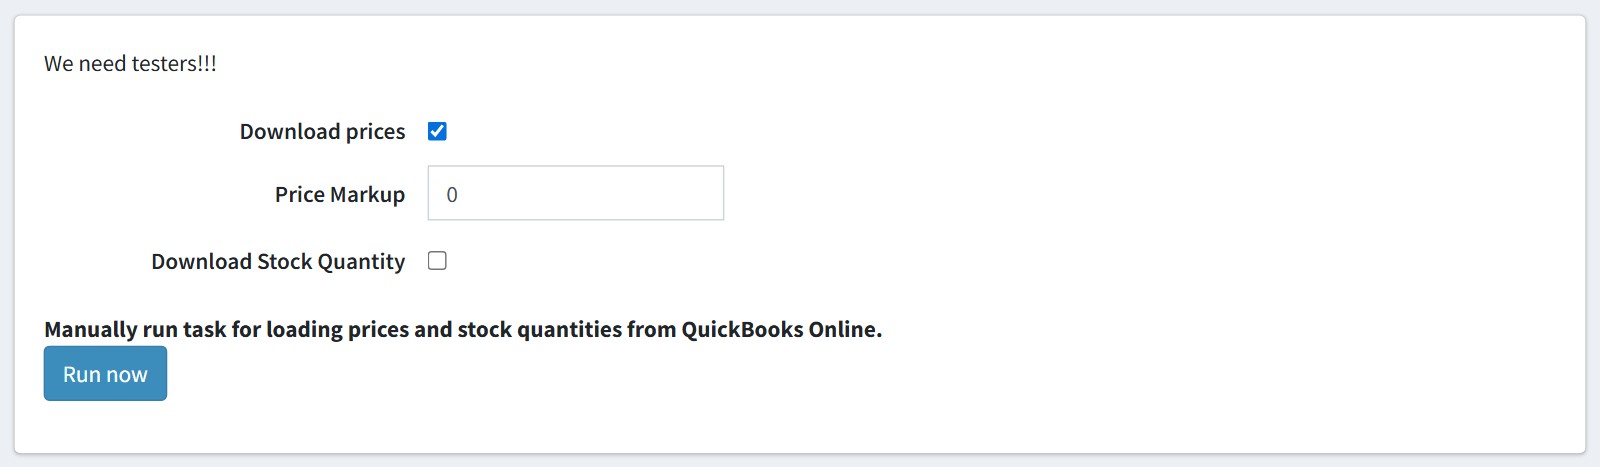
11. Download prices and stock quantities from QuickBooks Online to nopCommerce.
'Download prices'. The plugin updates the product prices from the QuickBooks prices.
'Price Markup'. The markup percentage for the downloaded prices. Example: 20 adds 20 percent.
'Download Stock Quantity'. The plugin updates the stock quantities, the warehouse quantities and the attribute combinations.
This works one way only, from QuickBooks to nopCommerce. The products are matched by SKU or by Manufacturer part number ('Select product SKU' in step 6). If your stores use different QuickBooks companies, only the first company is used, because the nopCommerce products are shared by all stores.
'Run now' loads the prices and the stock quantities at once.
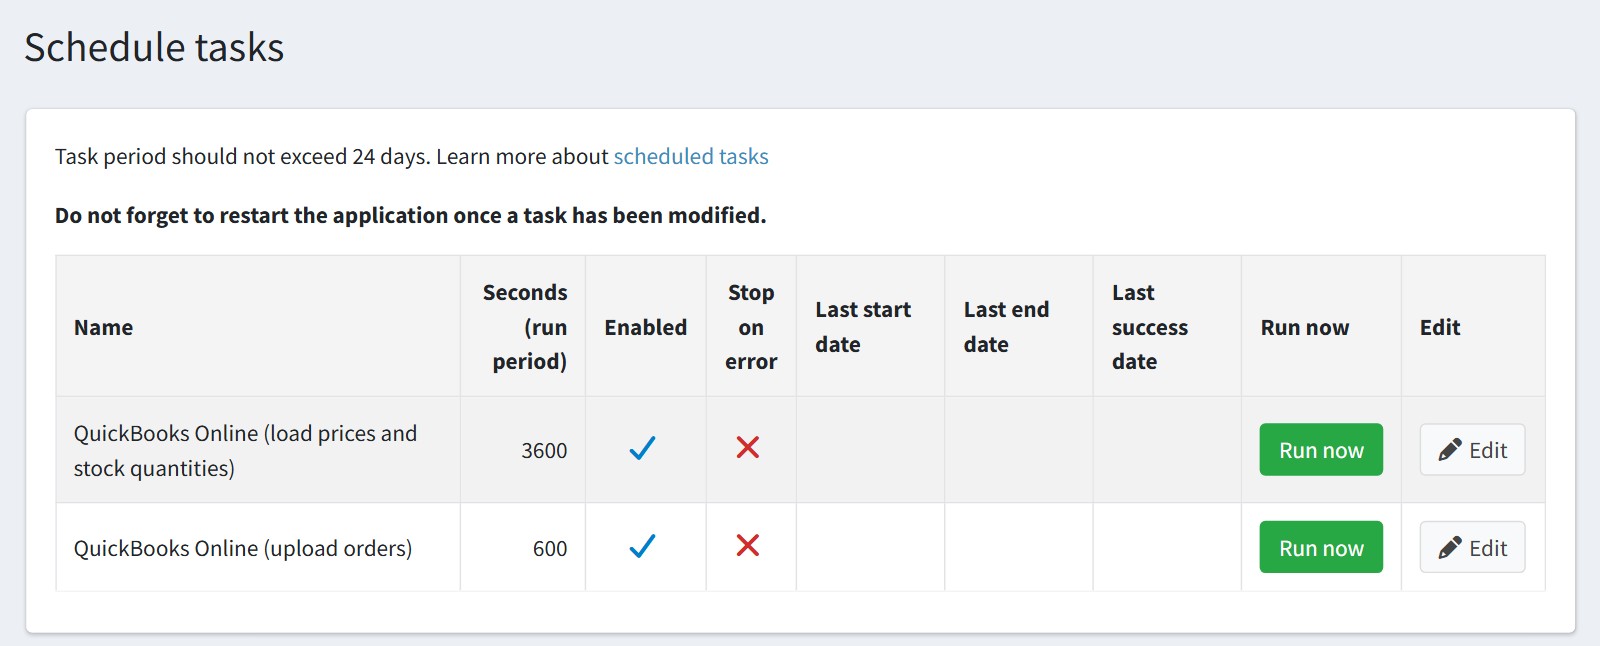
12. The plugin adds two schedule tasks in 'System - Schedule tasks':
'QuickBooks Online (upload orders)' - every 600 seconds by default.
'QuickBooks Online (load prices and stock quantities)' - every 3600 seconds by default.
You can change the period. Do not forget to restart the application once a task has been modified.
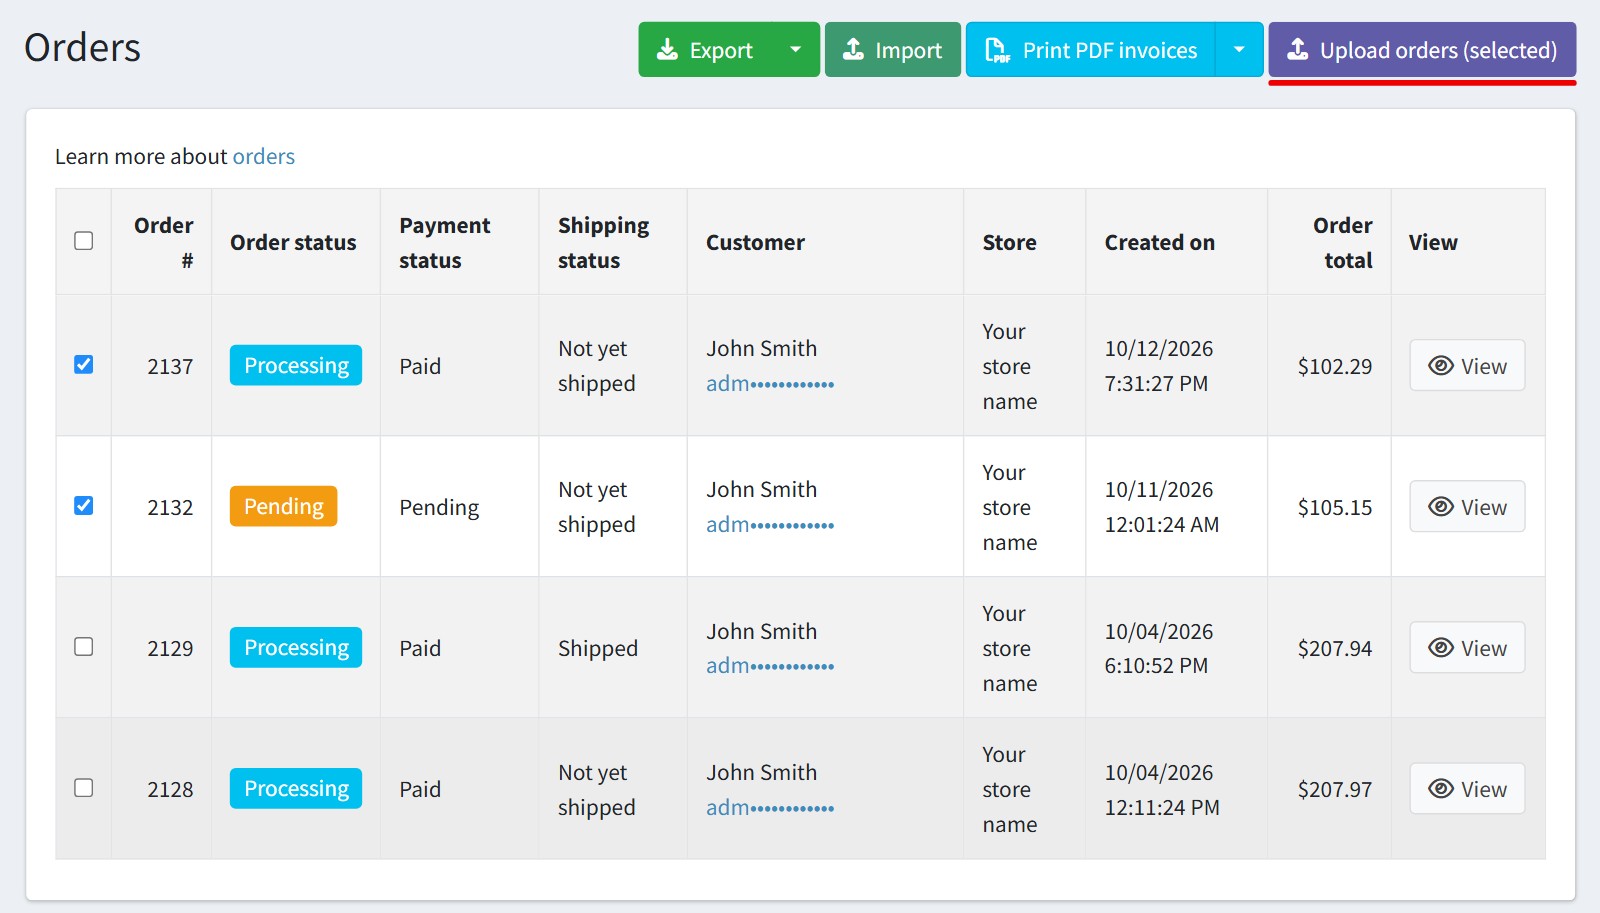
13. Upload the orders from the order list. Select the orders and press 'Upload orders (selected)'.
The orders are put in the queue and the scheduled task uploads them. The unpaid and cancelled orders are skipped, like the 'Pending' order on the picture.
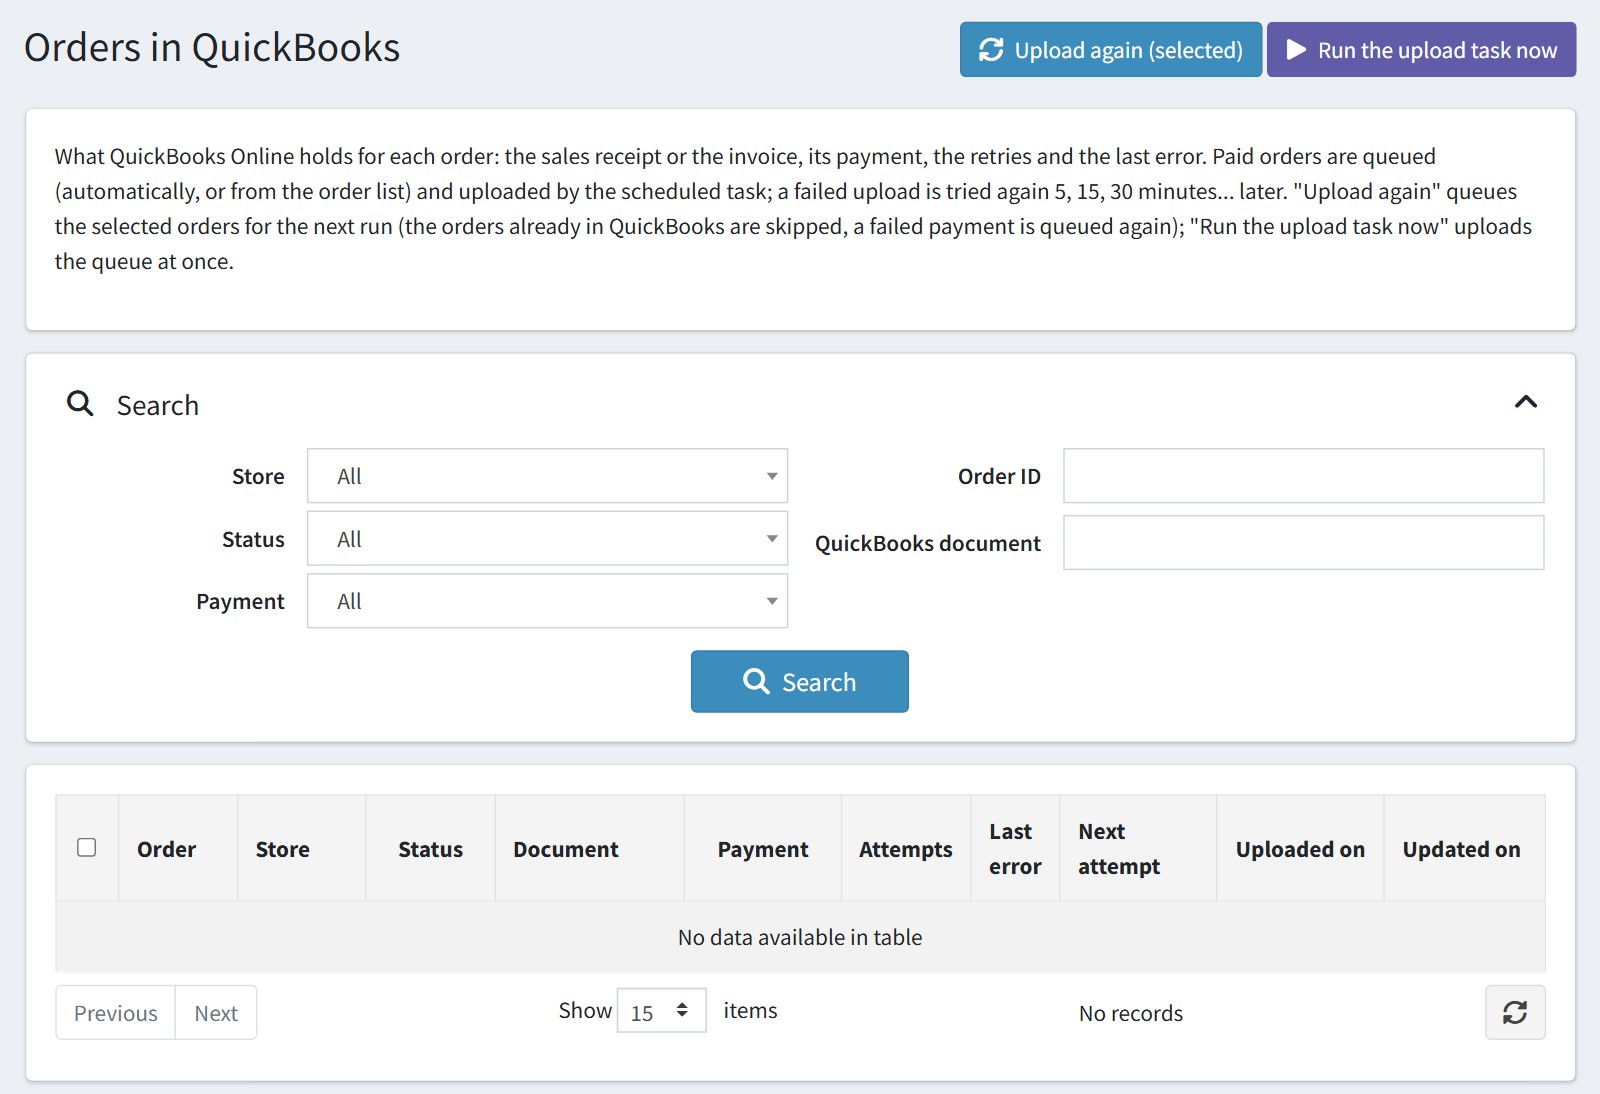
14. 'Orders in QuickBooks' shows what QuickBooks Online holds for each order: the sales receipt or the invoice, its payment, the attempts and the last error. Statuses: 'Queued', 'Uploaded', 'Failed, will retry', 'Failed' and 'Not uploaded'.
'Upload again (selected)' puts the selected orders in the queue for the next run. The orders already in QuickBooks are skipped, a failed payment is queued again.
'Run the upload task now' uploads the queue at once.
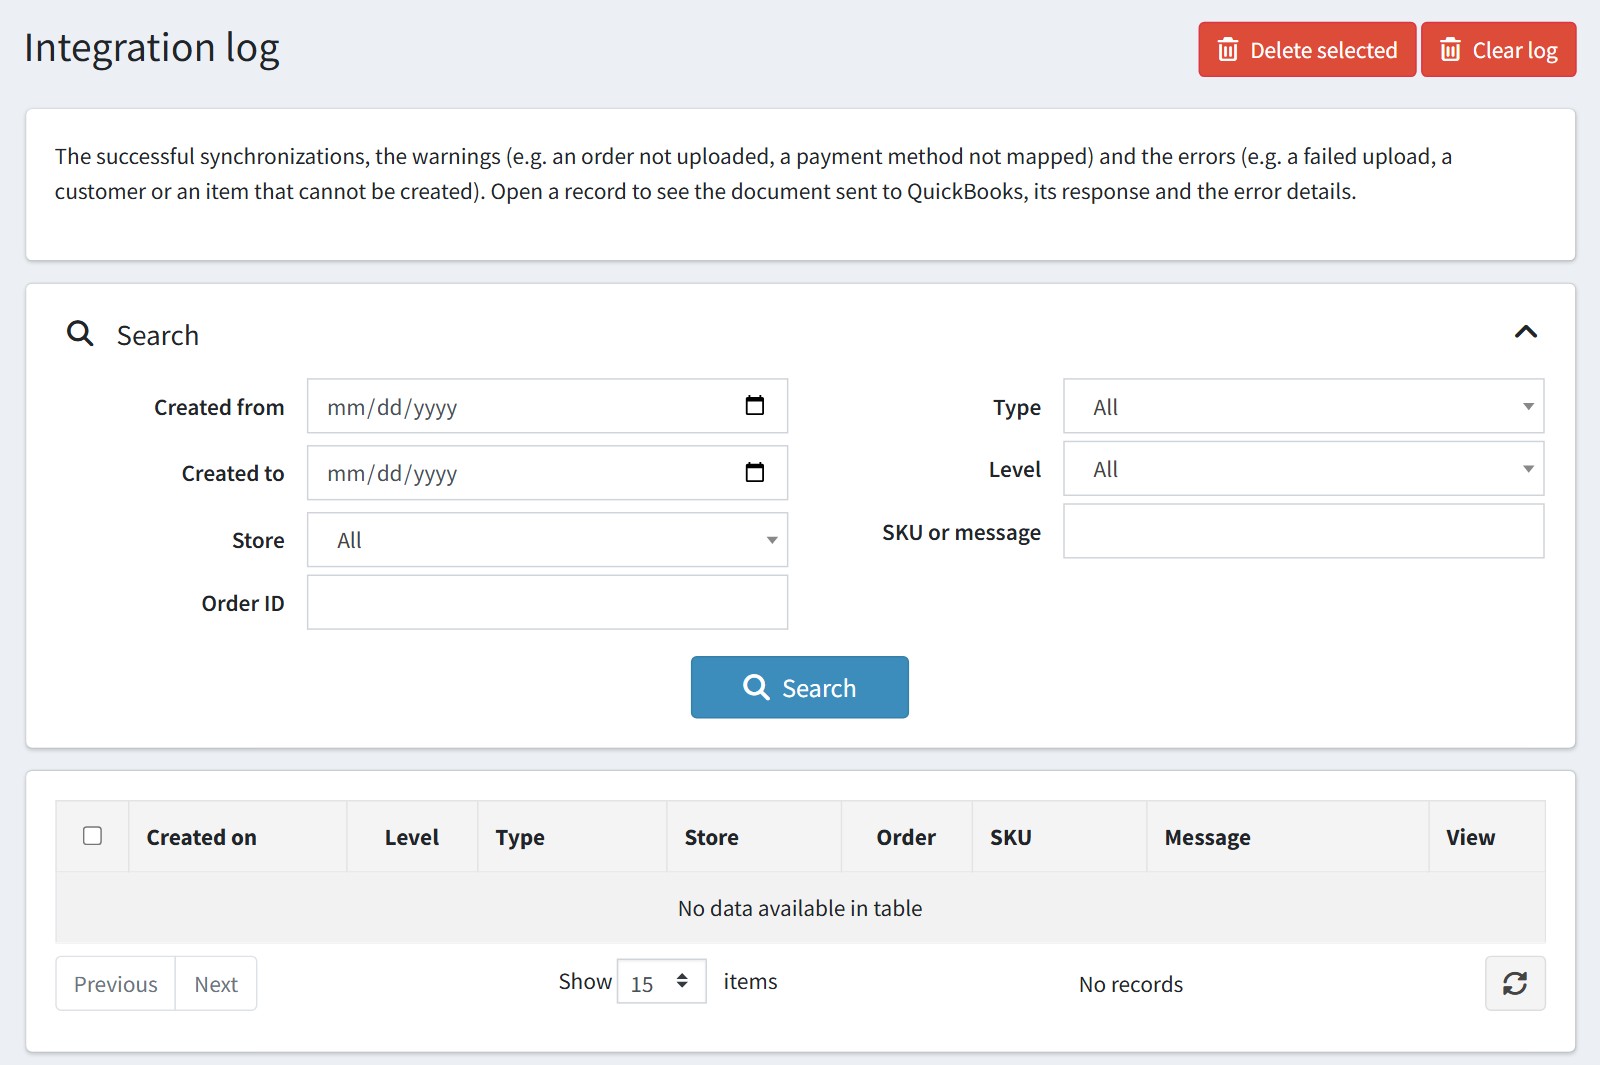
15. 'Integration log' shows the successful synchronizations, the warnings (an order not uploaded, a payment method not mapped) and the errors (a failed upload, a customer or an item that cannot be created). Open a record to see the document sent to QuickBooks, its response and the error details. Look here first when an order is not in QuickBooks.
16. The admin order page has the block 'QuickBooks Online' with the status of the order in QuickBooks, the document, the payment and the last error. 'Open in QuickBooks' opens the document. Use 'Upload to QuickBooks' and 'Create payment' to upload the order or its payment yourself, and 'Integration log' to see the log records of this order. Each upload and each failed attempt is also saved in the order notes.
All settings could be set for each store separately, and each store could use its own QuickBooks company. Select the store in 'Multi-store configuration for' and check the override checkboxes.