
Installation and configuring plug-in Fastlane by PayPal
The plugin adds Fastlane by PayPal to your store. A returning Fastlane shopper is recognised by e-mail and checks out with the stored card and address. A new shopper fills in one accordion block on the page and pays by card without leaving your site.
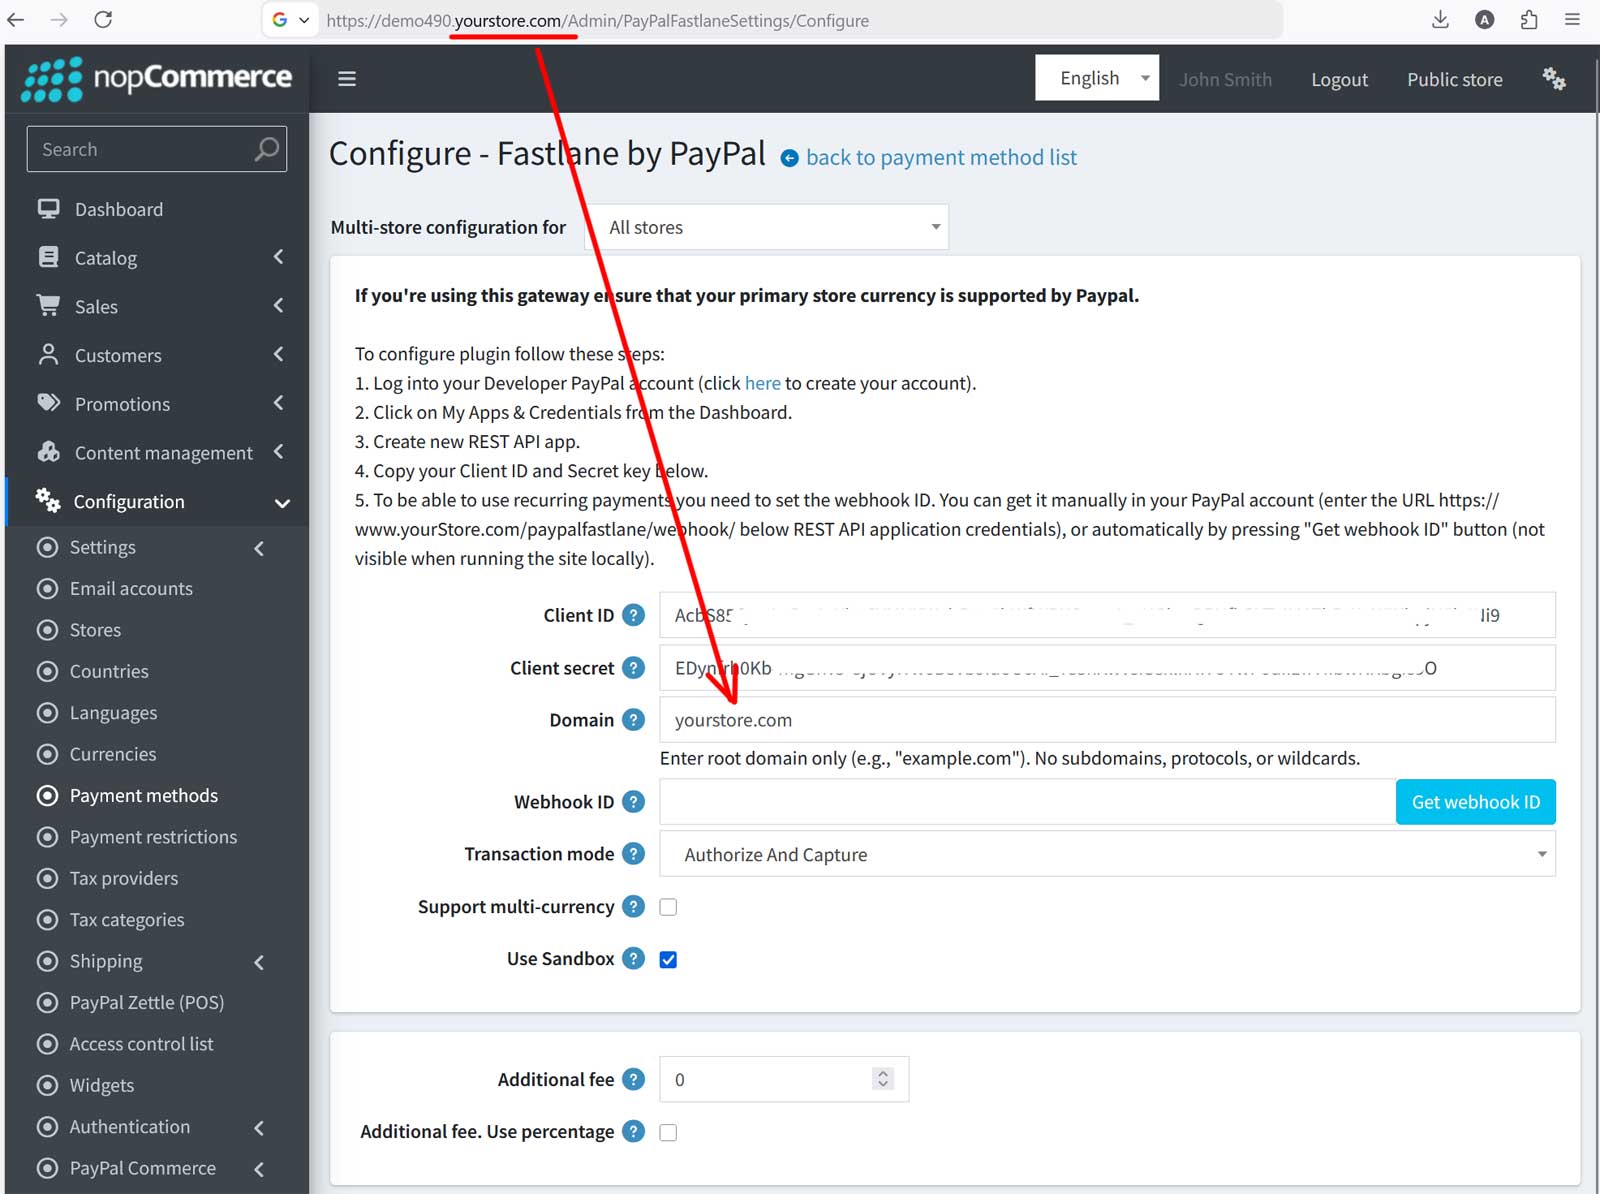
It's easy to configure the plugin. See pictures.
1. Log into your PayPal developer account. Choose 'Sandbox' or 'Live' at the top of the menu, open 'Apps & Credentials' and press 'Create App'. You can also use an app you already have.
Sandbox and Live have different credentials. Test with Sandbox first.
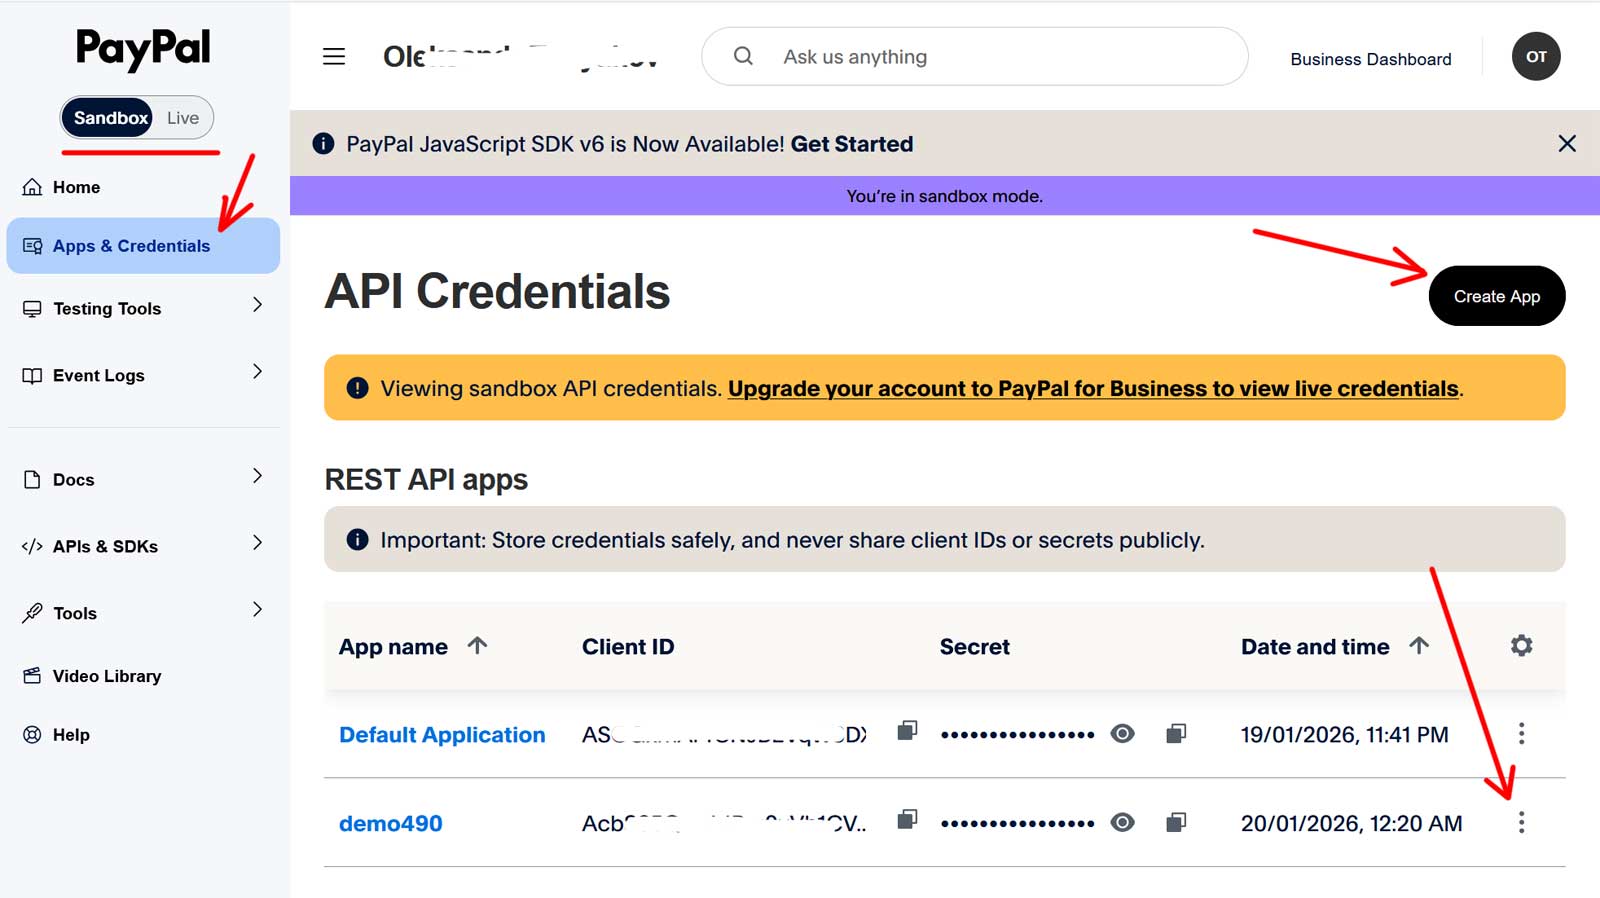
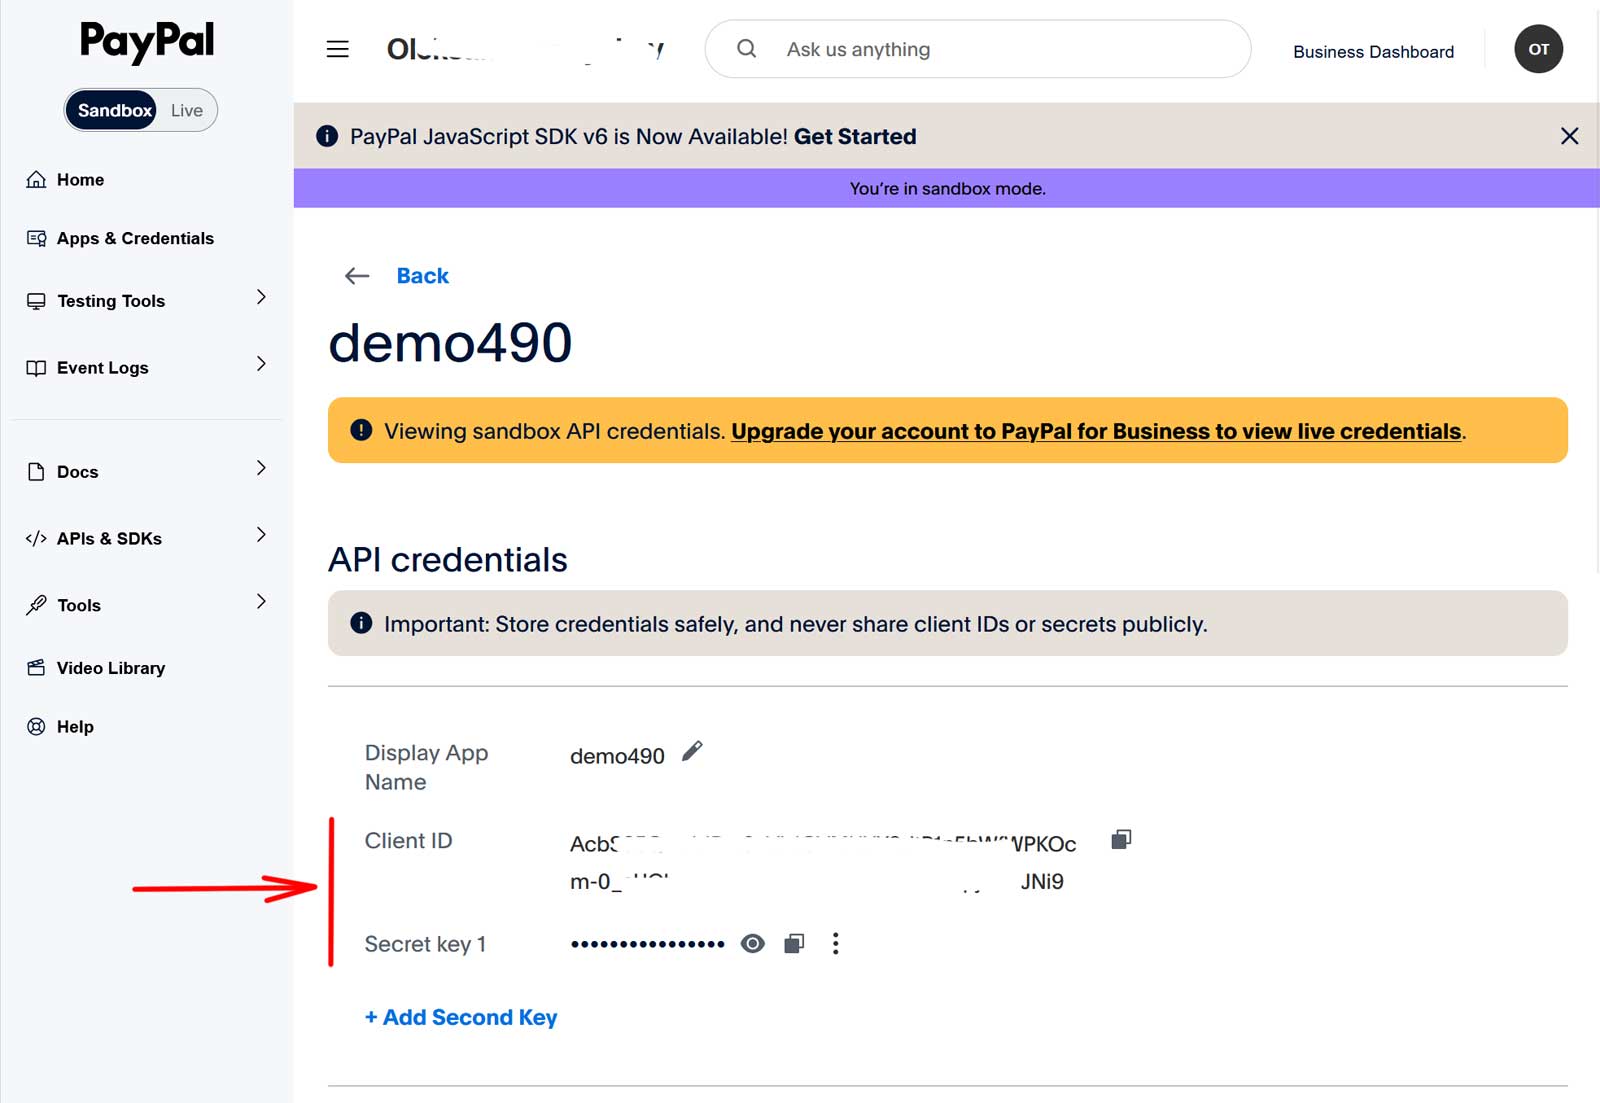
2. Open the app and copy 'Client ID' and 'Secret key 1'.
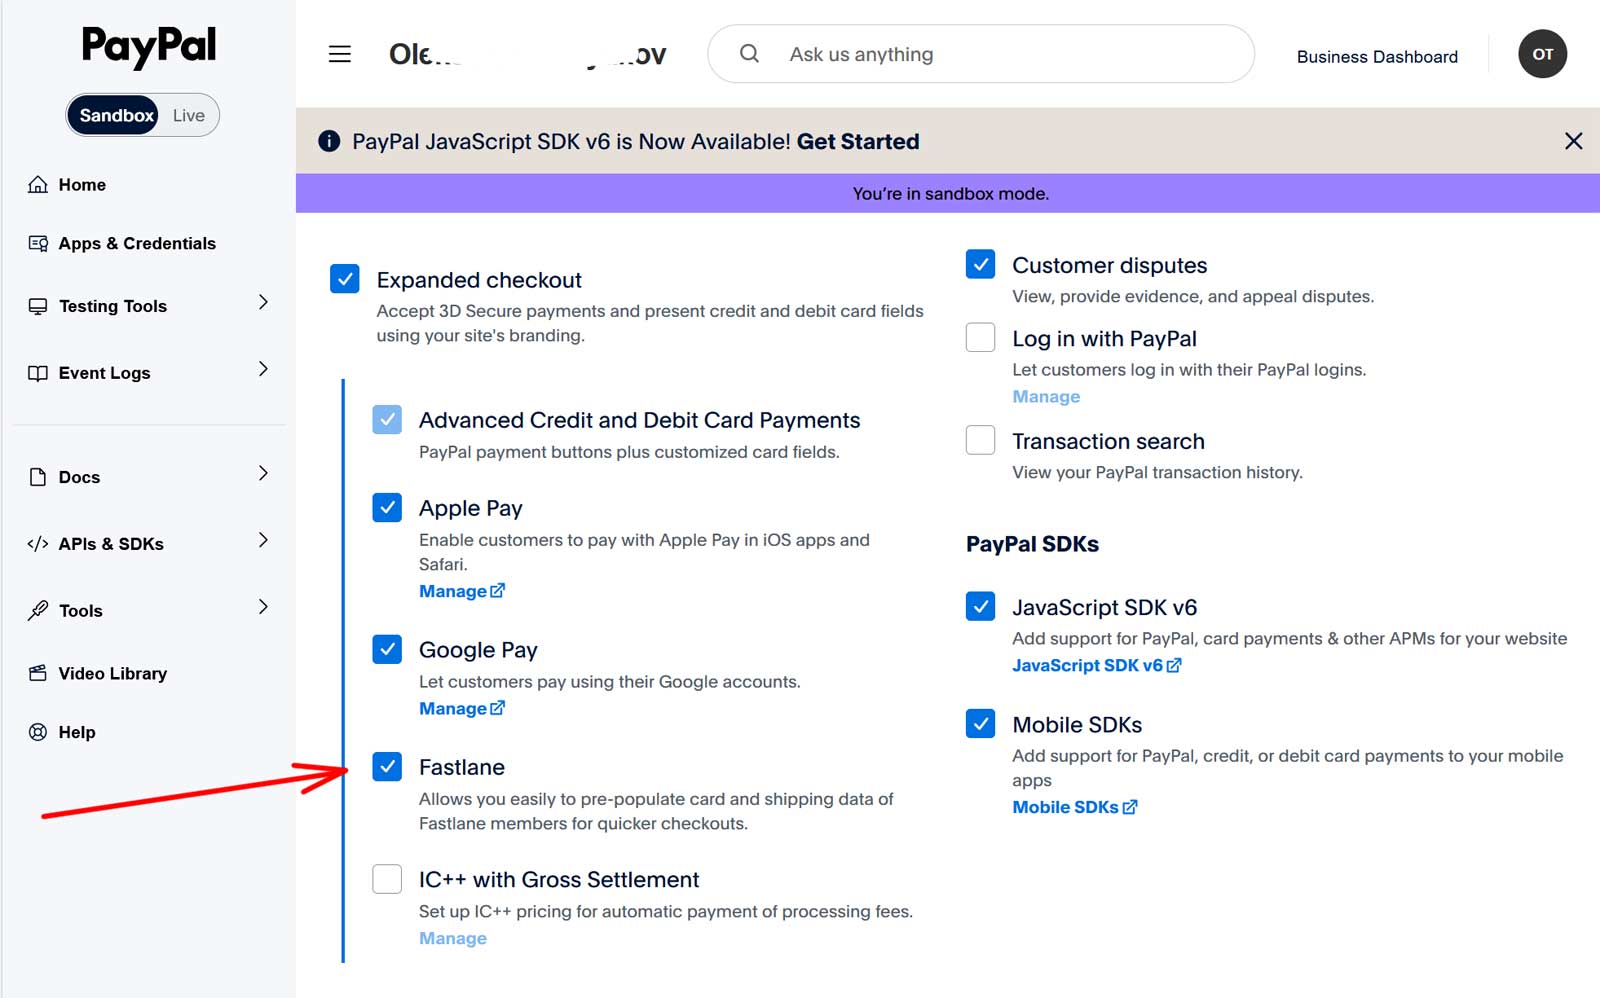
3. In the settings of the same app enable 'Fastlane', under 'Expanded checkout'. Do it for the Live app too when you go live.
4. Open the plugin configure page: Configuration > Payment methods > Fastlane by PayPal.
Your primary store currency must be supported by PayPal.
Paste 'Client ID' and 'Client secret'.
'Webhook ID'. The webhook keeps the payment status of the nop order in sync with PayPal (captures, refunds and voids). Press the button 'Get webhook ID'. You should use the live URL with https, not localhost.
'Transaction mode'. 'Authorize' only holds the money, you should capture it later from the admin order page. 'Authorize And Capture' takes the money at once.
'Support multi-currency'. Enable it to charge the customer in the order currency. Otherwise the plugin uses the primary store currency.
Enable 'Use Sandbox' when you test the plugin with the Sandbox credentials. Disable it for the Live credentials.
'Additional fee' is an optional fee for this payment method. Enable 'Additional fee. Use percentage' to take it as a percentage of the order total.
'Serial Number'. Paste it after the purchase. Without it the plugin runs in trial mode.
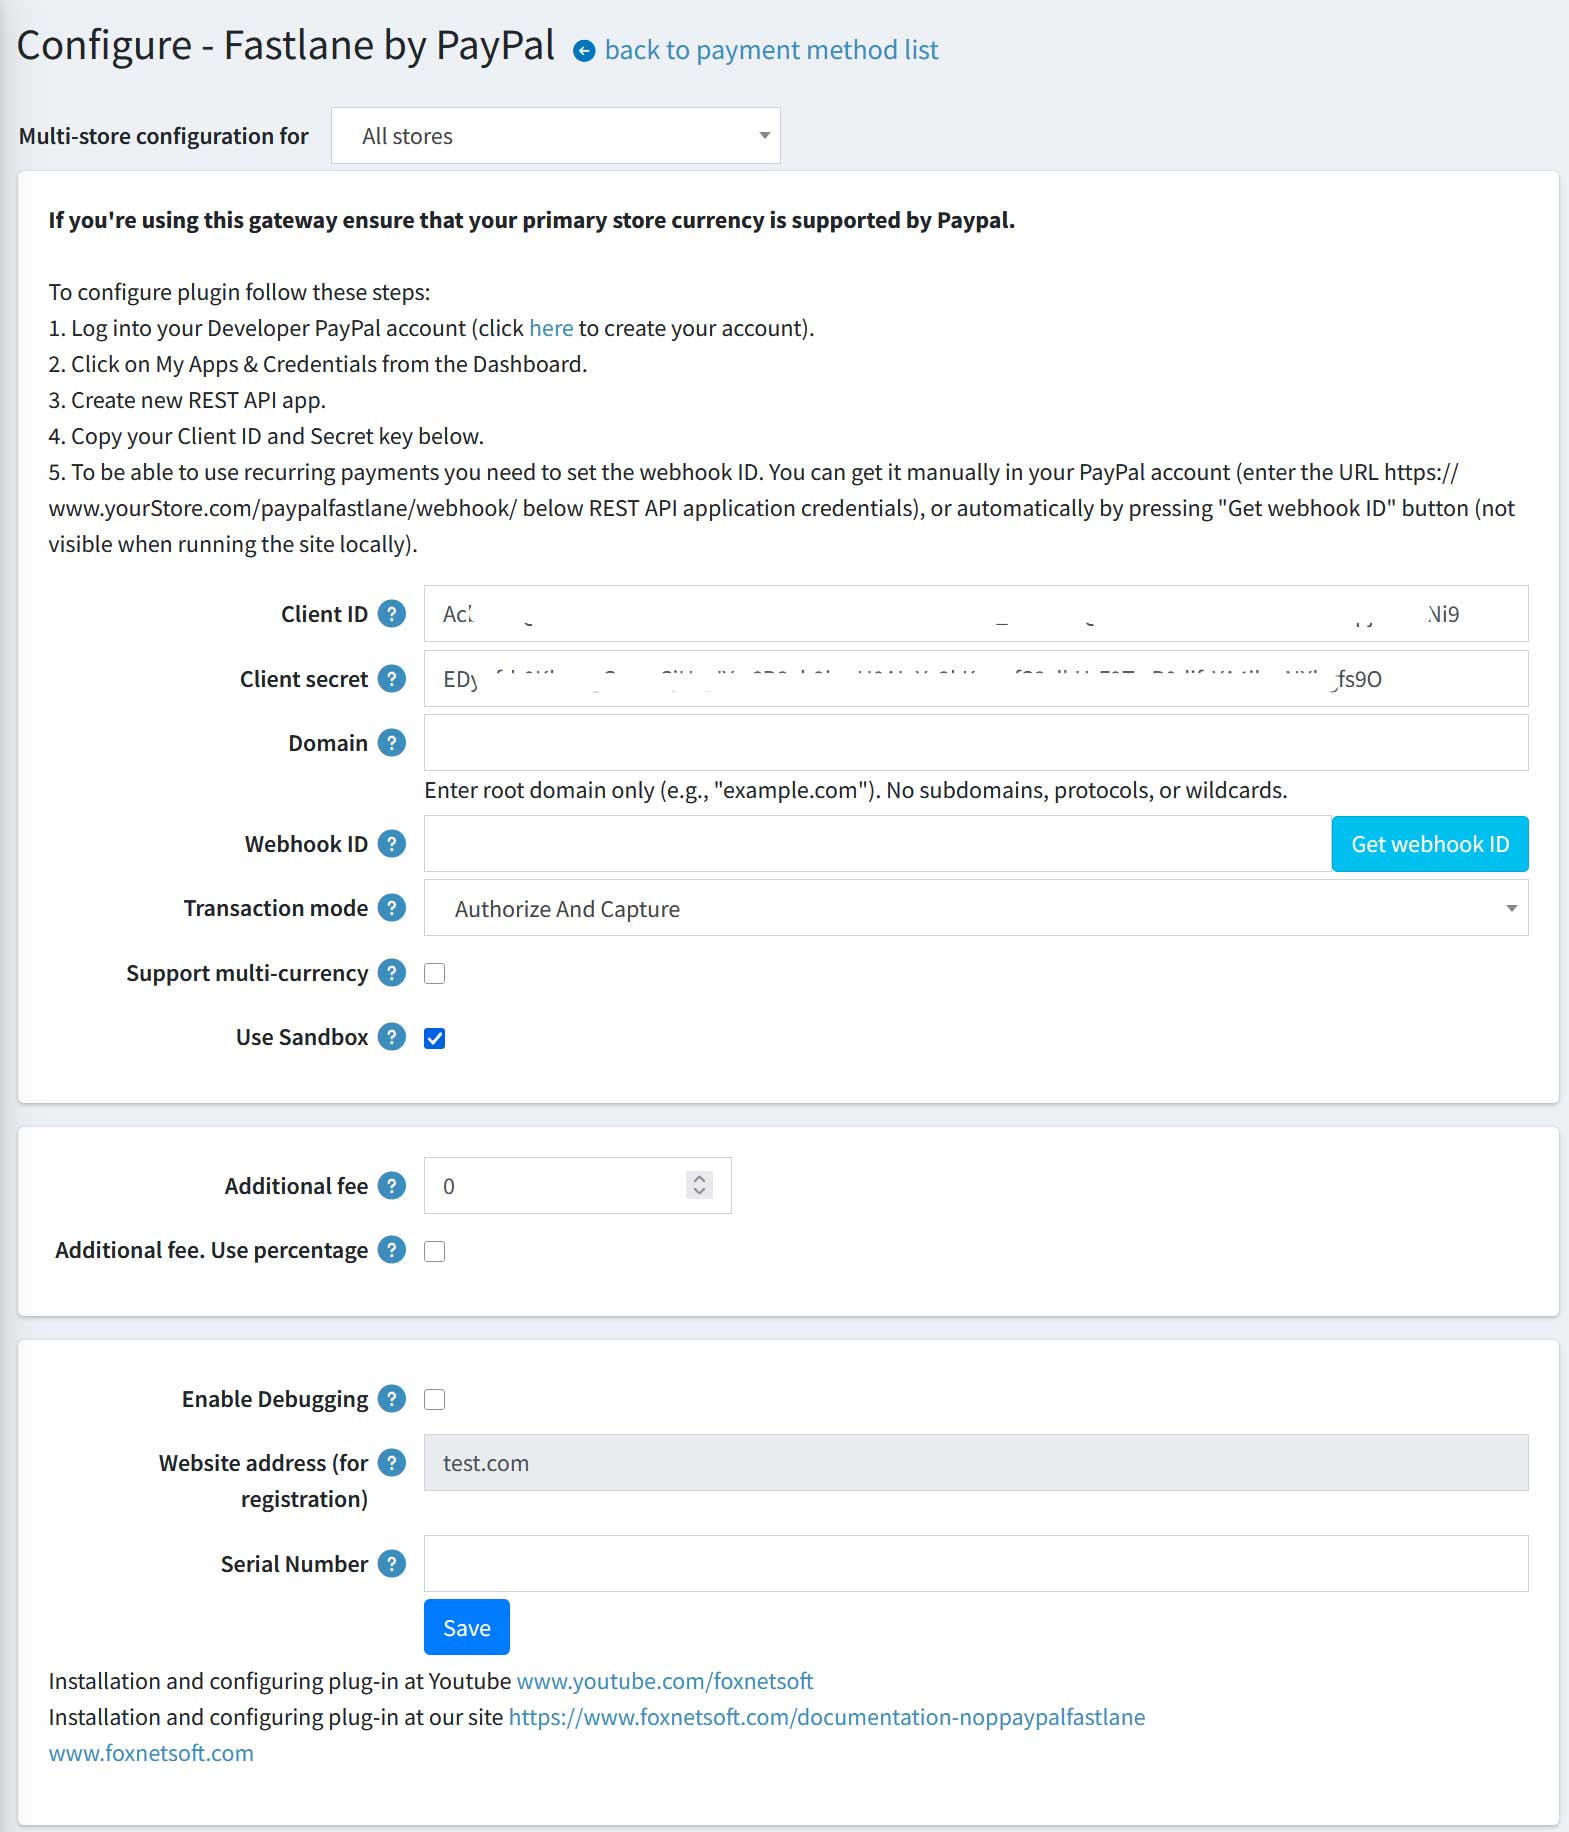
5. 'Domain' is required. Enter the root domain only, without the subdomain, the protocol or a wildcard. If your store is demo490.yourstore.com, you should enter yourstore.com.
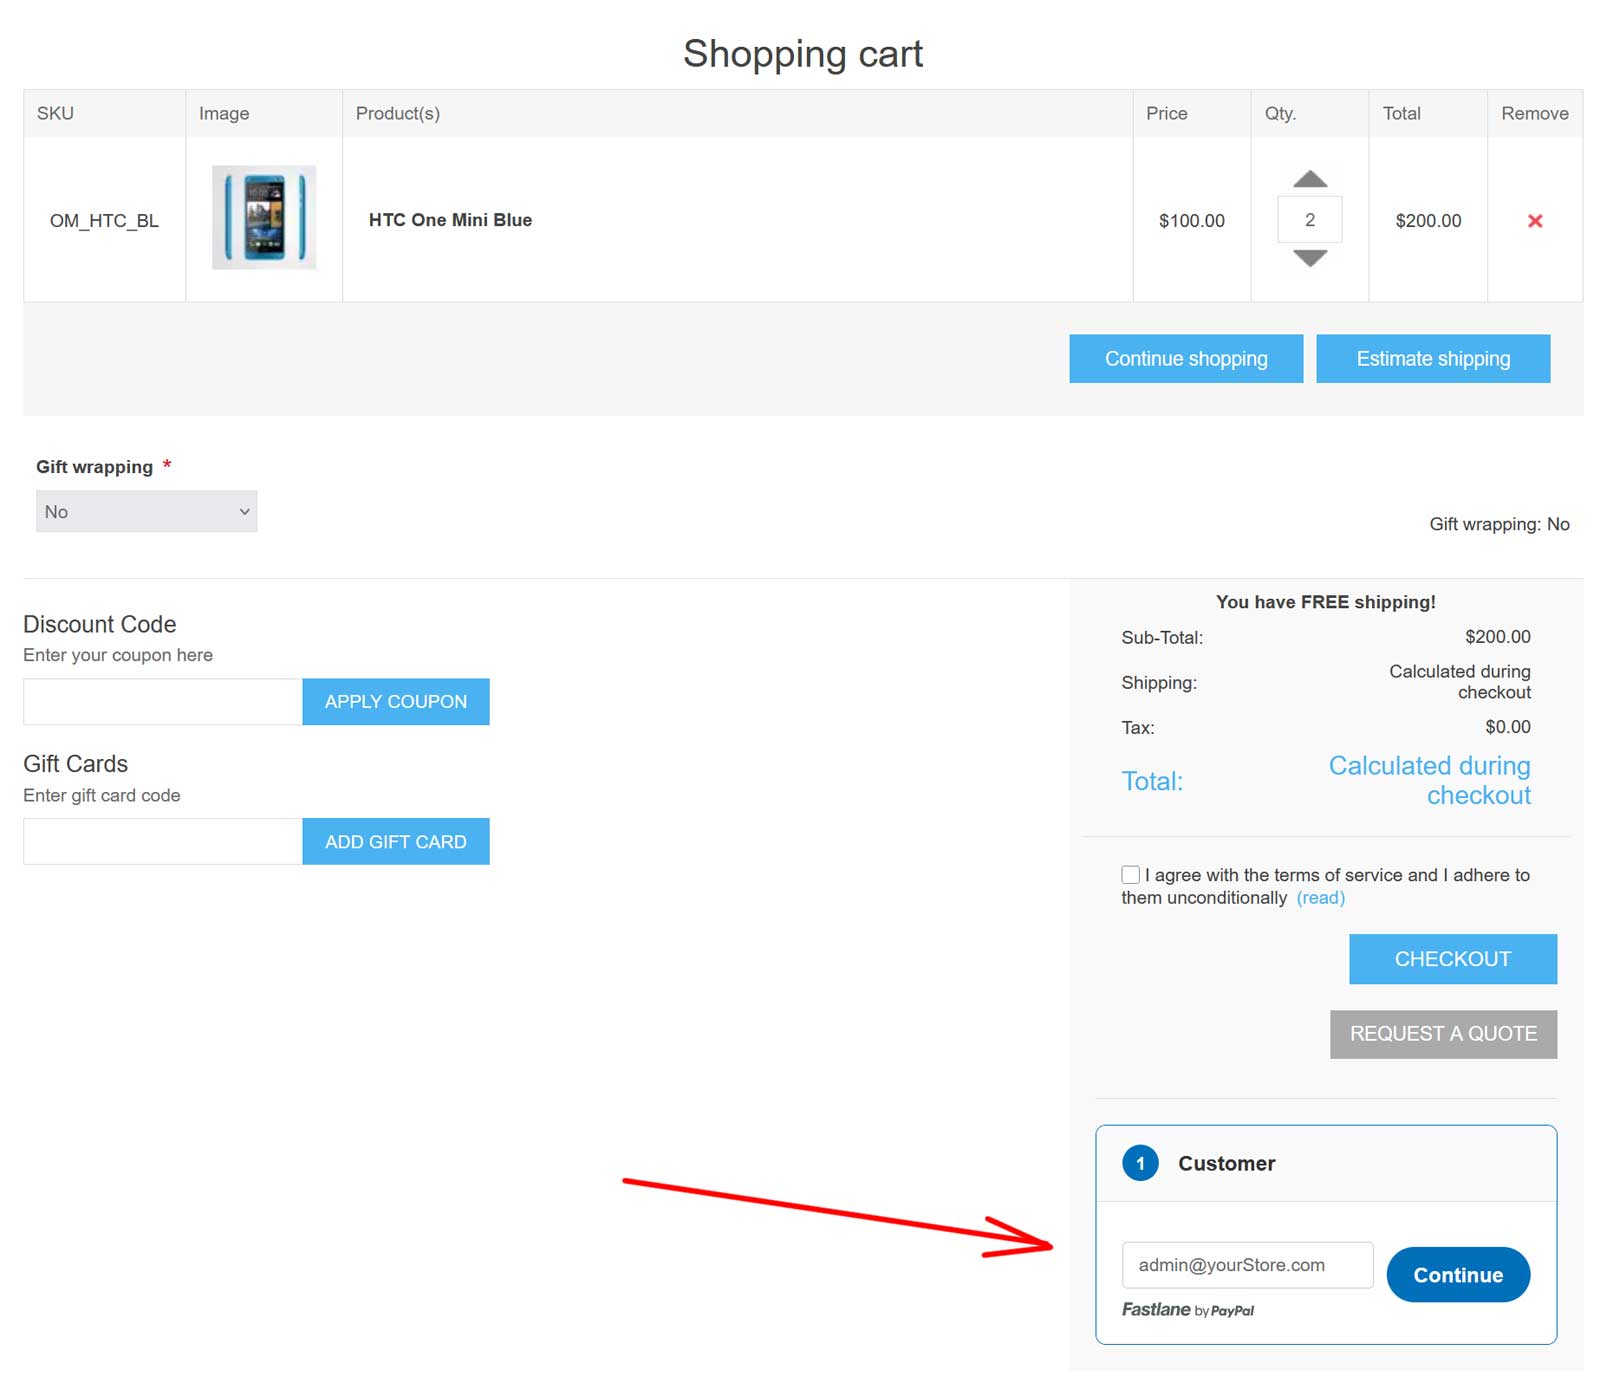
6. This is how the checkout looks for a new shopper. The block is on the shopping cart page, under the 'Checkout' button. The shopper enters an e-mail and presses 'Continue'.
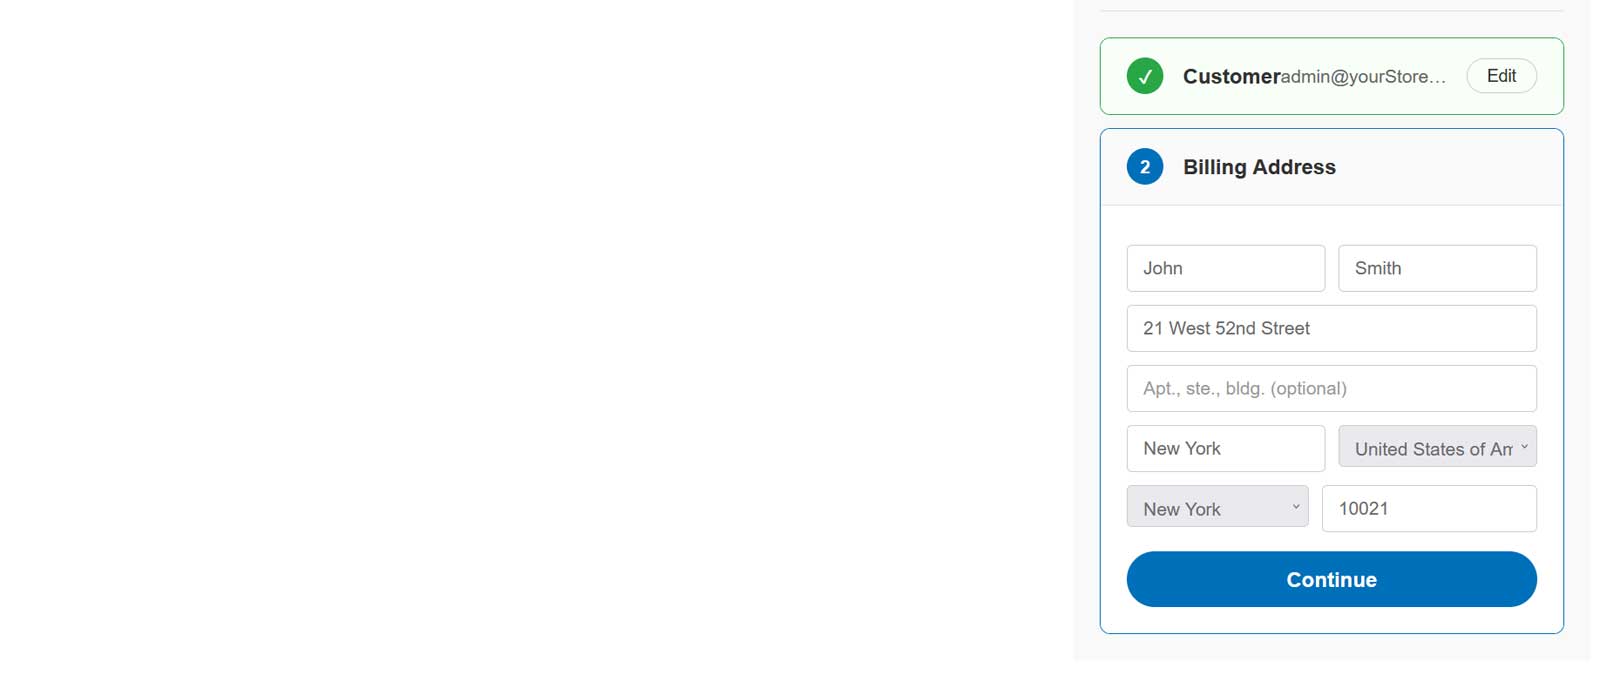
The billing address.
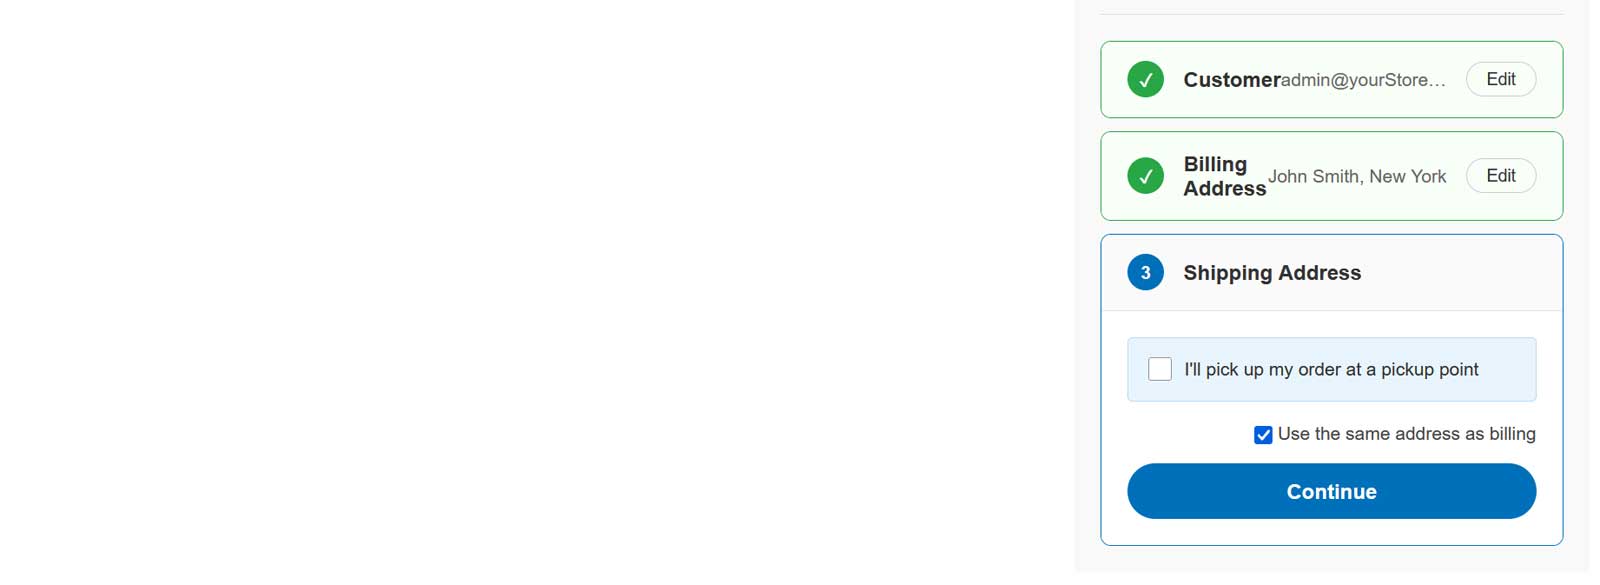
The shipping address. The shopper can use the billing address or pick up the order at one of your pickup points.
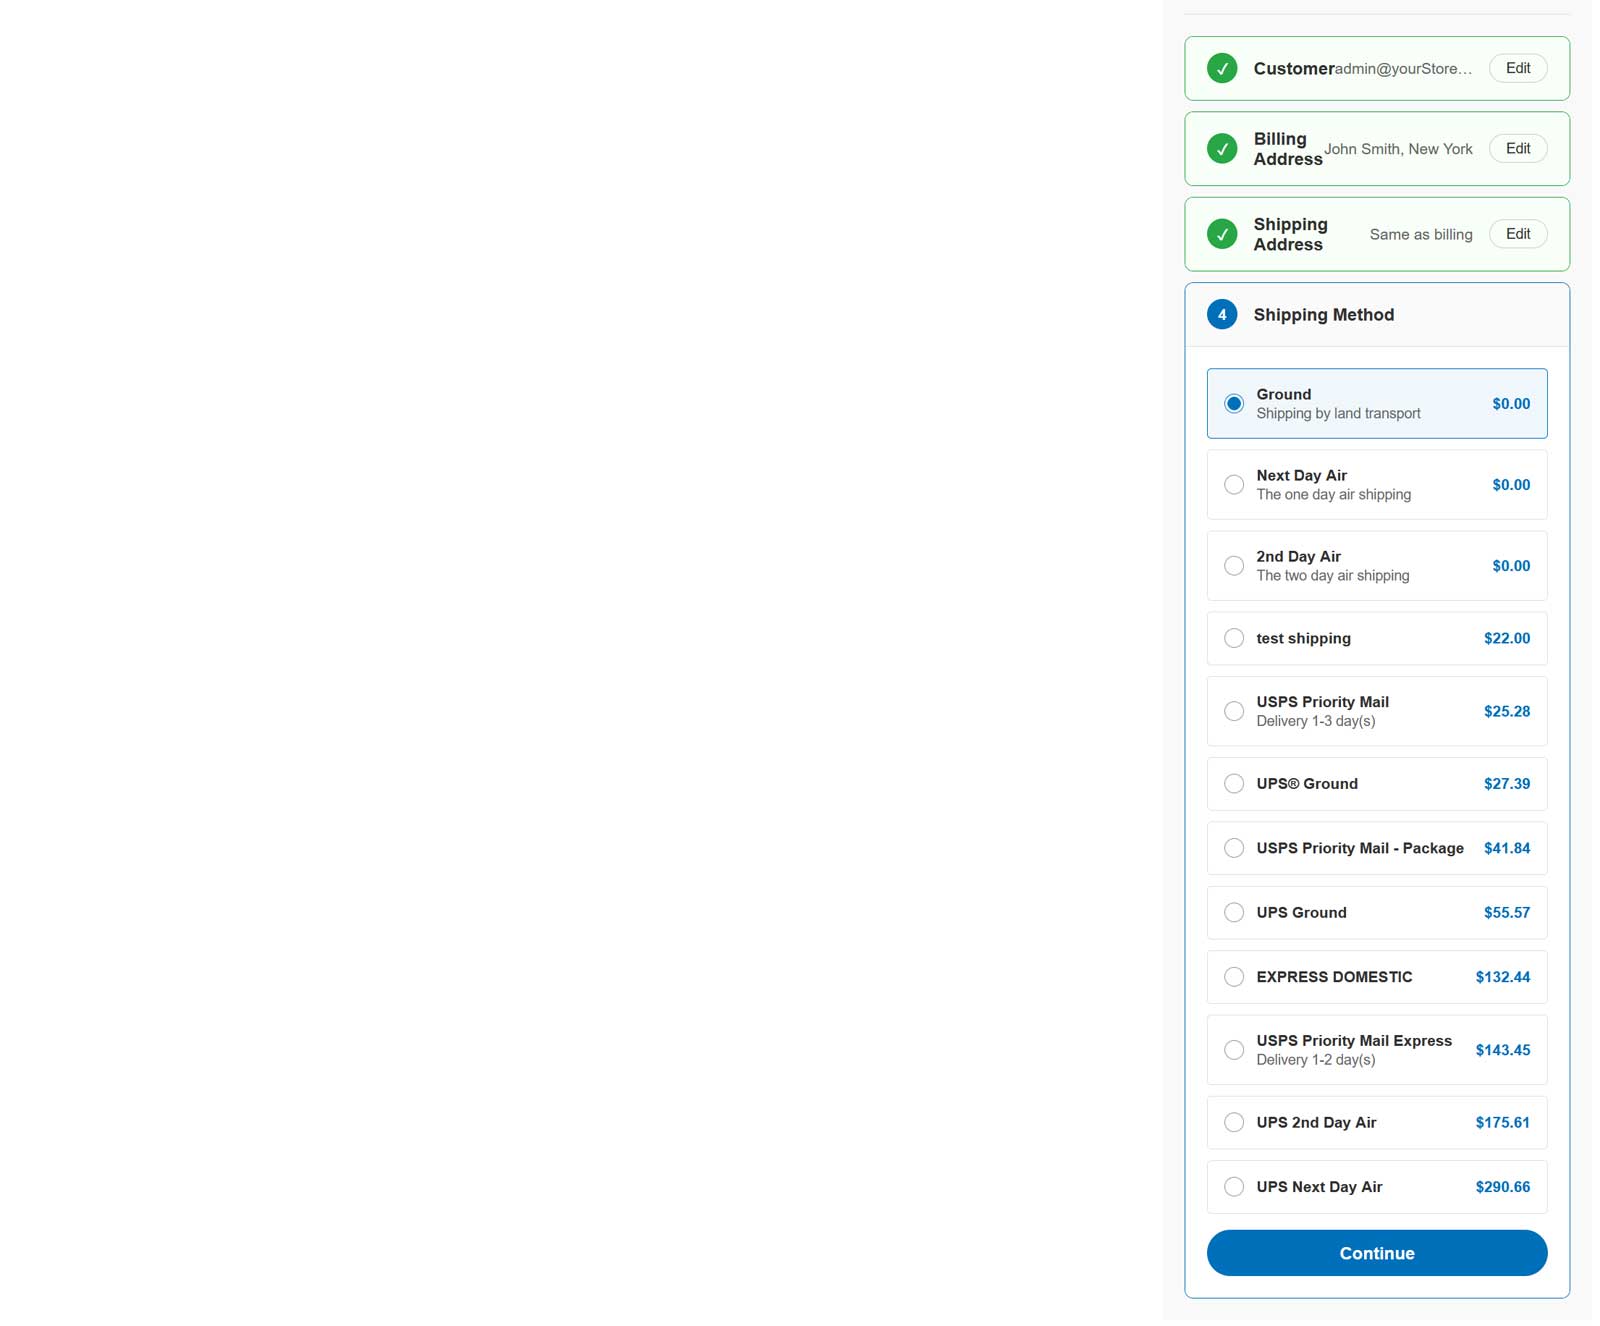
The shipping methods. The rates come from your nopCommerce shipping providers.
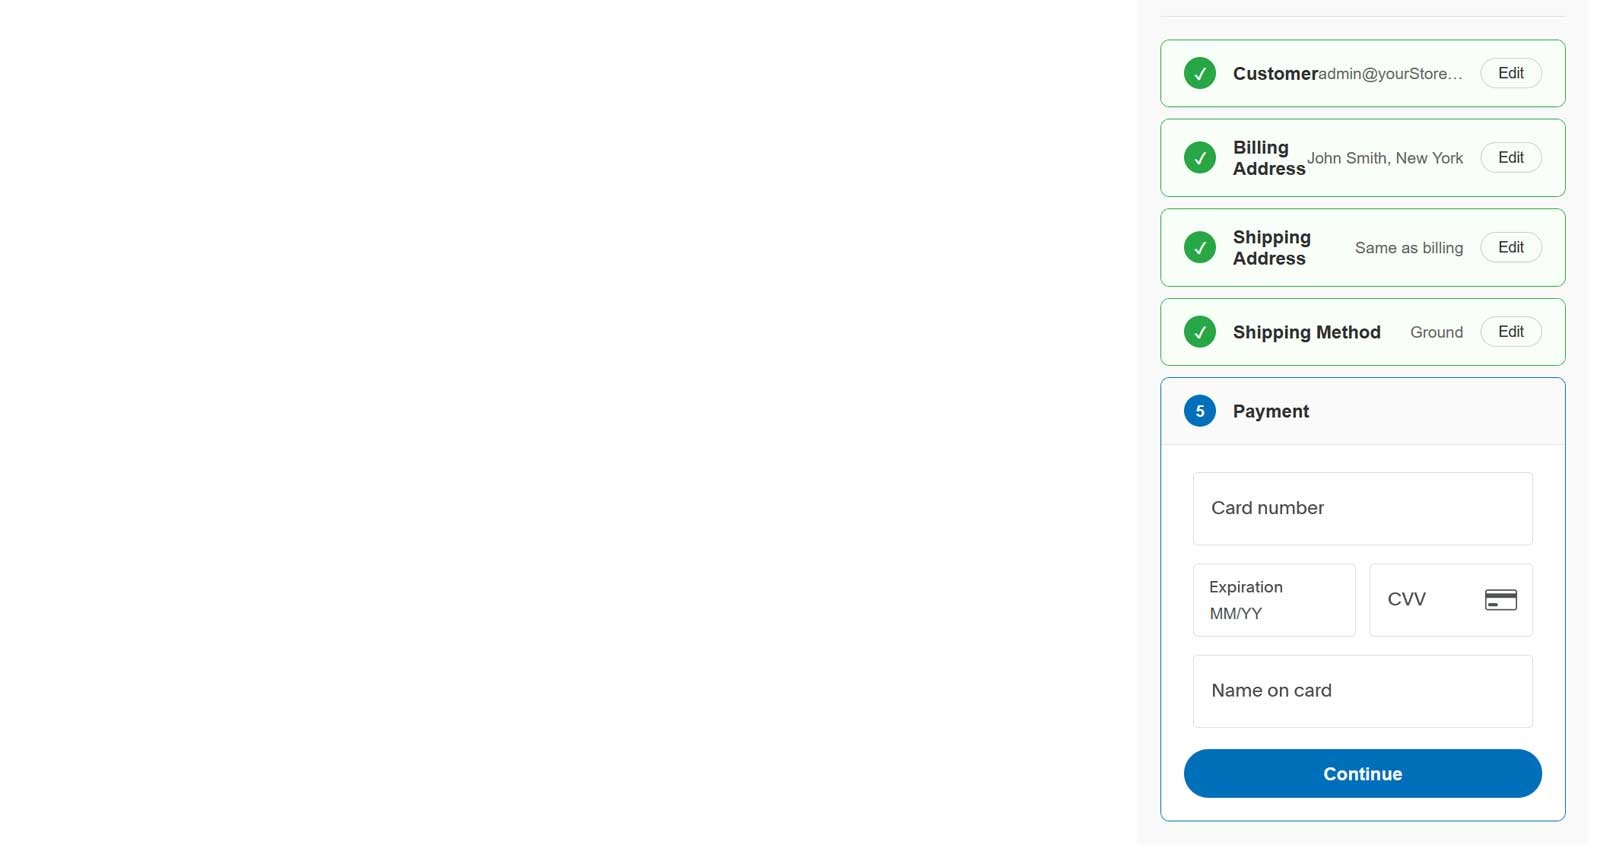
The card fields of PayPal.
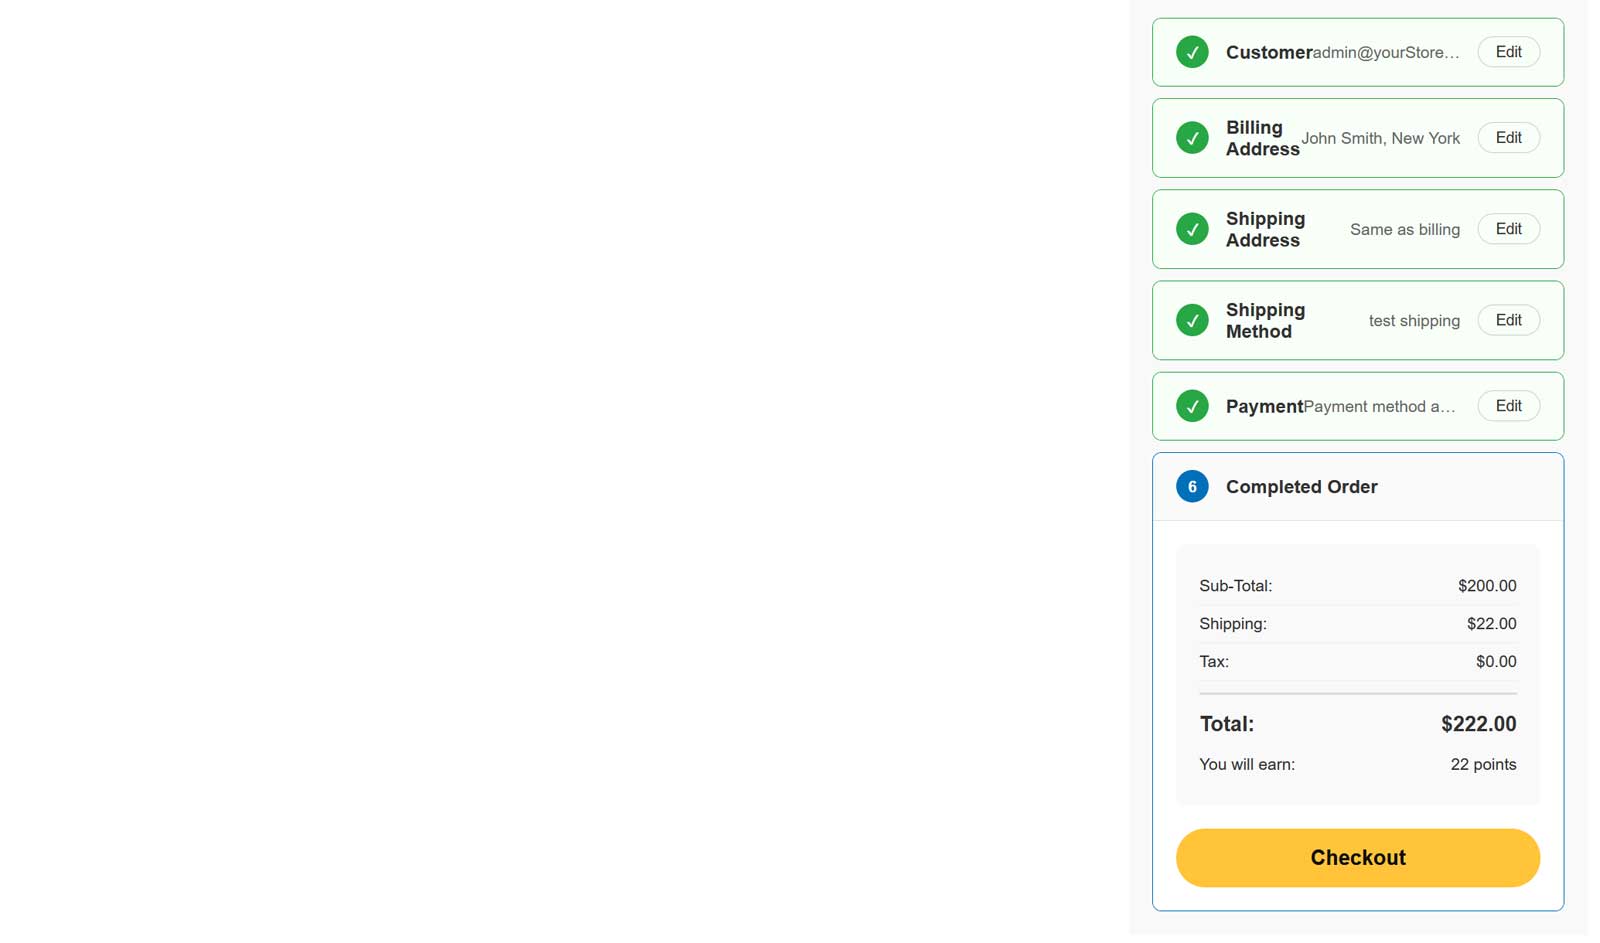
The totals. The shopper presses 'Checkout' to place the order.
7. A returning shopper with a Fastlane profile enters the same e-mail, then the code from PayPal. The stored card and shipping address are filled in, so the shopper goes straight to the totals.
8. On the admin order page you can use 'Capture' and 'Void' for an authorized order, 'Refund' and 'Partial refund' for a paid order.
Use 'Multi-store configuration for' at the top of the configure page if a store needs its own settings.
The plugin does not support recurring payments.