
Installation and configuring plug-in CMS Manager
The plugin adds a content management system to your store. You could publish articles, reviews, news, promotions and tips, build them into a tree of grouped pages and link them to your products, categories and manufacturers. Each page has its own SEO name and meta tags, a picture, tags and comments.
It's easy to configure the plugin. See pictures.
1. After the installation open the admin menu FoxNetSoft > CMS Manager.
'Custom pages' is the list of your pages, 'Comments' - the comments of your visitors, 'Templates' - the page templates, 'Configure' - the settings of the plugin.
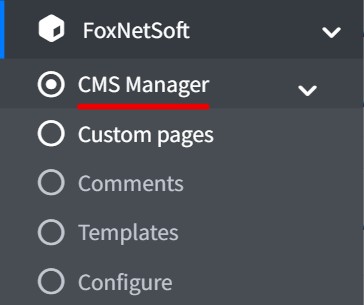
2. Open 'Configure'.
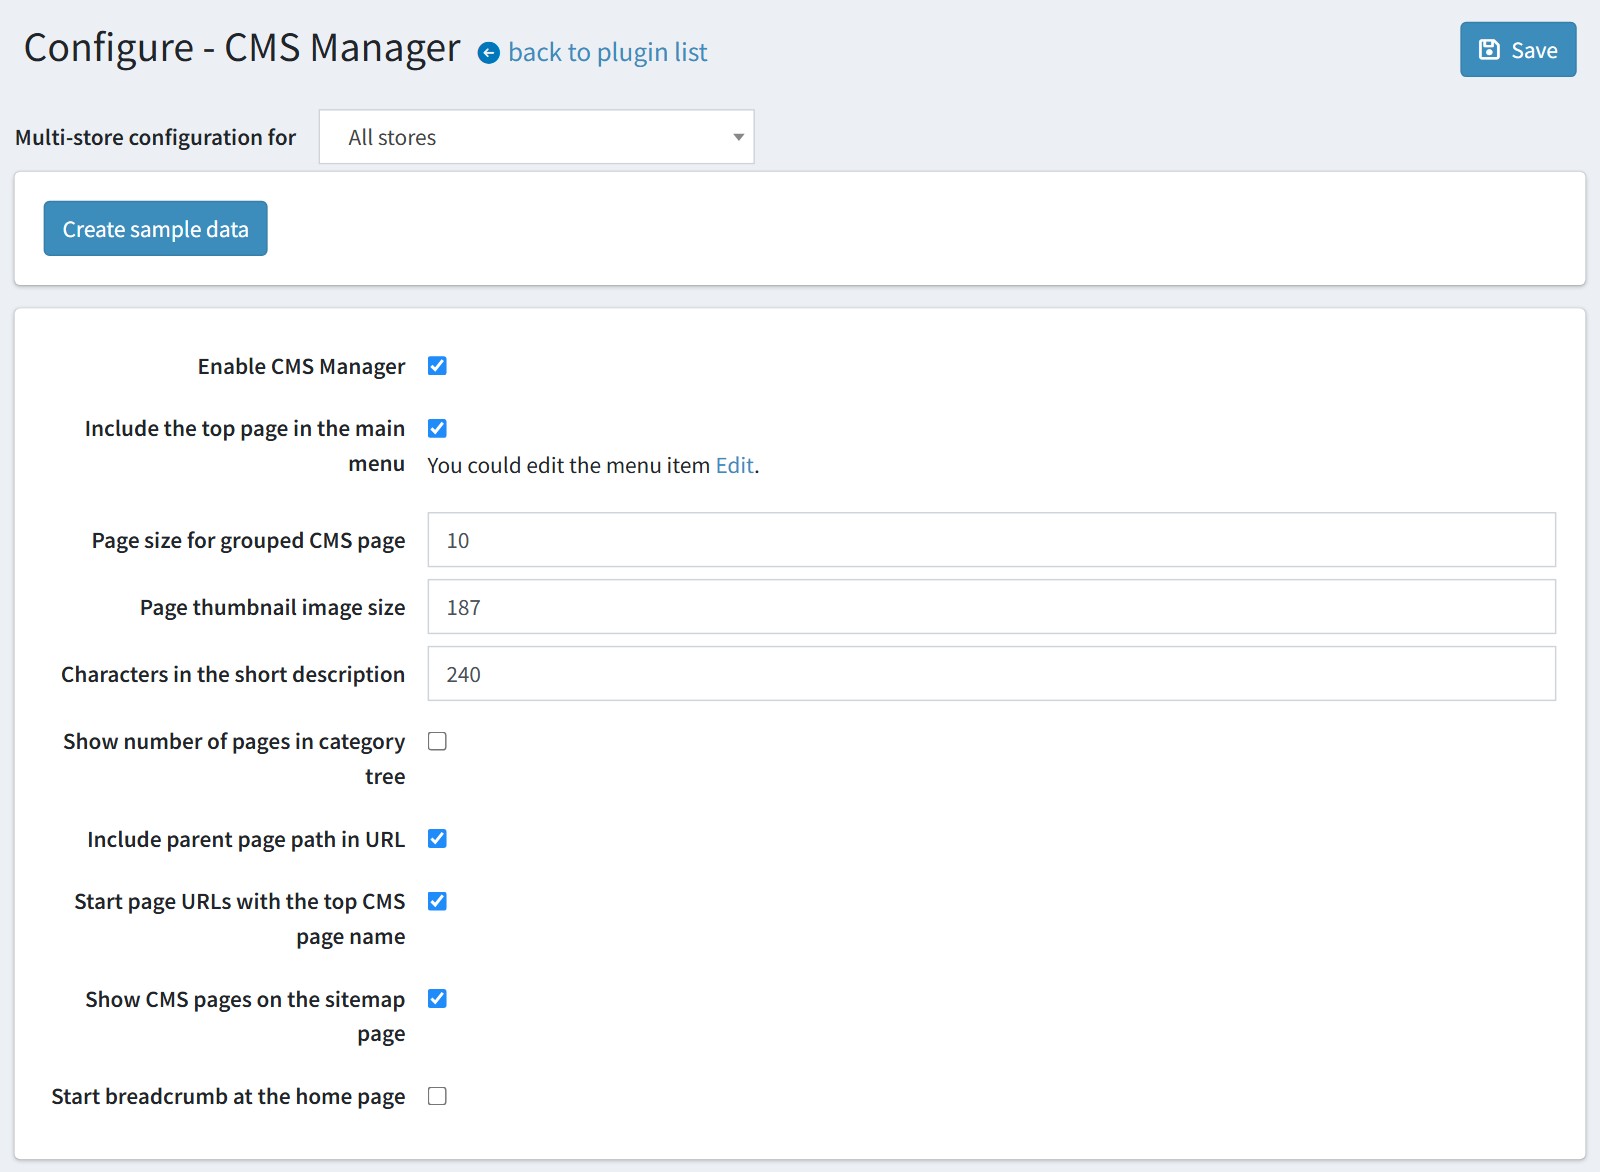
Press 'Create sample data' if you would like to see how the plugin works. It creates the grouped pages Reviews, Articles, News, Promotions and Tips and three published review pages linked to the products of your home page. Use it on a test store, or delete the sample pages before your customers see them.
'Enable CMS Manager' switches the plugin on and off.
'Include the top page in the main menu' adds the item for the top CMS page to the main menu of the store. Press 'Edit' to change the name or the position of this menu item.
'Page size for grouped CMS page' - how many pages are shown on one page of a list.
'Page thumbnail image size' - the size of the page picture in the lists, in pixels.
'Characters in the short description' - when a page has no short description, the lists show the beginning of its full description, cut to this length.
'Show number of pages in category tree' shows the number of pages next to each group in the page tree.
'Include parent page path in URL' - the page URL repeats the breadcrumb, e.g. /apple/iphone-5-review instead of /iphone-5-review.
'Start page URLs with the top CMS page name' - every page URL starts with the name of the top CMS page, e.g. /articles/apple/iphone-5-review. The old URLs are redirected (301) to the new ones, so you could change both options on a live store.
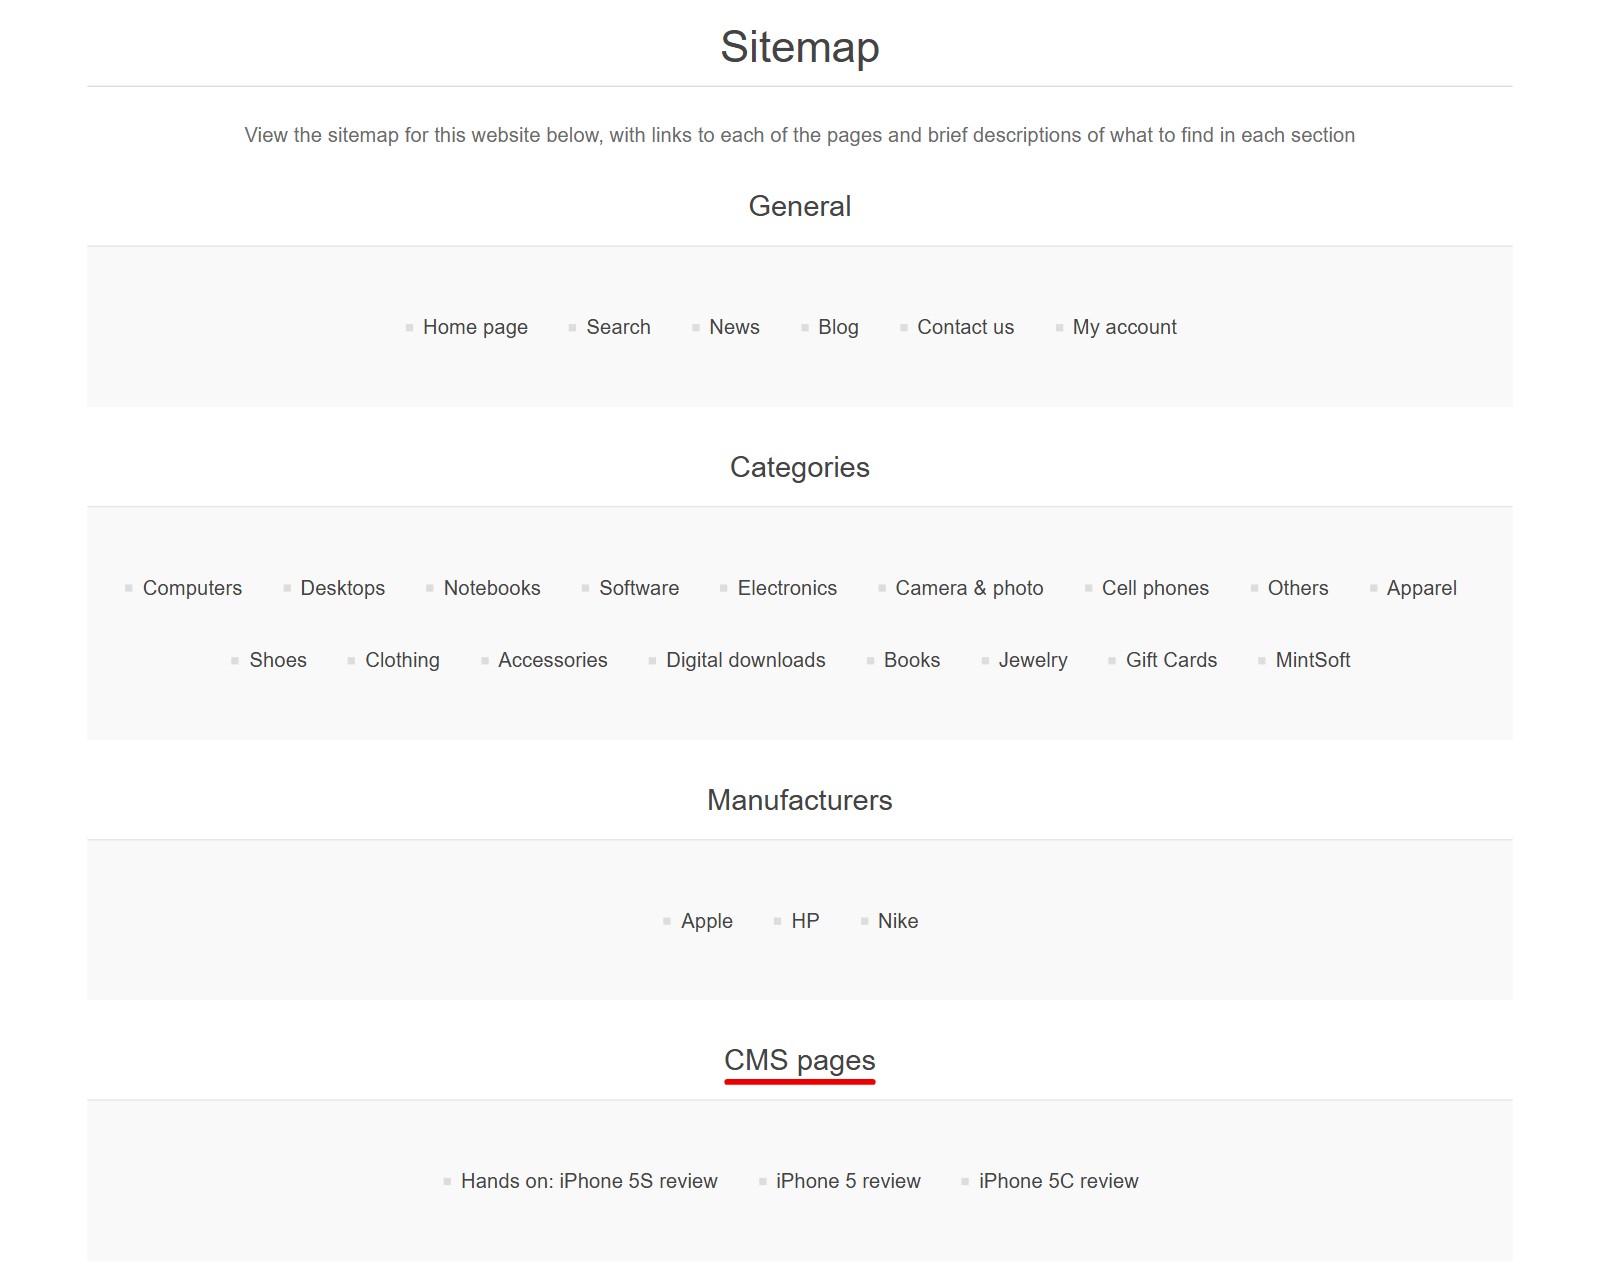
'Show CMS pages on the sitemap page' adds the block 'CMS pages' to the sitemap page of the store.
'Start breadcrumb at the home page' - the breadcrumb starts with the home page, not with the top CMS page.
This is how the CMS pages look on the sitemap page. Only the pages with 'Include in sitemap' are listed (see step 7). The same pages are added to sitemap.xml.
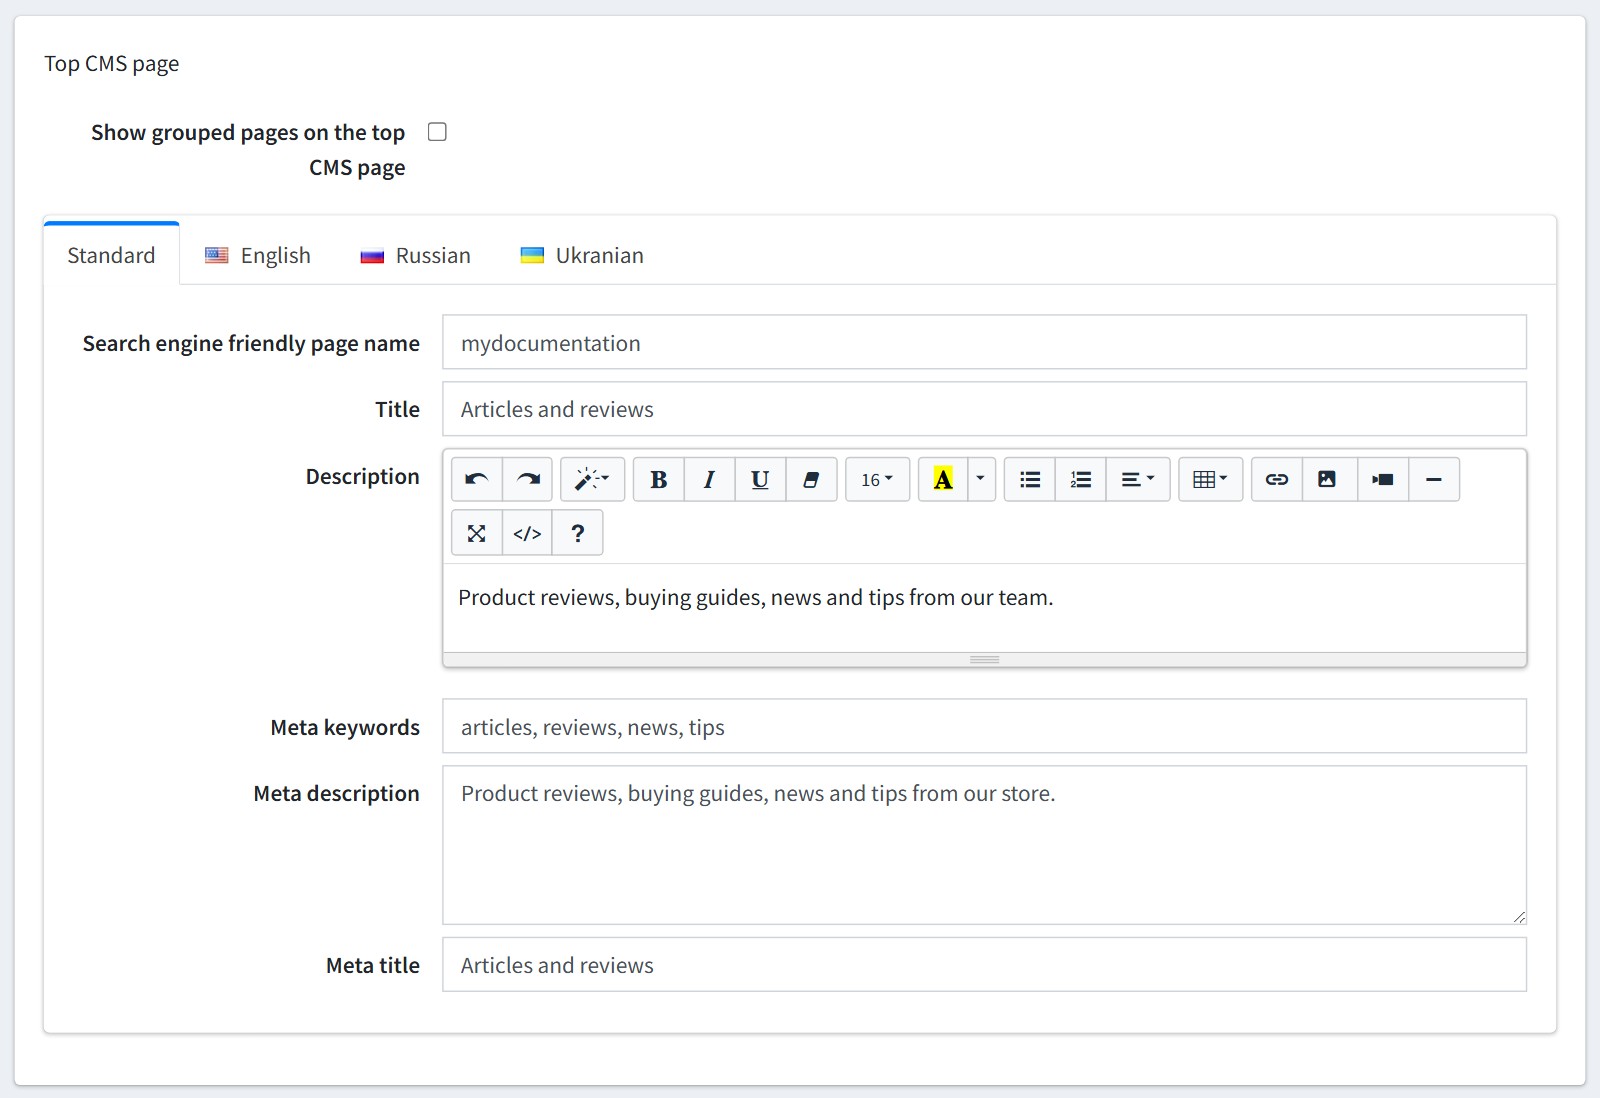
3. The top CMS page is the start page of all your CMS pages.
'Search engine friendly page name' - the address of the top CMS page and the first part of the address of its search page and of the tag pages. Example. 'articles' gives /articles, /articles/search and /articles/tag/sale. You could set it for each language. Leave a language empty to use the standard name. If the name is already used, the plugin adds a number to it. After a rename the old address is redirected (301) to the new one at once, no restart is needed.
'Title' and 'Description' - the heading and the text of the top CMS page. The title is also the heading of the CMS page blocks on the product page and on the home page.
'Meta keywords', 'Meta description' and 'Meta title' - the SEO tags of the top CMS page.
Enable 'Show grouped pages on the top CMS page' if the top page should show only the cards of the top-level grouped pages (picture, name, short description). When it is disabled, the top page lists all your pages with paging and sorting.
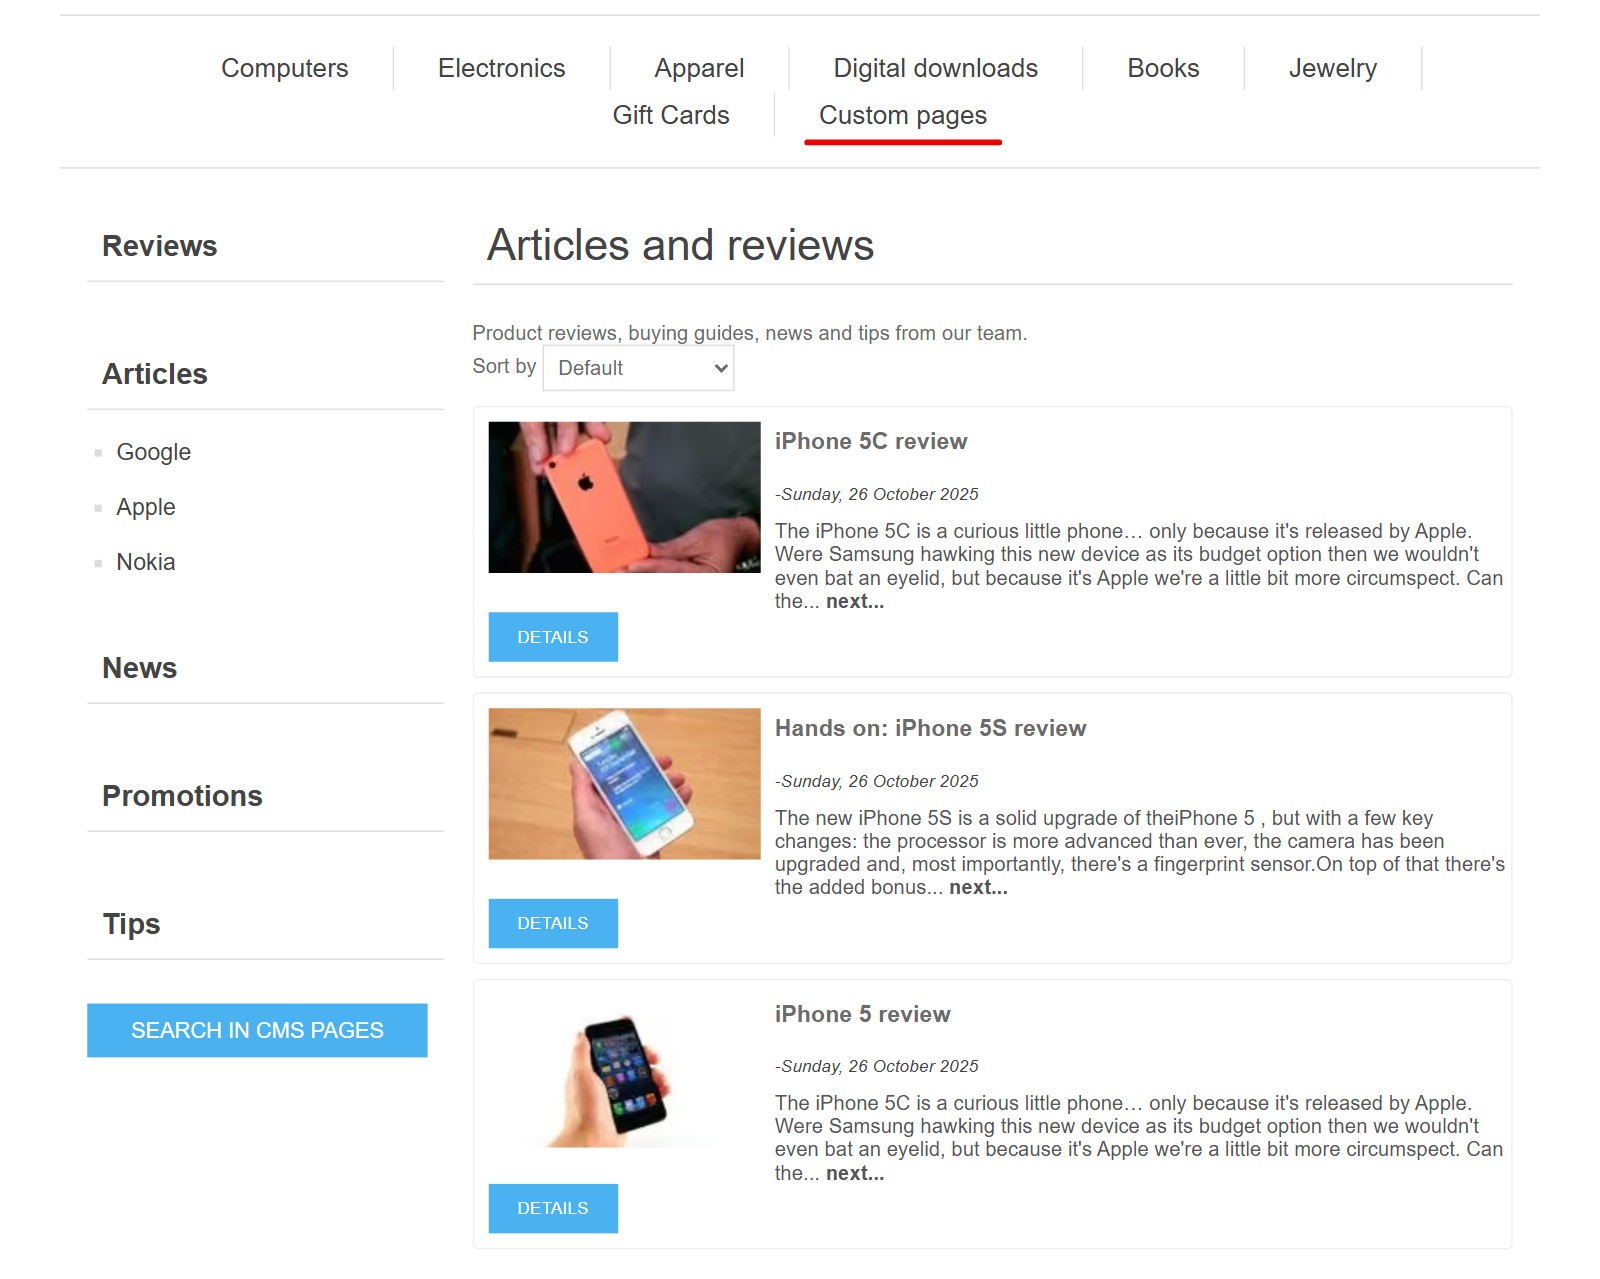
This is the top CMS page on the storefront, opened from the main menu. The page tree and the button 'Search in CMS pages' are in the left column.
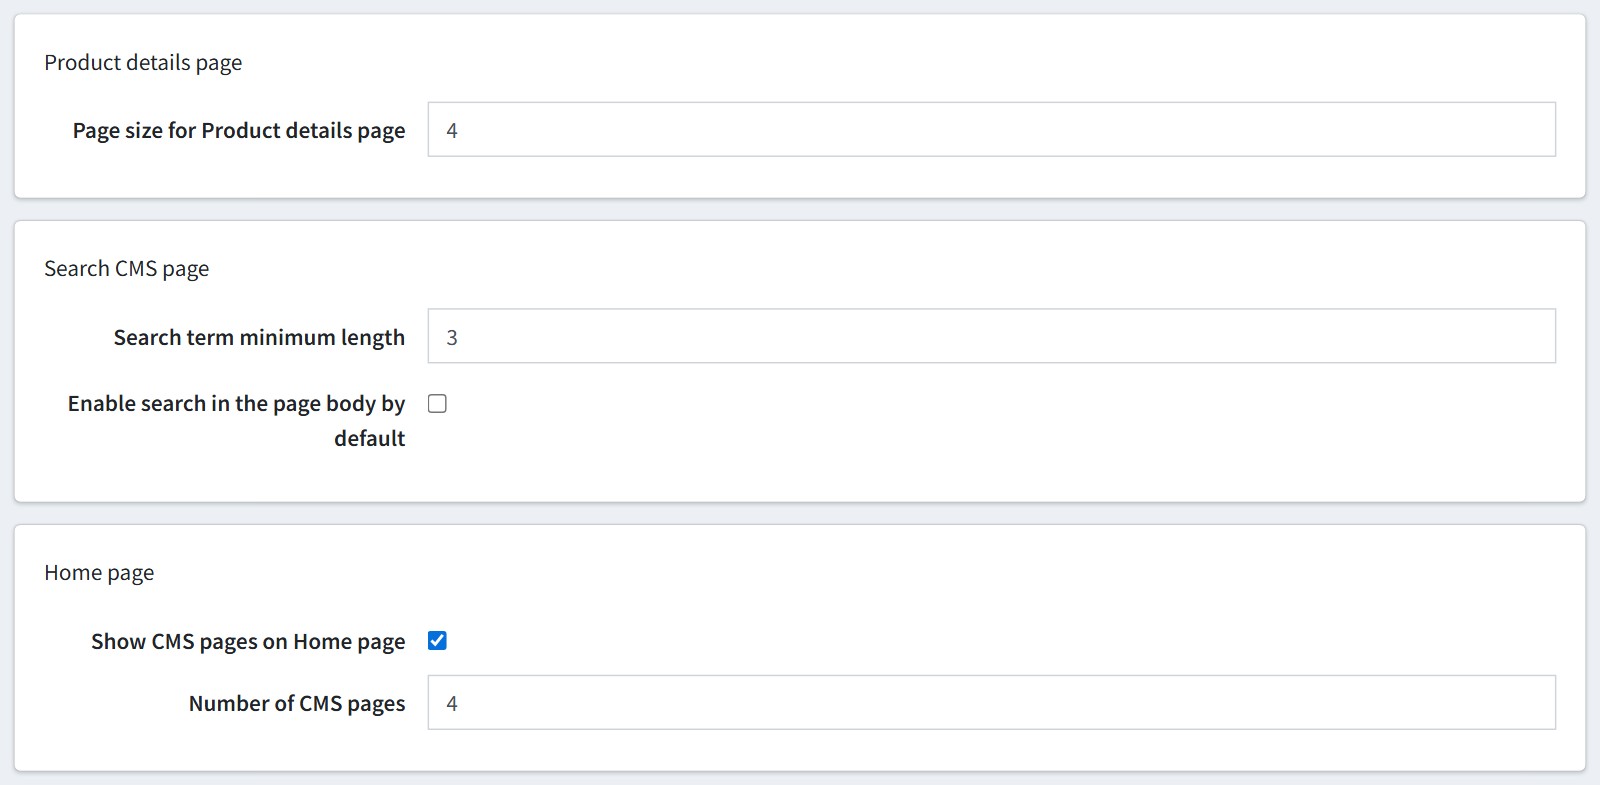
4. 'Page size for Product details page' - how many products are shown in the block 'Related products' of a CMS page (see step 9). Set 0 to hide this block.
'Search term minimum length' - the shortest search word the CMS search accepts.
The CMS search looks only in the page names. Enable 'Enable search in the page body by default' to search in the full text of the pages too. The customer could change it in the advanced search.
Enable 'Show CMS pages on Home page' to show a block of CMS pages on the home page of the store. 'Number of CMS pages' - how many pages it shows. Only the pages with 'Show on home page' are shown there (see step 7).
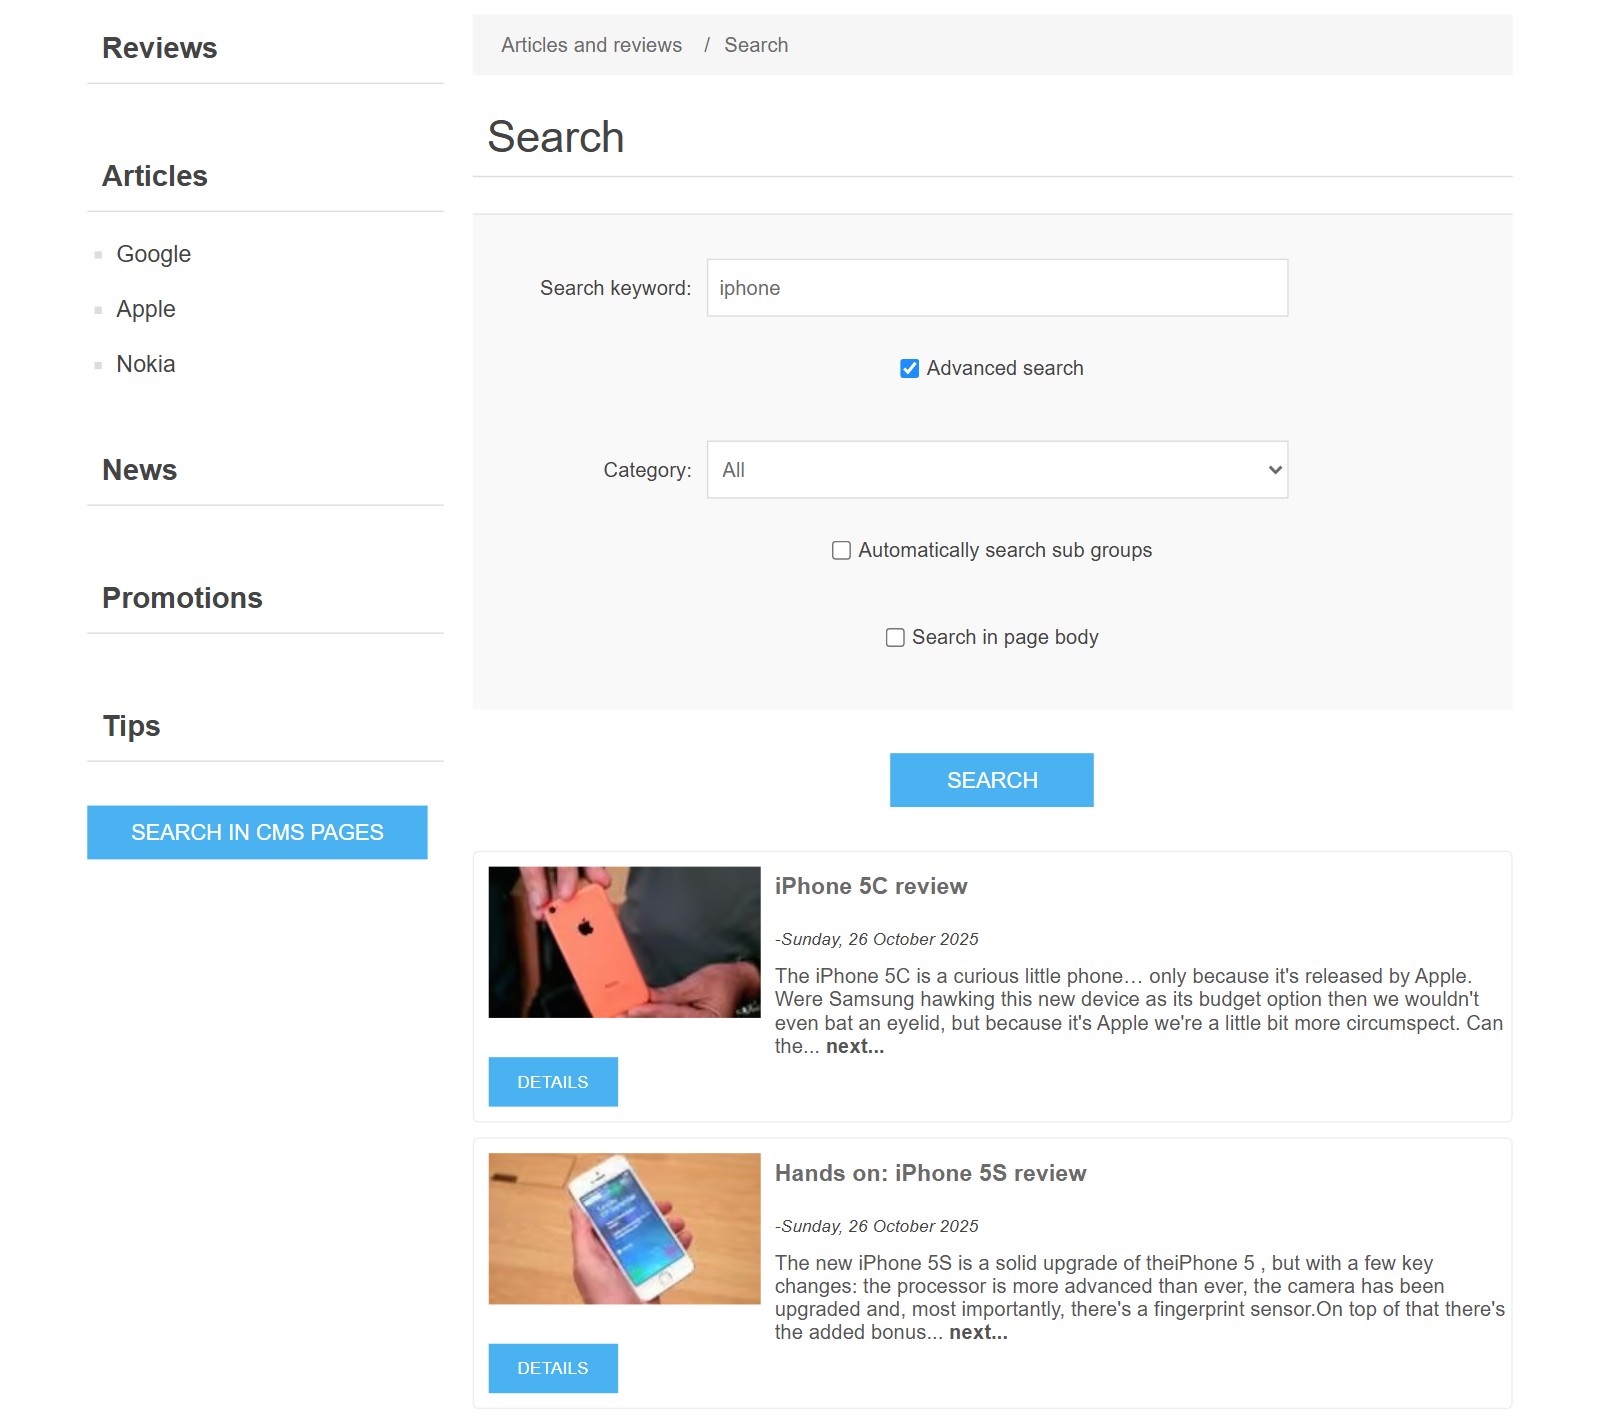
This is the CMS search page with the advanced options. The customer could limit the search to one group and its sub groups.
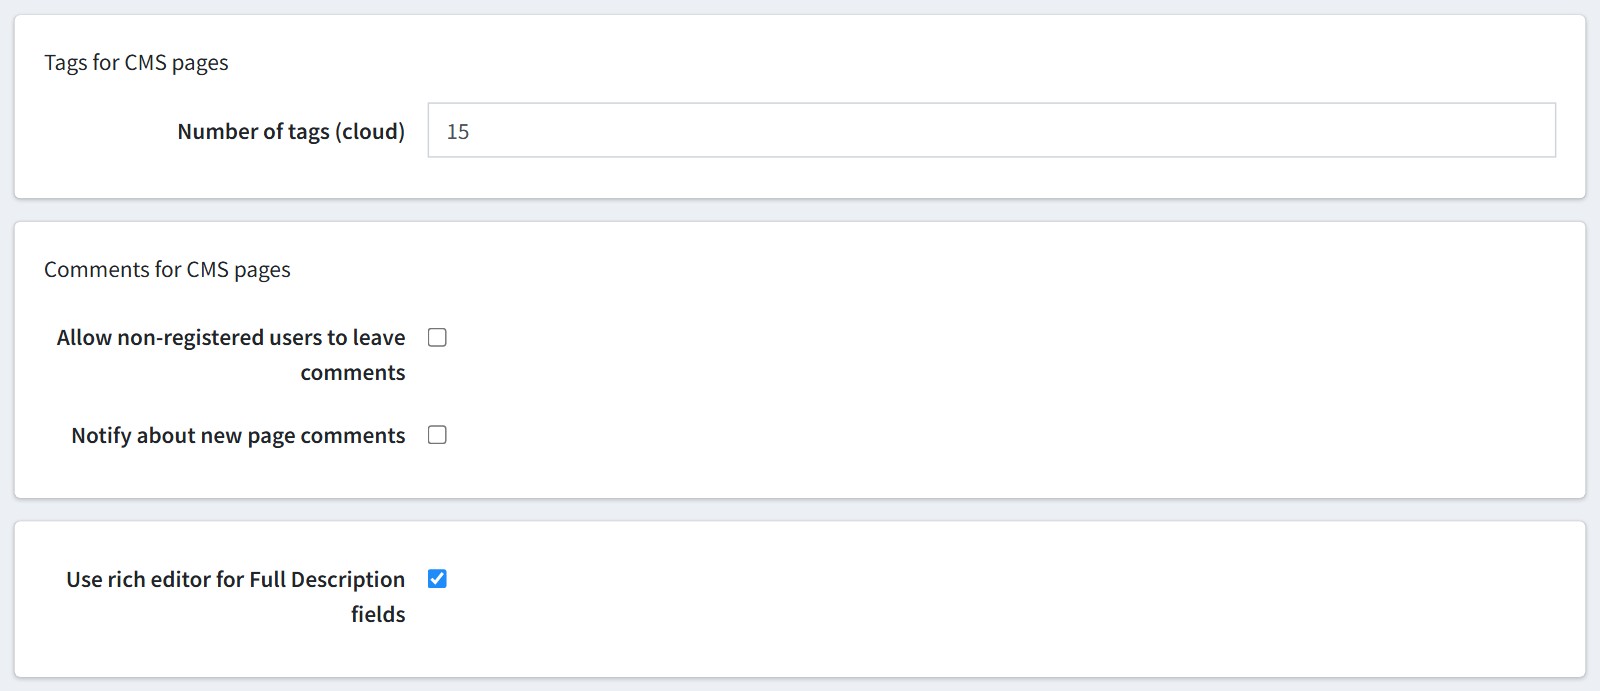
5. 'Number of tags (cloud)' - how many tags the tag cloud shows. The tag cloud is in the left column of the top CMS page and of the grouped pages. Add the tags in the field 'Tags' of a page (see step 7). Each tag has its own page with all pages of this tag, e.g. /articles/tag/sale.
The comment form is shown only on the pages with 'Allow comments'. 'Allow non-registered users to leave comments' - guests could comment too.
Enable 'Notify about new page comments' to get an email about each new comment. The email uses the message template 'CMSManager.PageComment'.
'Use rich editor for Full Description fields' - edit the page text in the rich editor. Disable it to edit the HTML as plain text.
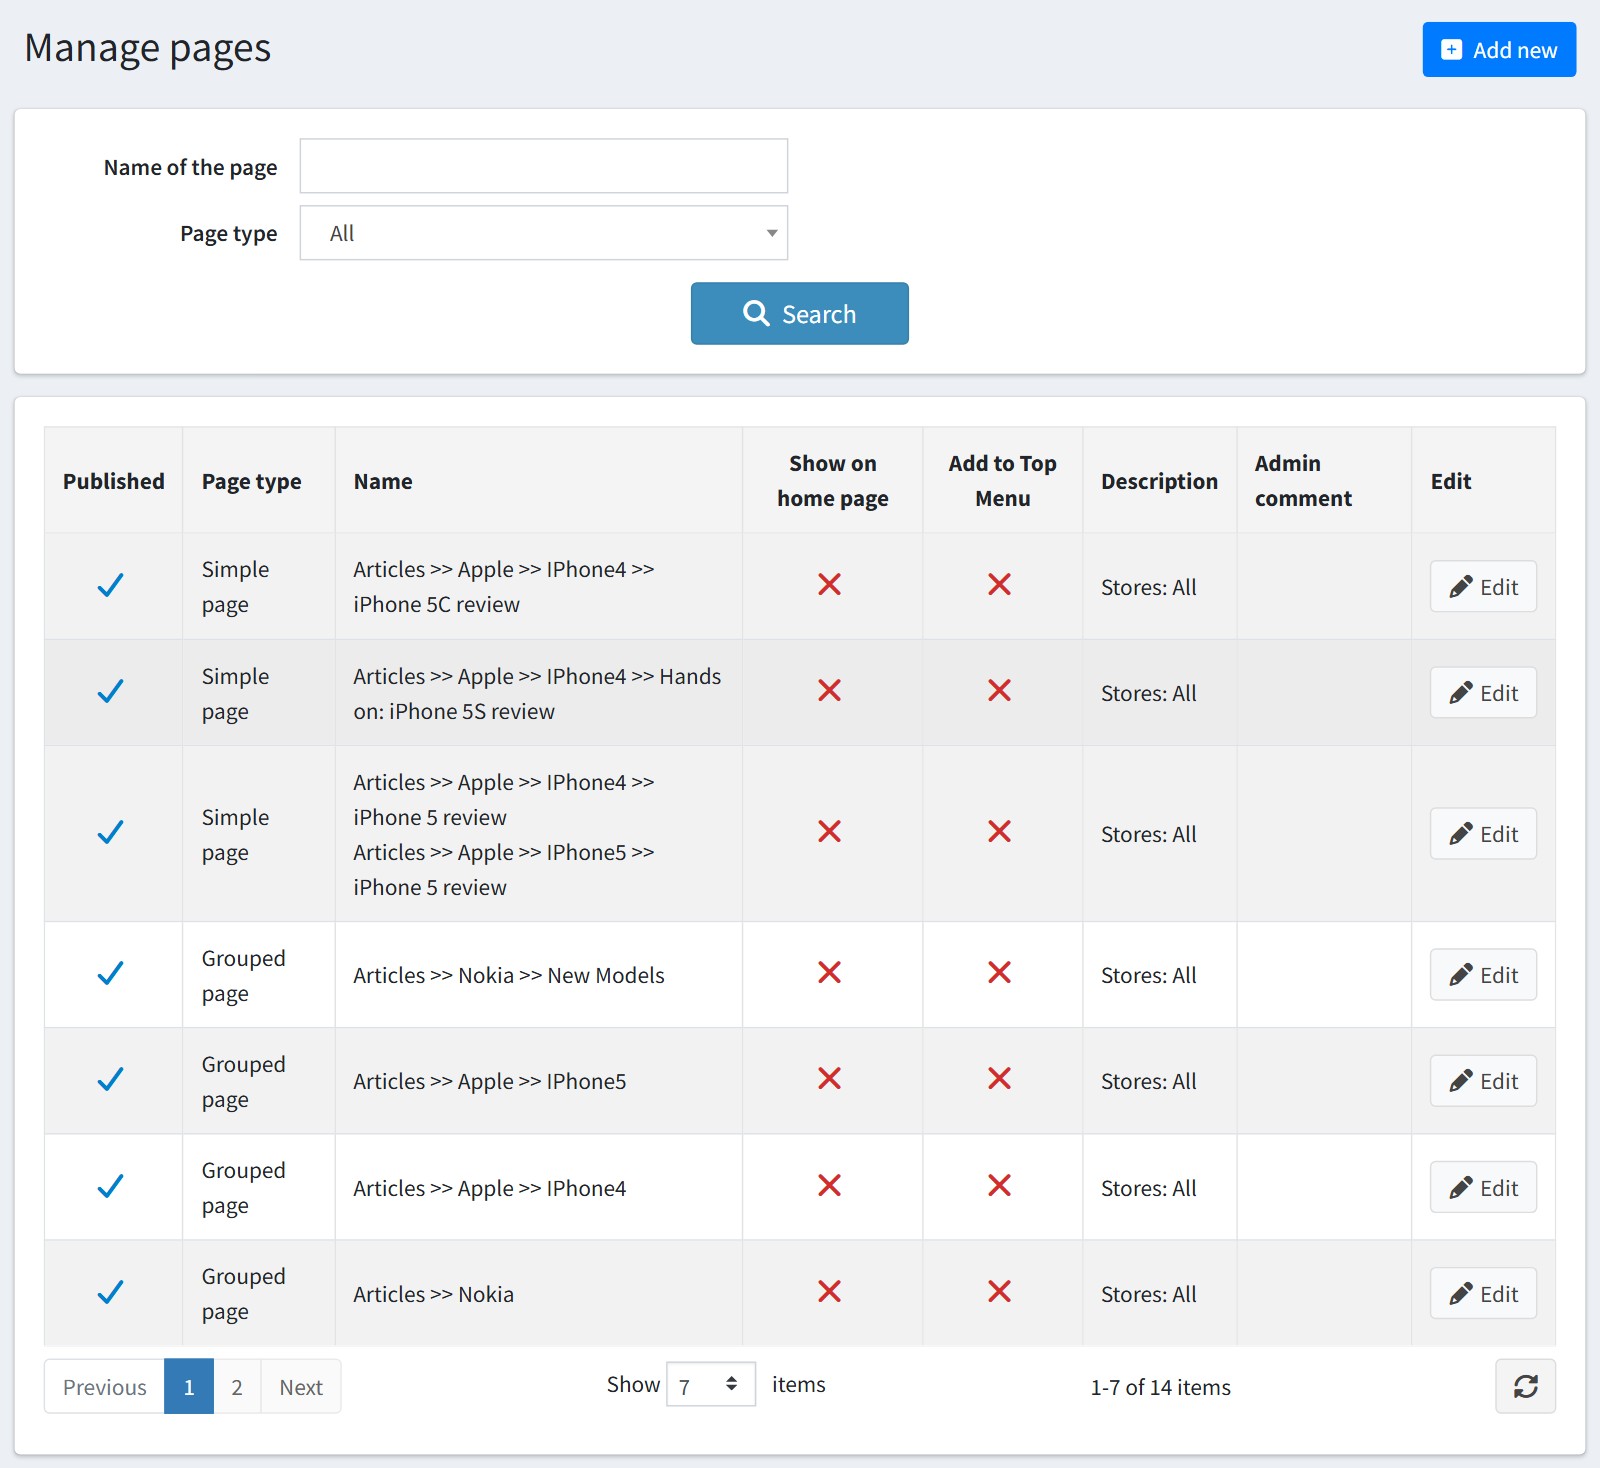
6. Open FoxNetSoft > CMS Manager > Custom pages. You could search the pages by name and by type.
There are two page types. A 'Simple page' is an article, a review, a news item. A 'Grouped page' is a section that holds other pages, like a category.
The name shows the full path of the page in the tree, e.g. Articles >> Apple >> IPhone4 >> iPhone 5C review. A page in several groups has one line for each group.
Press 'Add new' to create a page.
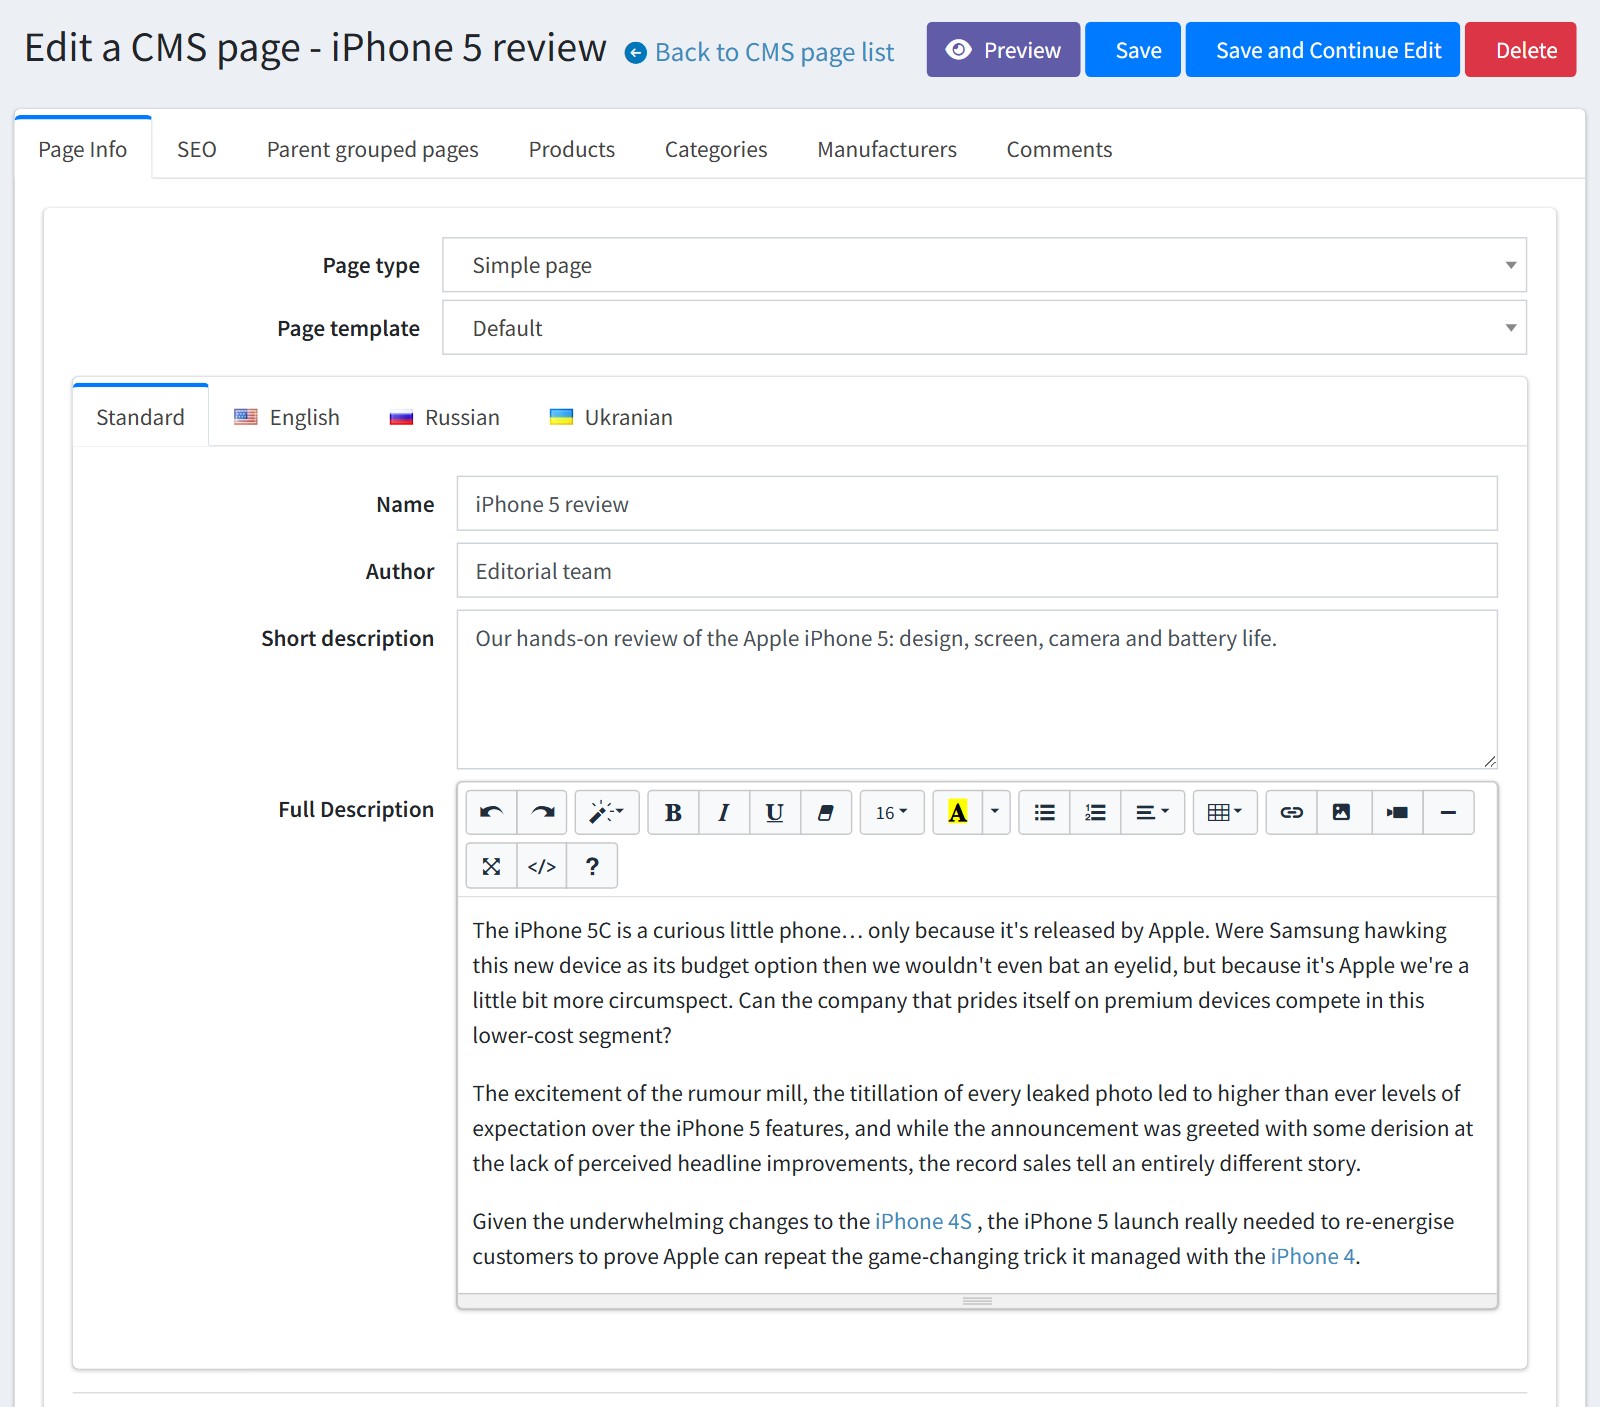
7. Create a simple page.
'Page type' - 'Simple page'. 'Page template' - the layout of the page (see step 13).
'Name', 'Author', 'Short description' and 'Full Description' could be set for each language on its tab. The short description is shown in the lists. If it is empty, the lists show the beginning of the full description.
Press 'Preview' to see the page on the storefront.
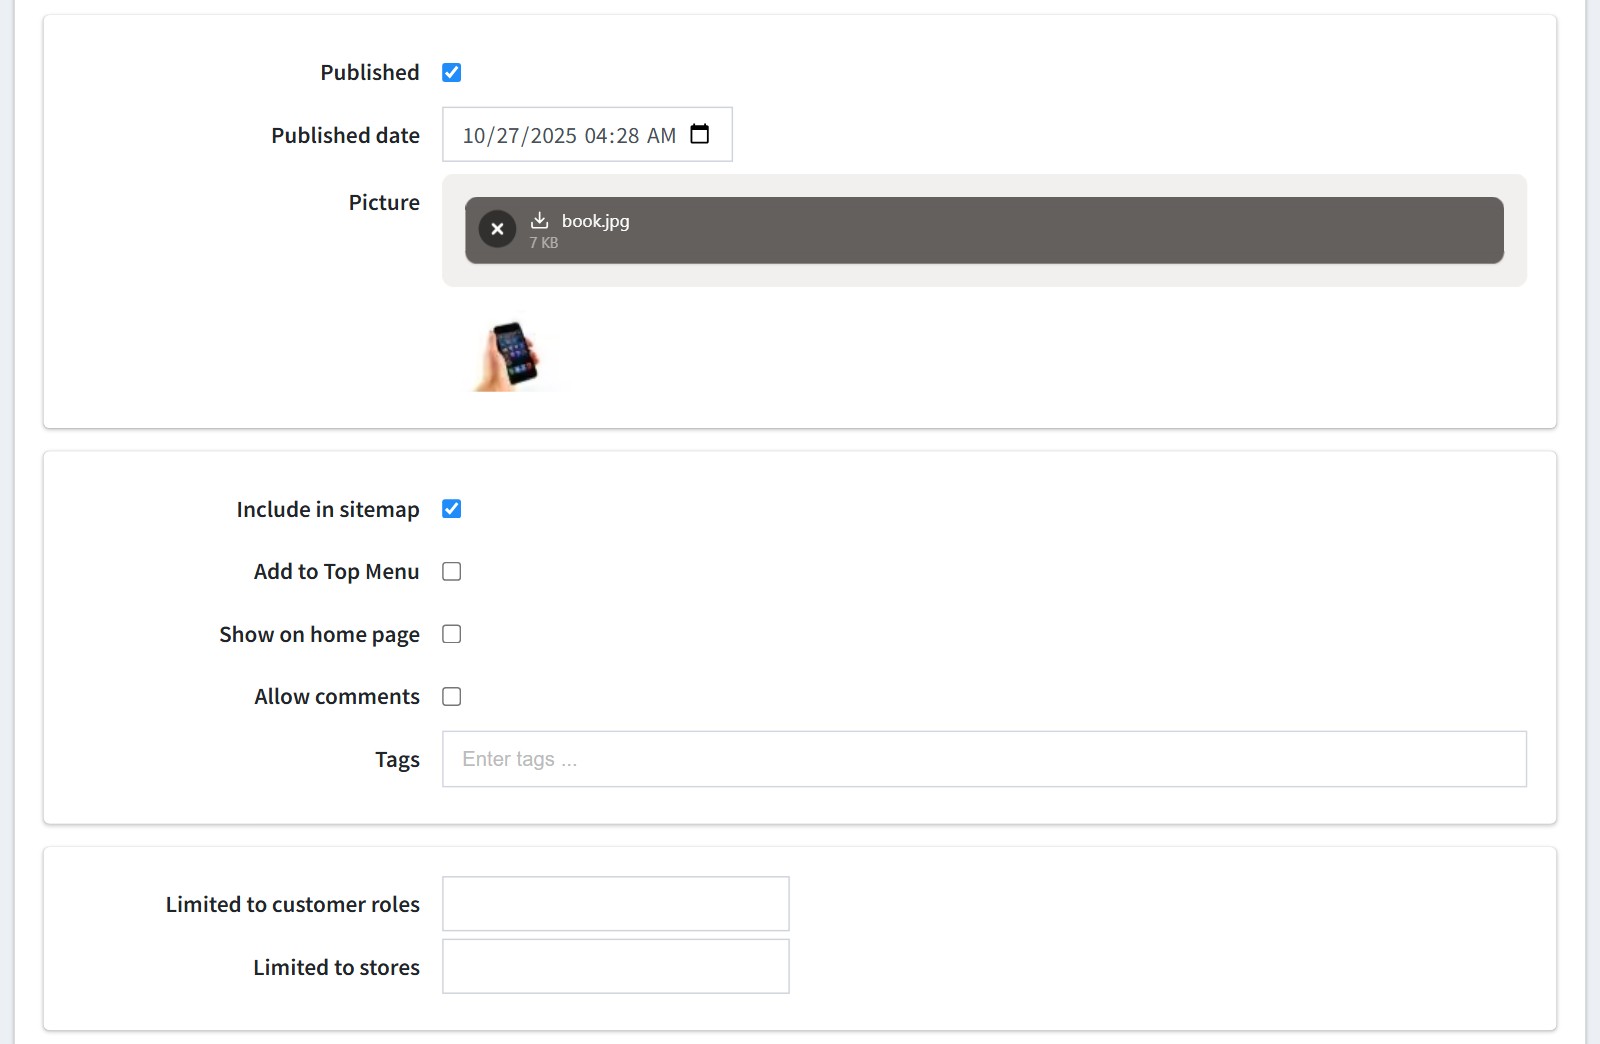
'Published' and 'Published date' - the date is shown on the page and in the lists. 'Picture' - the picture of the page in the lists.
'Include in sitemap' - the page is listed in sitemap.xml and on the sitemap page.
'Add to Top Menu' adds a separate item for this page to the main menu.
'Show on home page' - the page is shown in the CMS block on the home page (see step 4).
'Allow comments' shows the comment form under the page (see step 5).
'Tags' - the tags of the page.
'Limited to customer roles' and 'Limited to stores' - who could see the page. Leave them empty to show the page to everybody in all stores.
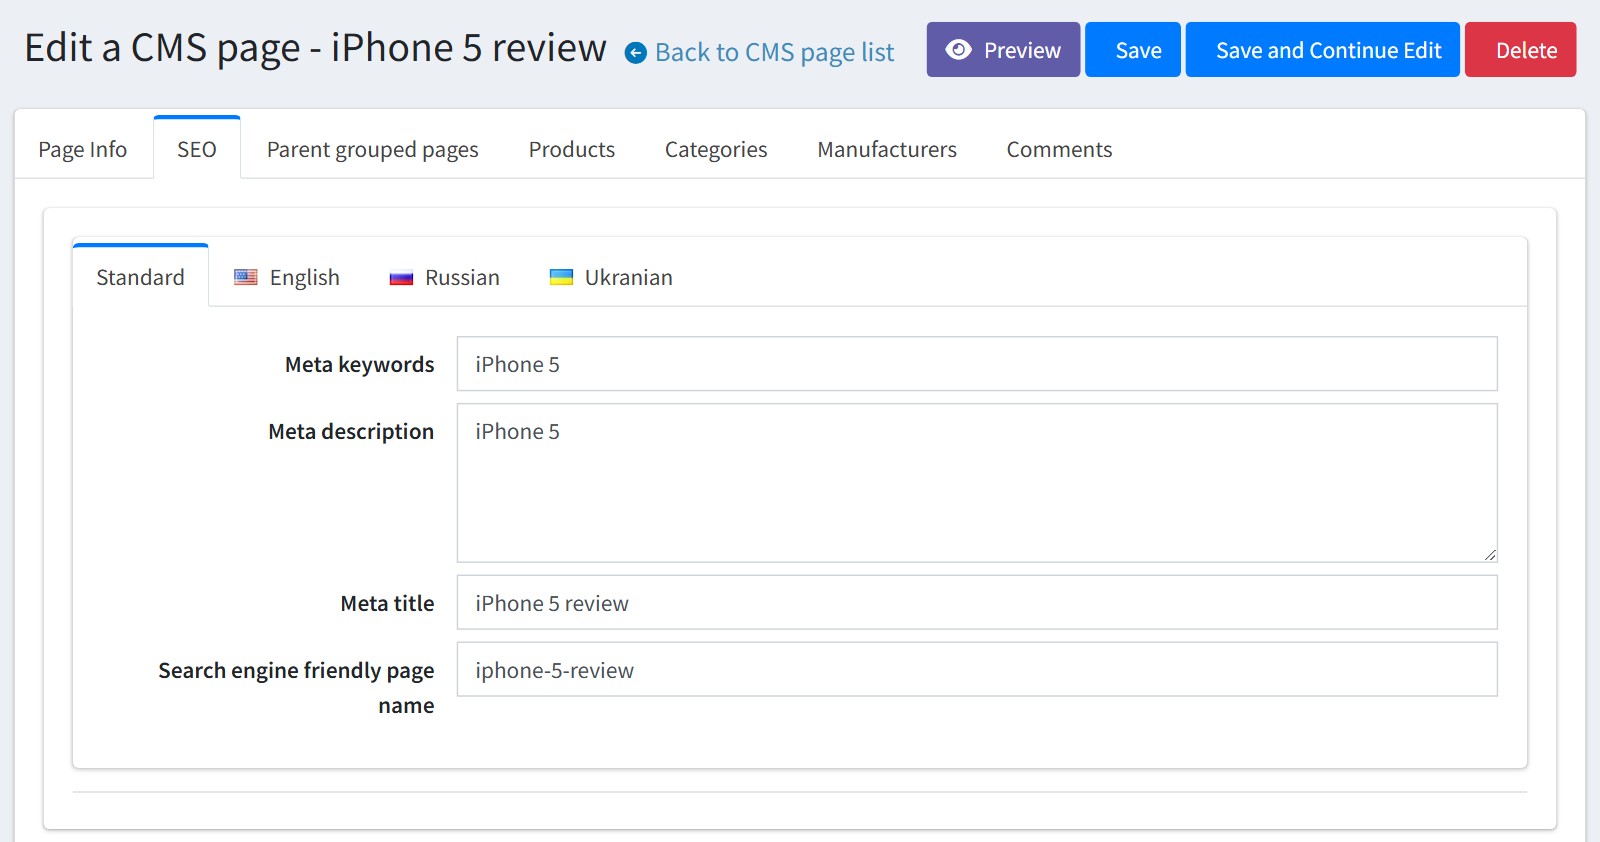
The tab 'SEO' has the meta tags and the 'Search engine friendly page name' of the page, for each language. Leave the name empty and the plugin creates it from the page name.
This is how the simple page looks on the storefront: the breadcrumb, the title, the date, the text and the related products (see step 9). The page tree is in the left column.
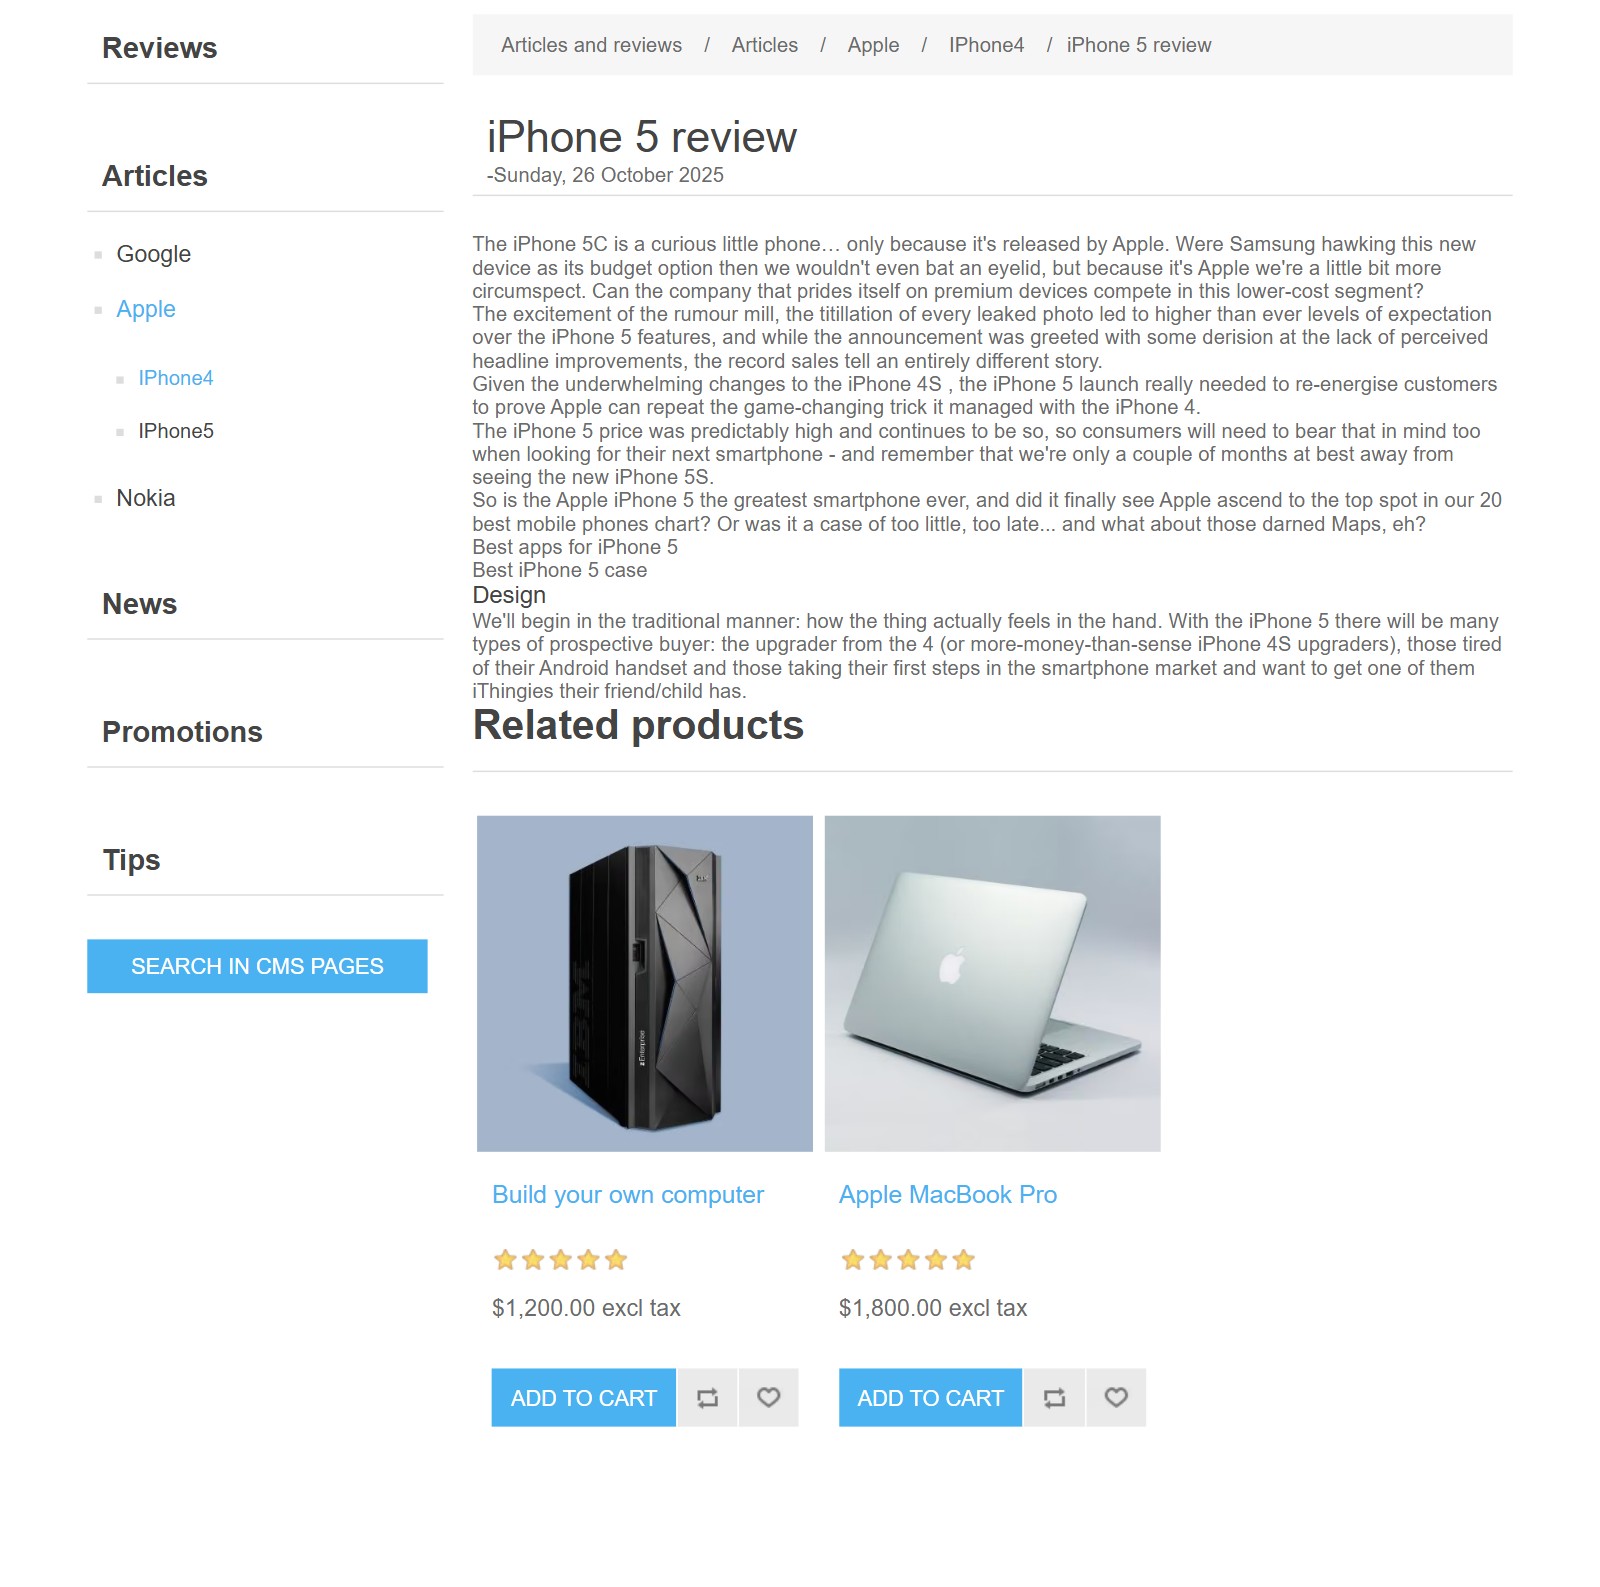
8. On the tab 'Parent grouped pages' put the page into one or several grouped pages. Press 'Add this page to the grouped page' and select the group. 'Display order' sets the position of the page in the group.
The same page could be in several groups. Example. The iPhone 5 review is in IPhone4 and in IPhone5.
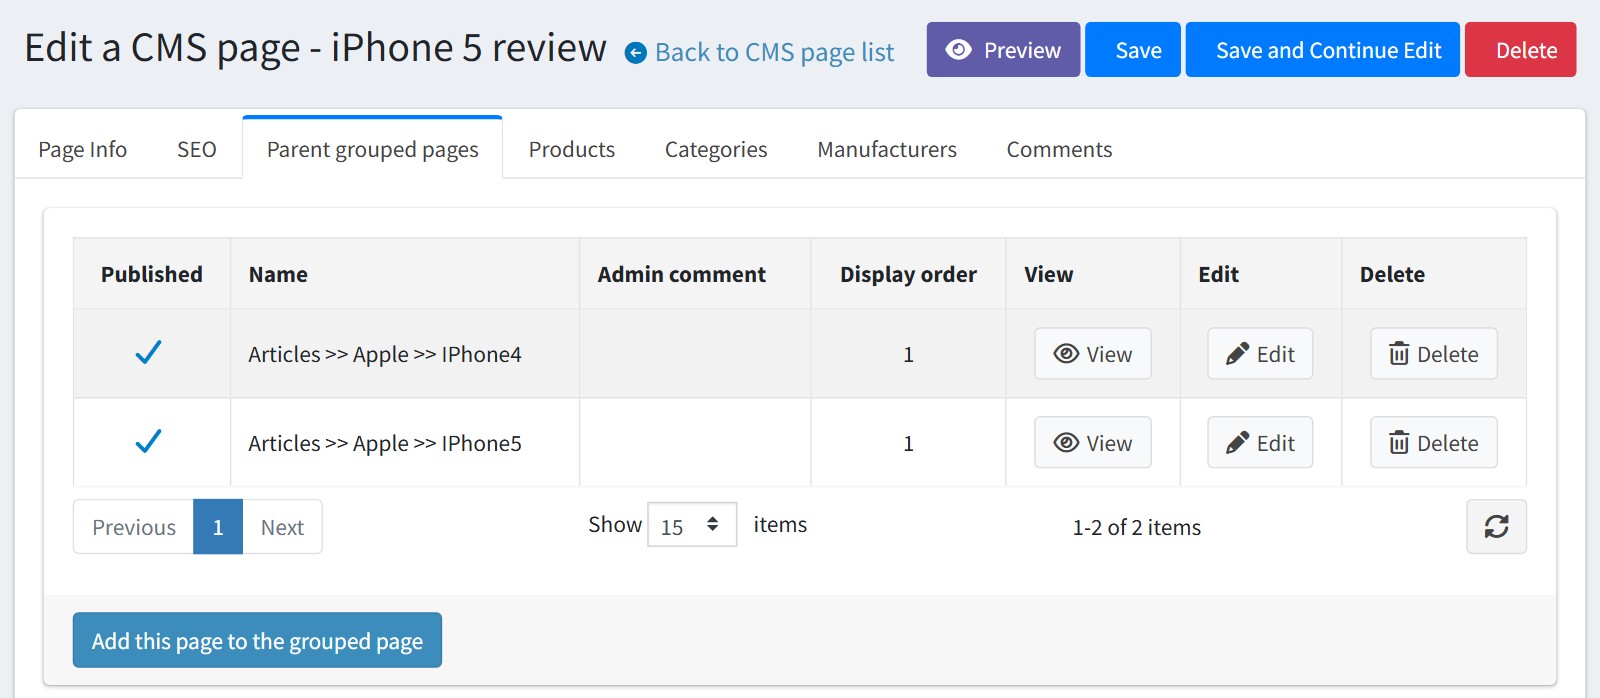
9. Link the page to your catalog. On the tab 'Products' press 'Add a new product' and select the products. The tabs 'Categories' and 'Manufacturers' work the same way.
The block 'Related products' of the page shows these products first, then the products of the linked manufacturers and categories.
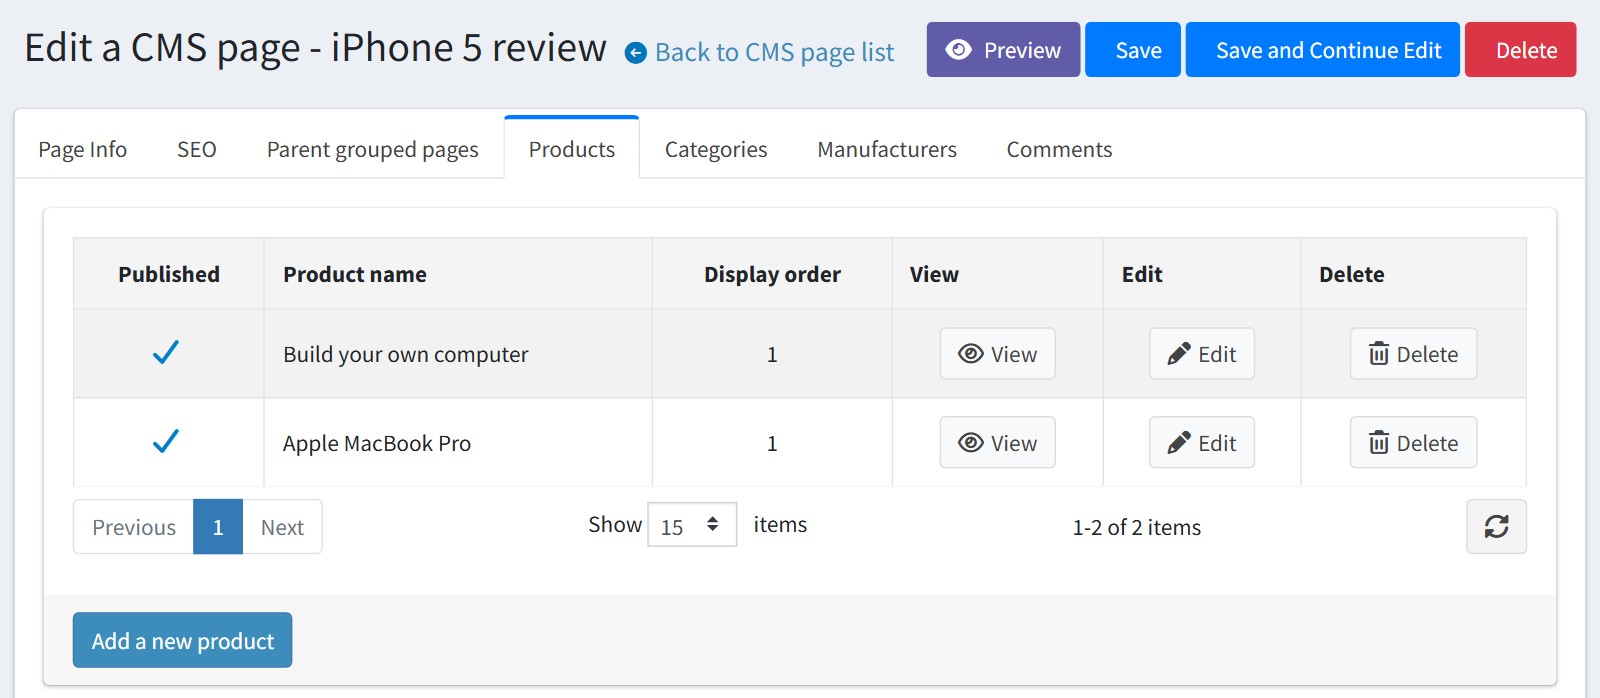
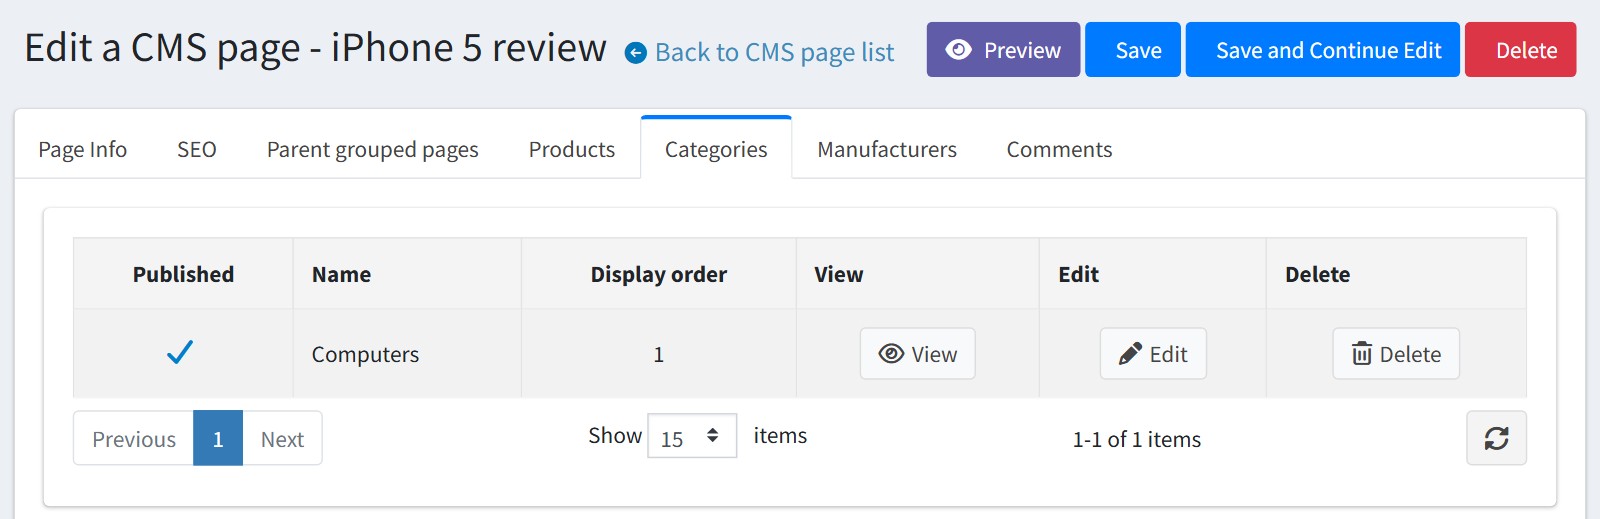
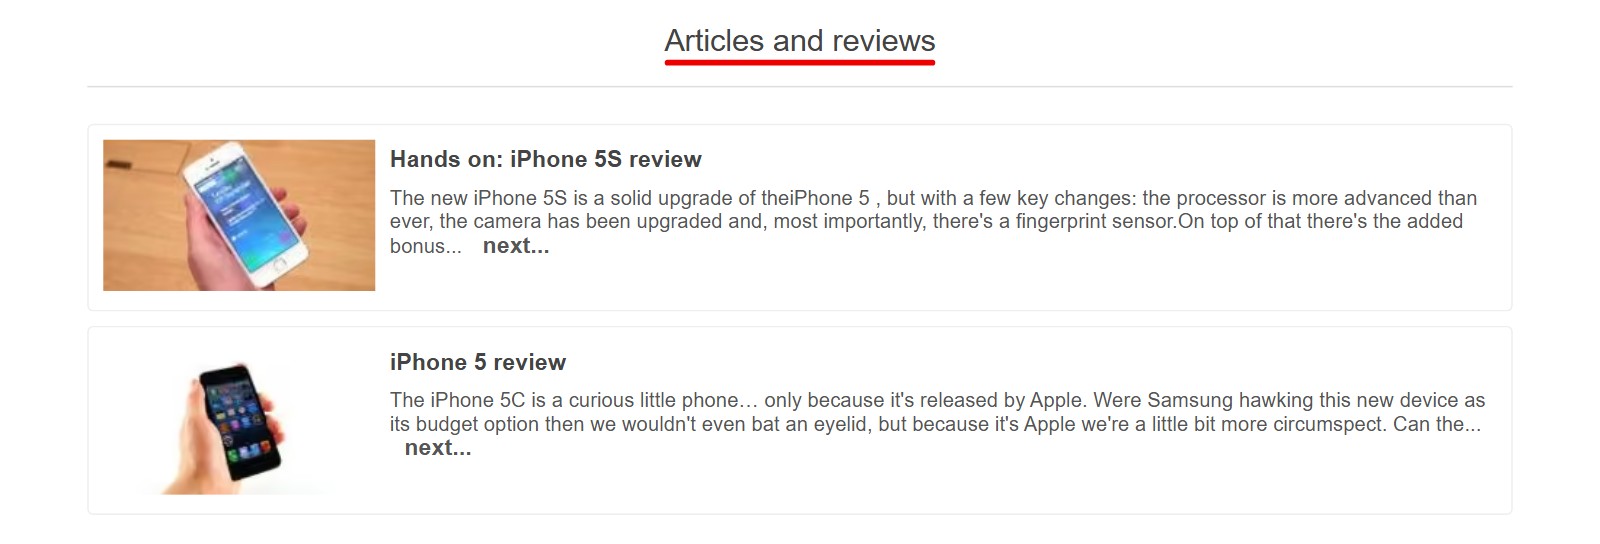
The page is also shown in the CMS block at the bottom of the product page. The block shows up to 4 pages: first the pages linked to this product, then the pages linked to its manufacturers, then the pages linked to its categories. So one page linked to a category appears on every product of this category.
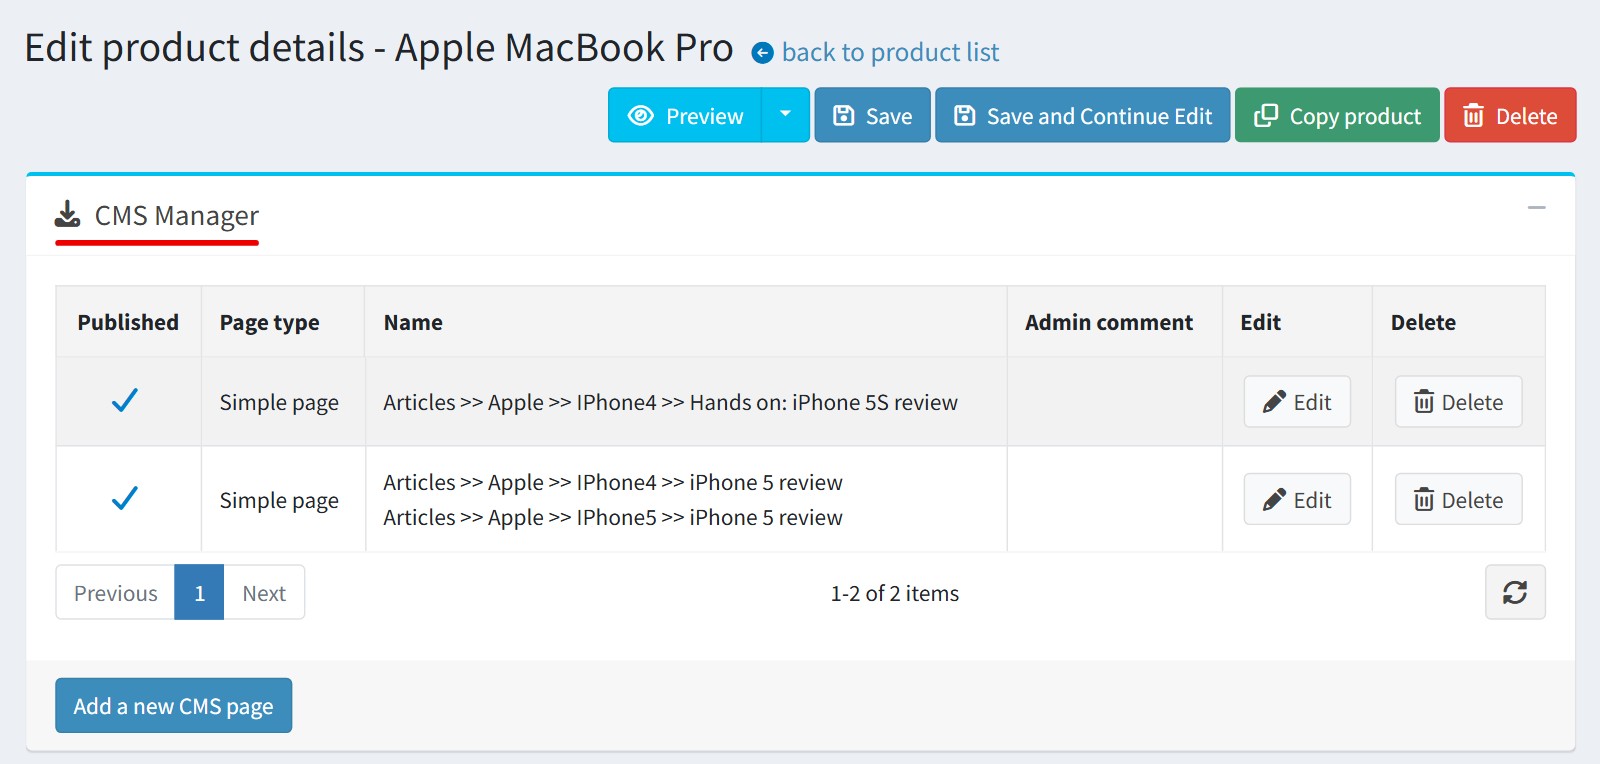
10. You could link the pages from the other side too. The plugin adds the block 'CMS Manager' to the product edit page. It lists the pages of this product.
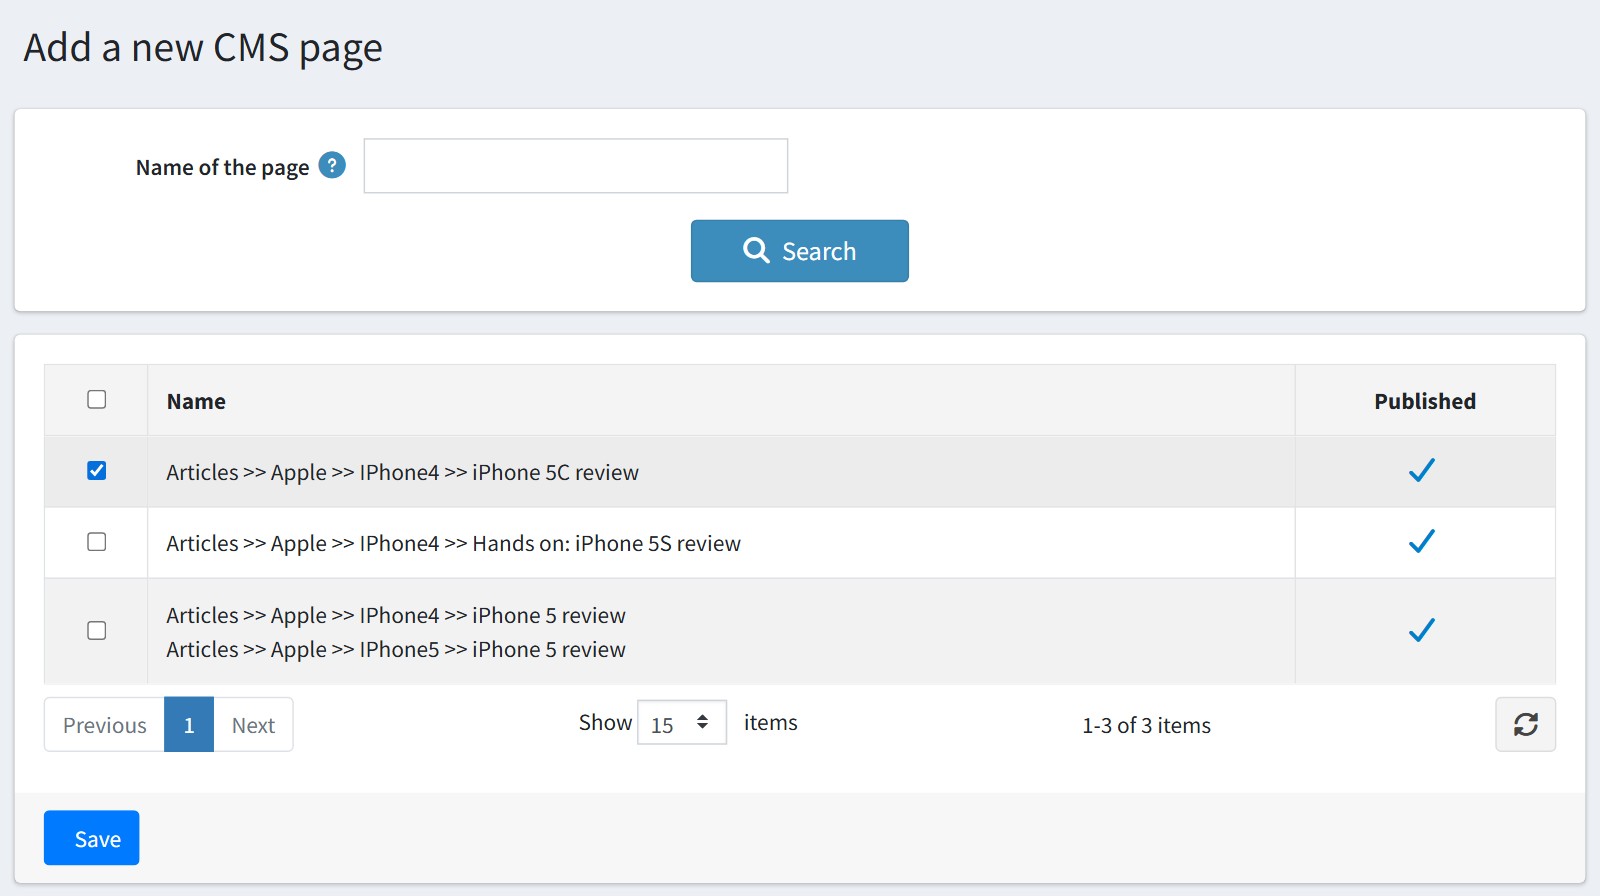
Press 'Add a new CMS page', tick the pages and press 'Save'. The category and manufacturer edit pages have the same block.
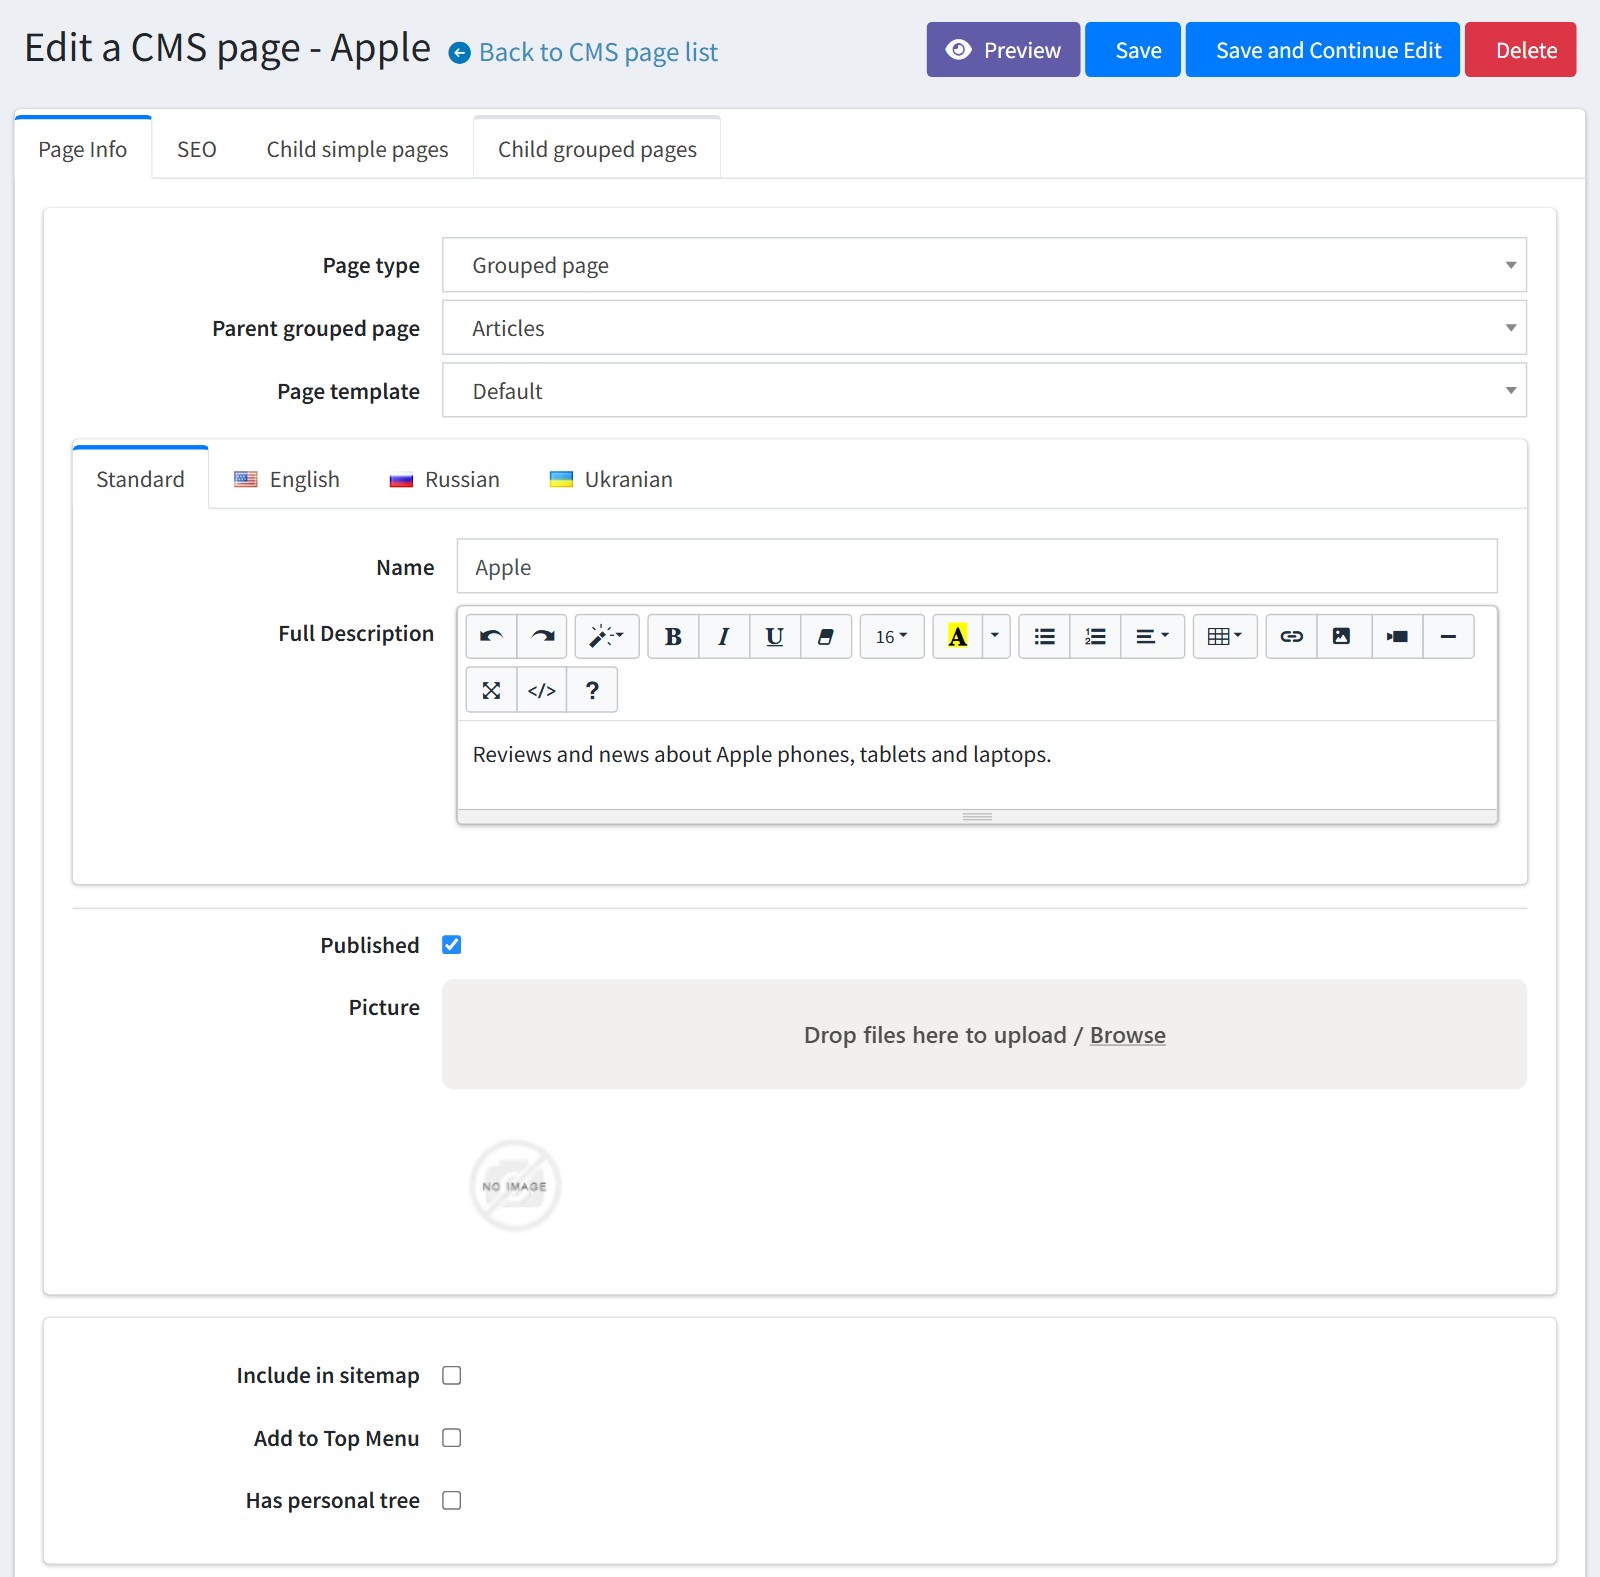
11. Build the page tree with grouped pages, e.g. Articles > Apple > IPhone4.
'Page type' - 'Grouped page'. 'Parent grouped page' - the group above it. Example. Apple is in Articles. A top-level group has no parent.
'Full Description' is the text at the top of the group page. 'Picture' is shown on the card of the group on the top CMS page (see step 3).
Enable 'Has personal tree' if the group should be a separate section with its own tree. Its pages show only the tree of this group, and their breadcrumb starts at this group. The group is left out of the main tree and of the top CMS page, and the addresses of its pages do not start with the top CMS page name.
12. The tab 'Child simple pages' lists the pages of the group. Press 'Add child simple page' to put pages into the group. 'Display order' sets the order of the pages.
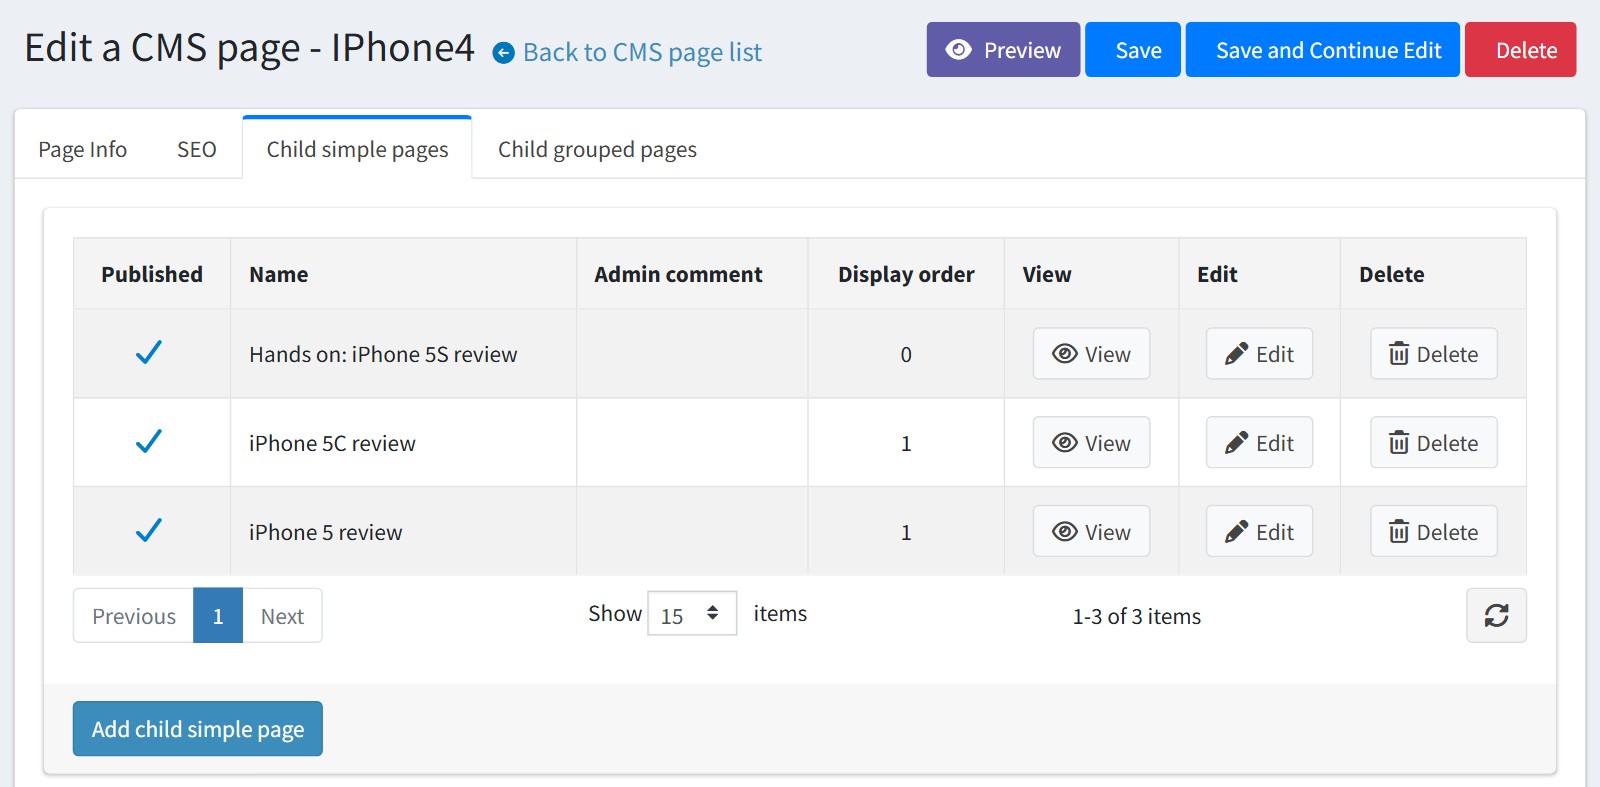
The tab 'Child grouped pages' lists the sub groups. Press 'Add child grouped page' to add one.
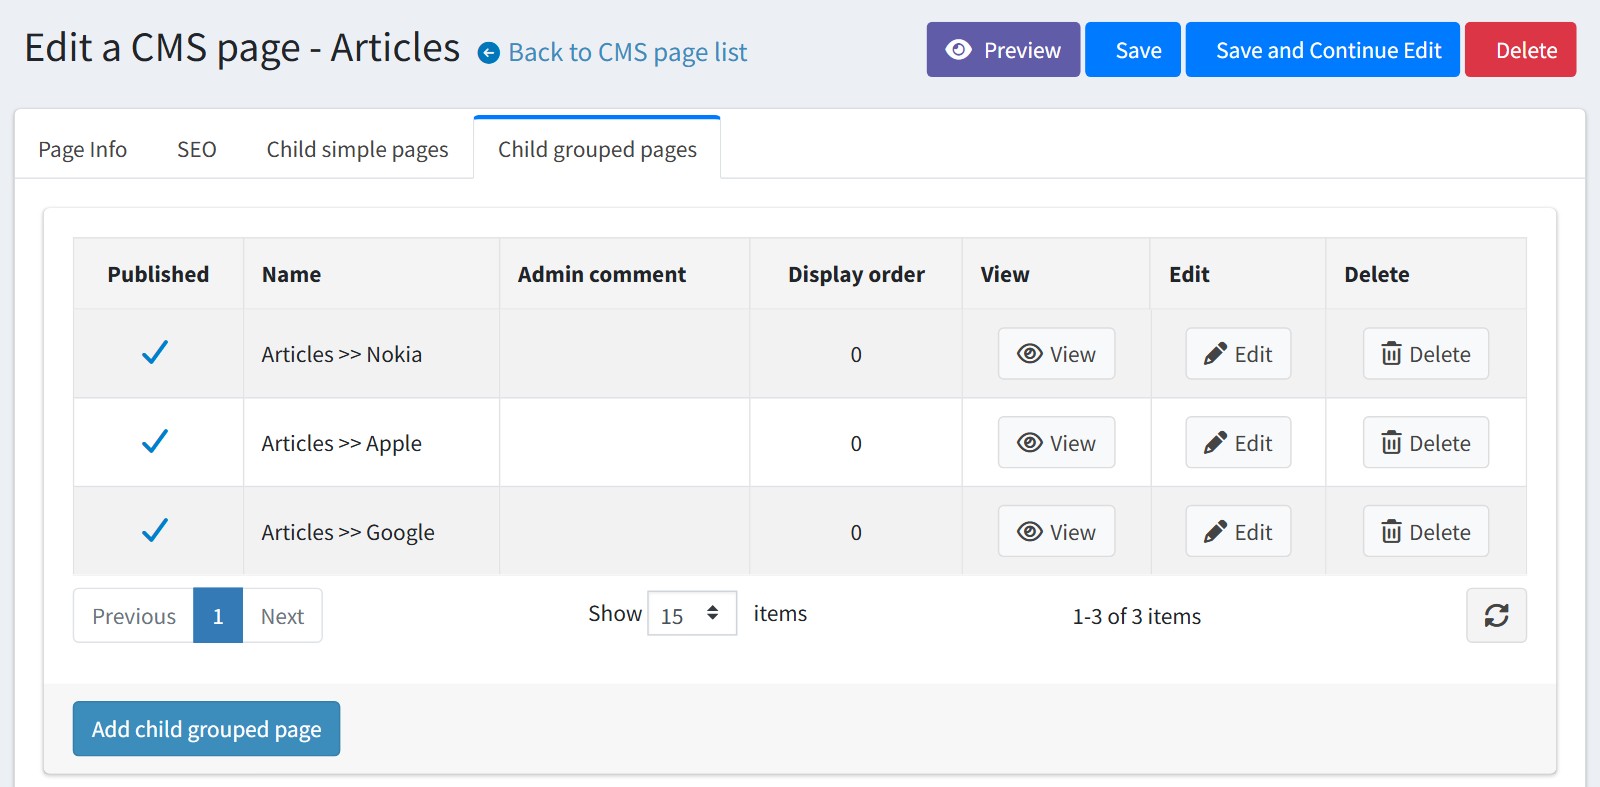
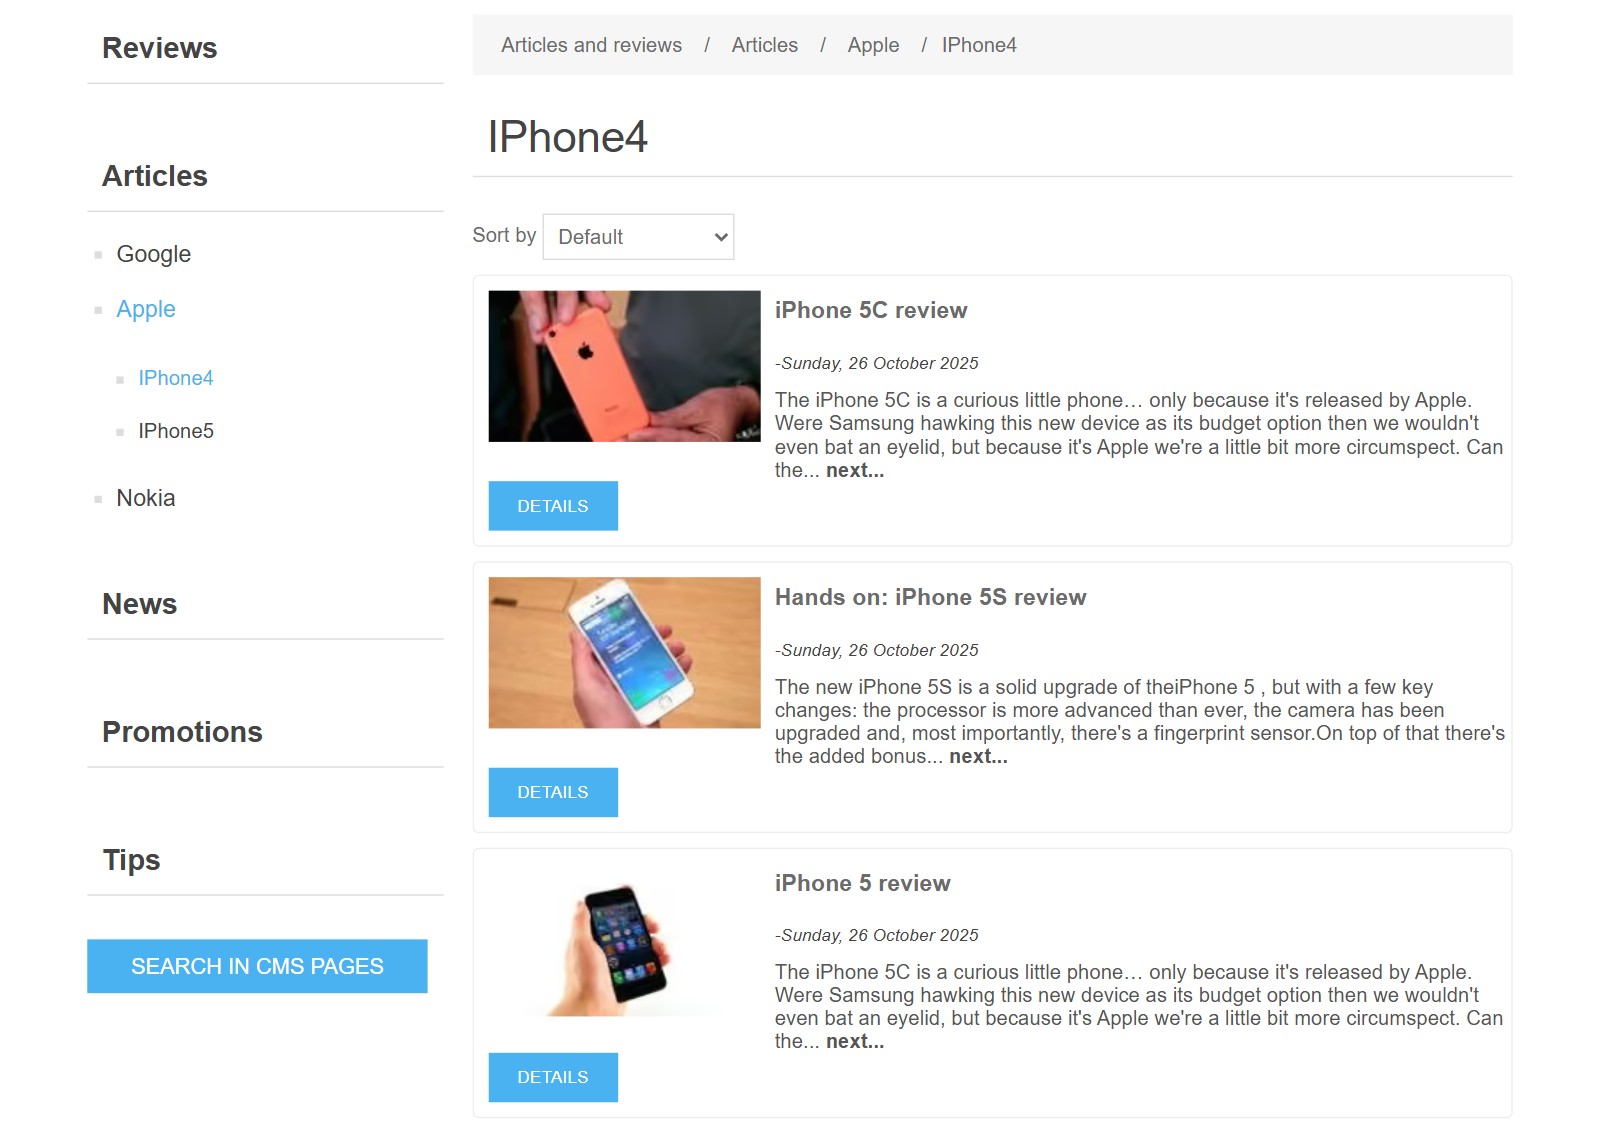
This is how a grouped page looks on the storefront: the breadcrumb, the open branch of the page tree and the list of its pages with sorting.
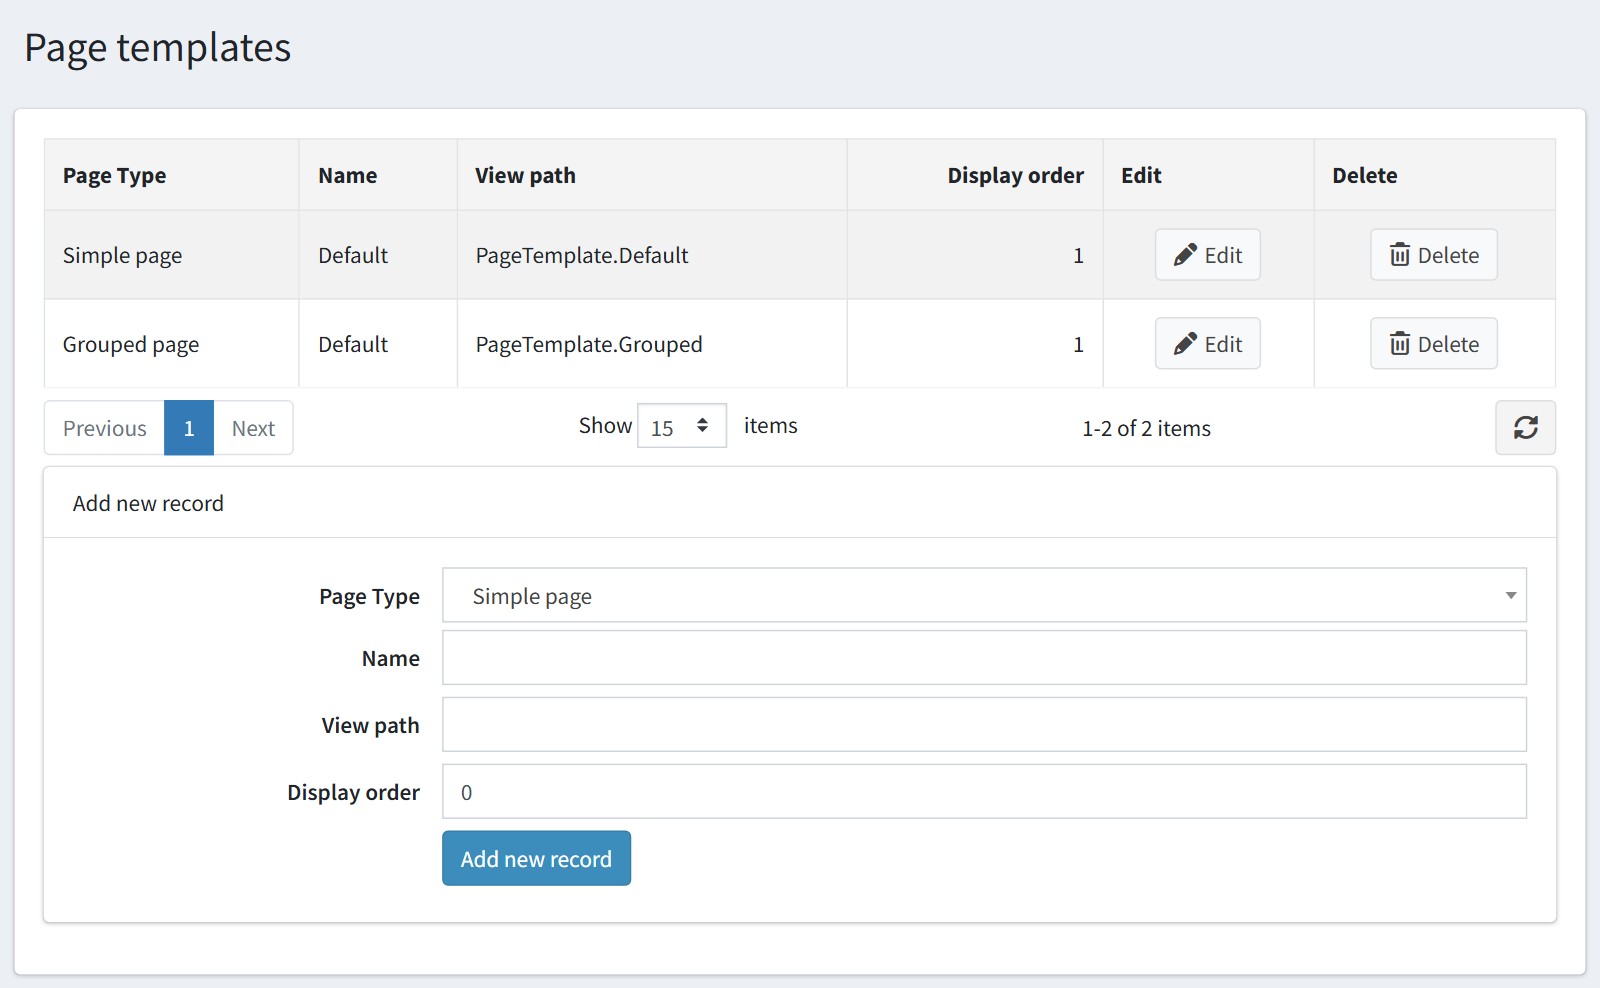
13. FoxNetSoft > CMS Manager > Templates lists the page templates. The plugin installs one template for each page type: PageTemplate.Default for the simple pages and PageTemplate.Grouped for the grouped pages.
If some pages need another layout, copy the file PageTemplate.Default.cshtml (or PageTemplate.Grouped.cshtml) in the folder Plugins\FoxNetSoft.CMSManager\Views\CMSPage, give the copy a new name and change it. Then add a template here with this file name without .cshtml in 'View path', and select it in 'Page template' of the page.
Keep a copy of your file. A plugin update replaces the plugin folder.
14. The comments of your visitors are in FoxNetSoft > CMS Manager > Comments and on the tab 'Comments' of each page. There is no approval step: a comment is shown at once, and you could only delete it. The customer edit page shows the comments of this customer.
The settings could be set for each store separately. Select the store in 'Multi-store configuration for' and check the override checkboxes. The name, the title and the meta tags of the top CMS page are common for all stores.
Admins who are not in the 'Administrators' role need the permission of the plugin (group FoxNetSoft) in Configuration > Access control list.
If you use our plugin LLMs TXT Generator, it adds the published CMS pages with 'Include in sitemap' to the llms.txt file of your store.