
Installation and configuring plug-in Authorize.Net Hosted Checkout (PCI compliance)
The plugin allows your customers to pay by credit or debit card on the secure Authorize.Net hosted payment page. The customer enters the card data on the Authorize.Net site, not in your store, so the card data never reaches your server. It helps you with PCI compliance.
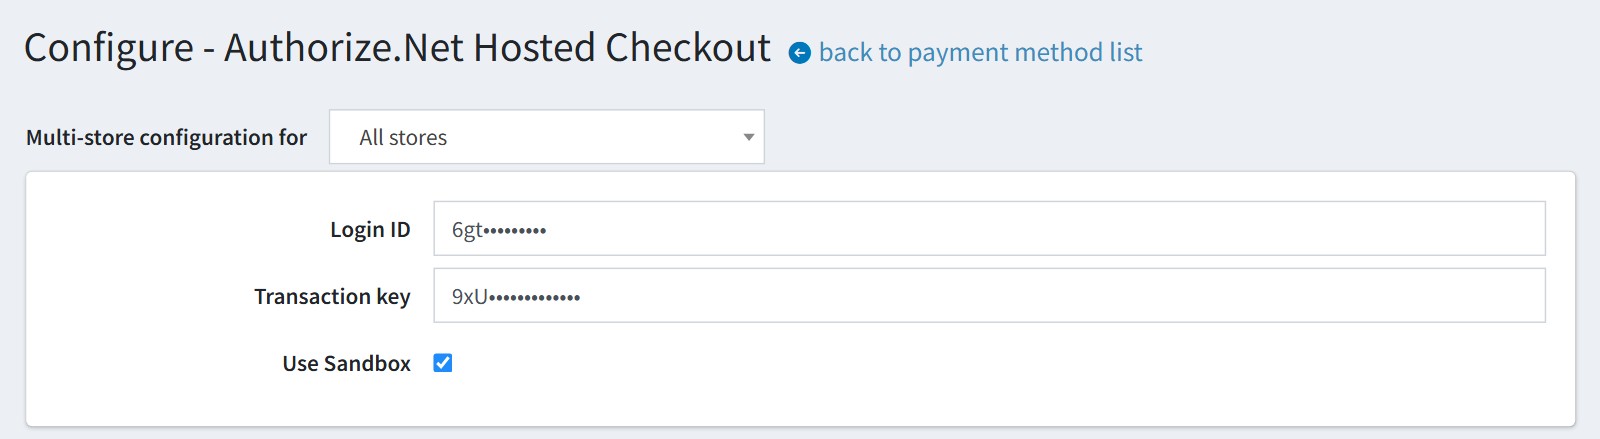
It's easy to configure the plugin. See pictures.
1. Open the Authorize.Net Merchant Interface, go to 'Account > Settings > Security Settings > General Security Settings > API Credentials and Keys' and copy 'Login ID' and 'Transaction key' on the plugin configure page.
Enable 'Use Sandbox' when you test the plugin with the keys of a sandbox account. Disable it for the live keys. The sandbox keys don't work with the live server and the live keys don't work with the sandbox.
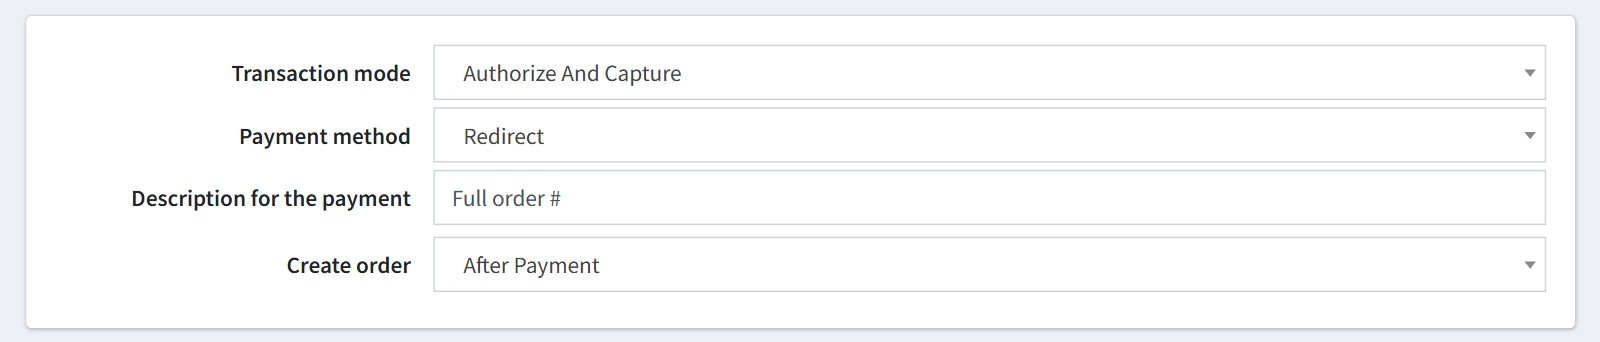
2. 'Transaction mode'. 'Authorize And Capture' takes the money at once. 'Authorize' only holds the money, you should capture it later from the admin order page.
'Payment method'. 'Redirect' is the only value. The customer goes to the Authorize.Net page to pay.
'Description for the payment' is the text sent to Authorize.Net with the order.
'Create order' with the value 'After Payment'. The nop order is created when the customer returns from the Authorize.Net page after the payment, so you don't have unpaid orders. If the customer closes the browser before the return then the money is taken, but there is no order in the store. If the customer changes the cart in another tab while paying then the order is not created too. You will see this error in the system log and you should refund the transaction in the Authorize.Net Merchant Interface.
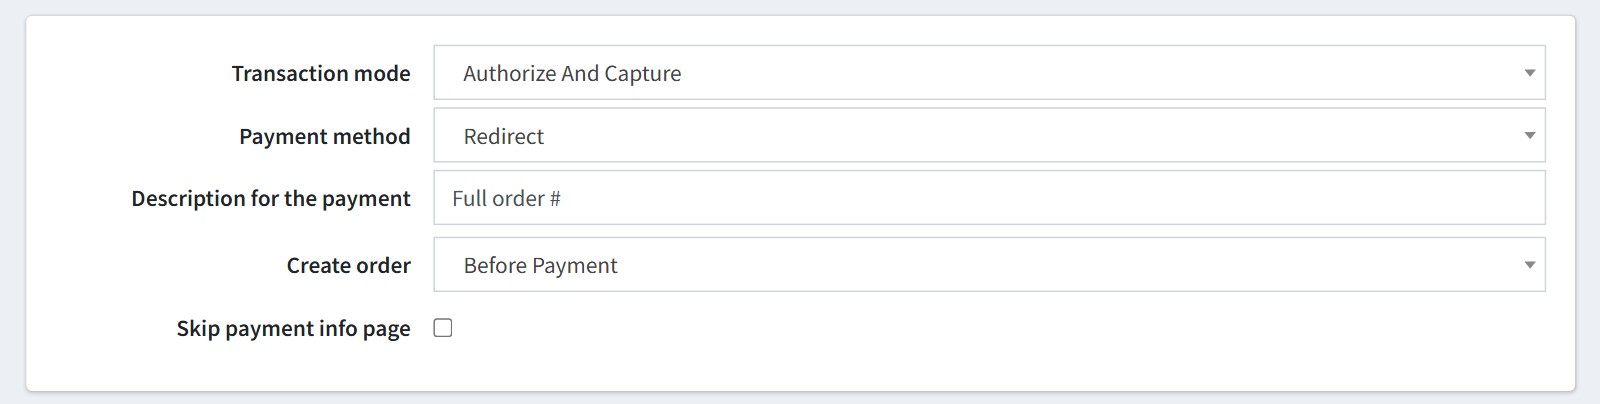
'Create order' with the value 'Before Payment'. The nop order is created first with the status 'Pending', then the customer goes to the Authorize.Net page. If the customer cancels the payment, the order stays unpaid. In this mode only the webhook (see step 4) changes the payment status of the order.
'Skip payment info page' appears only in this mode. It skips the payment info step of the checkout.
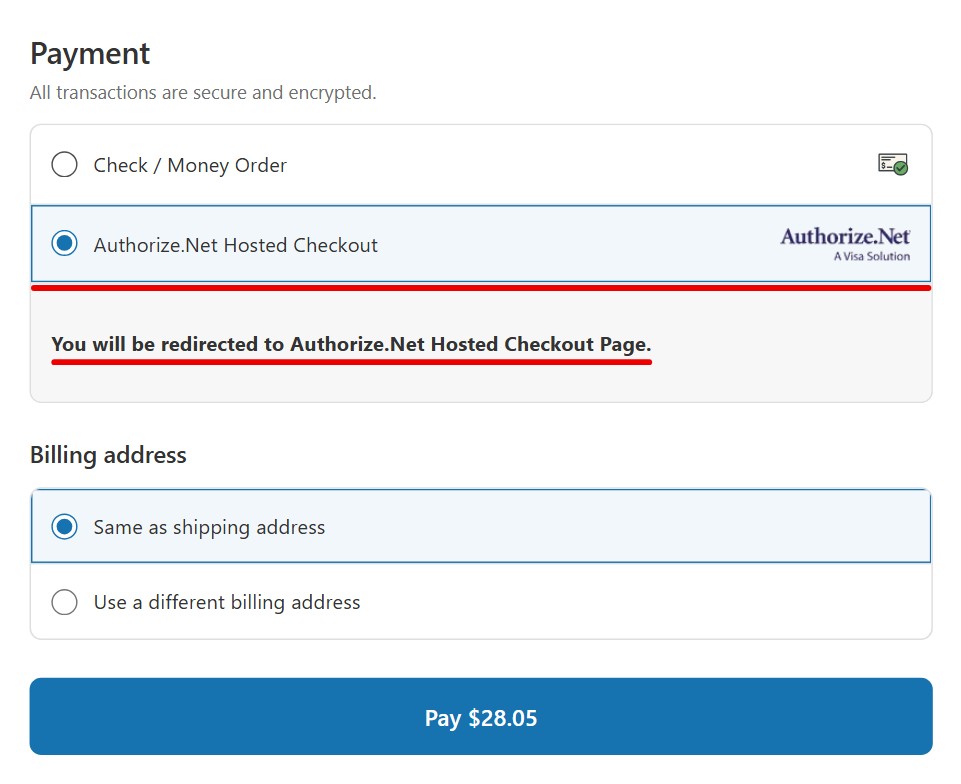
This is how the payment method looks on the checkout page.
3. These settings choose what the Authorize.Net page shows.
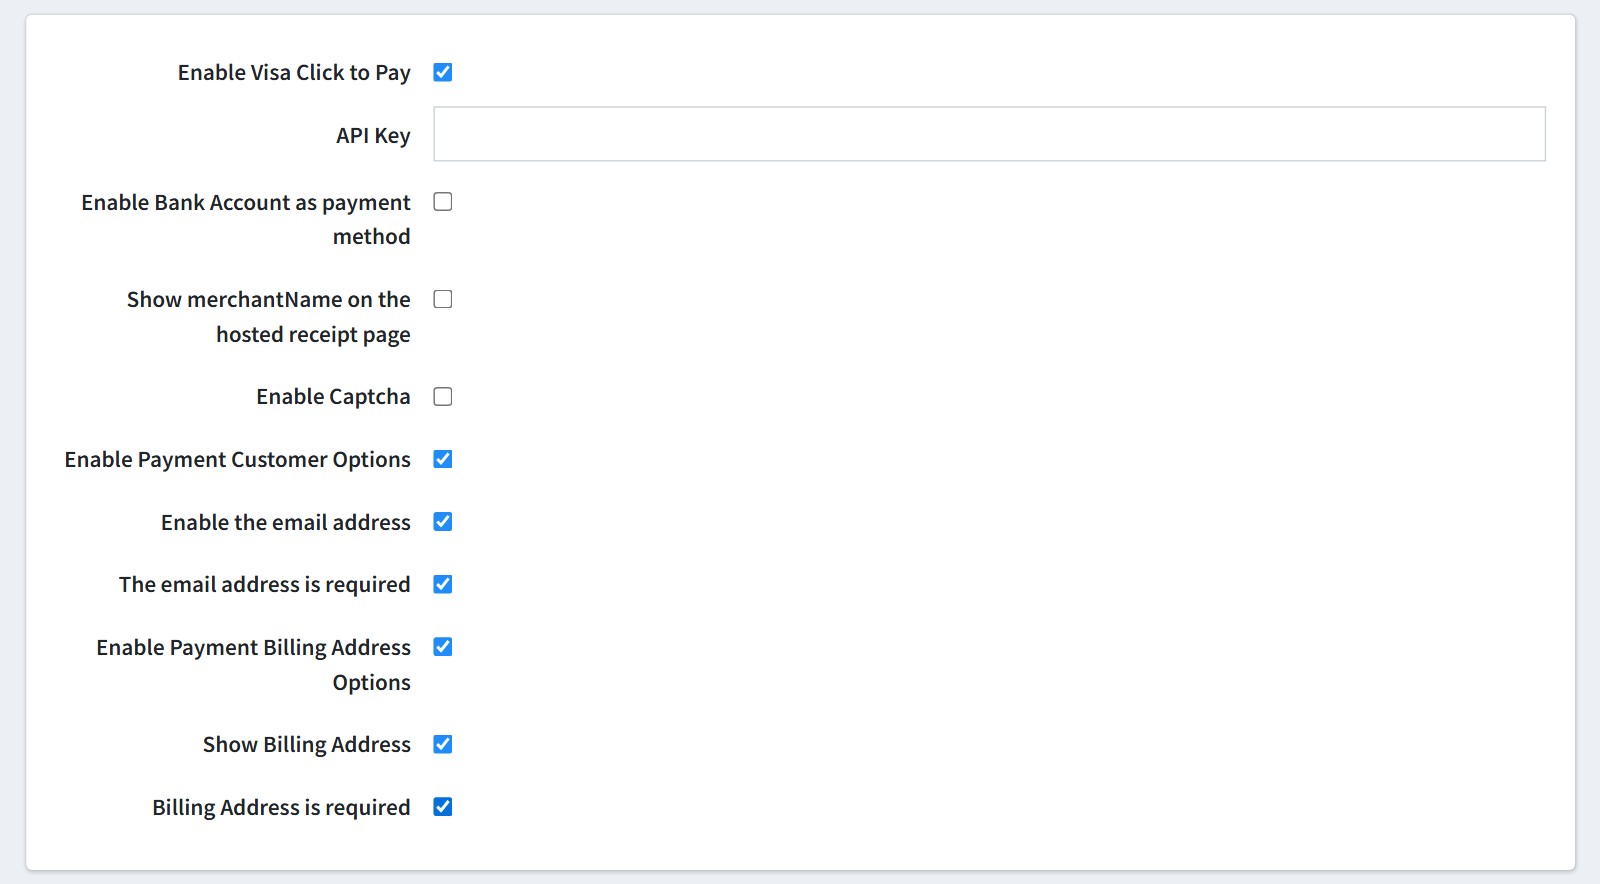
'Enable Visa Click to Pay' adds Visa Click to Pay, enter its 'API Key'. 'Enable Bank Account as payment method' adds the bank account next to the credit card. Both of them must also be enabled in your Authorize.Net account. The plugin cannot check it.
'Show merchantName on the hosted receipt page' shows the name of your company.
'Enable Captcha' adds a captcha to the payment form.
'Enable Payment Customer Options' shows the email address of the customer, and could make it required.
'Enable Payment Billing Address Options' shows the billing address, and could make it required.
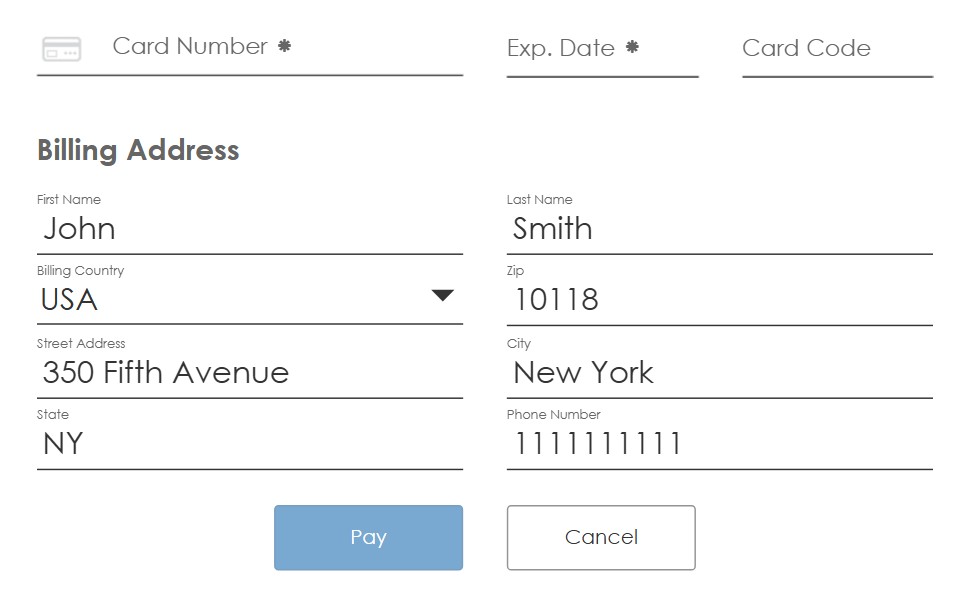
This is how the Authorize.Net page looks. The billing address is already filled in from the store.
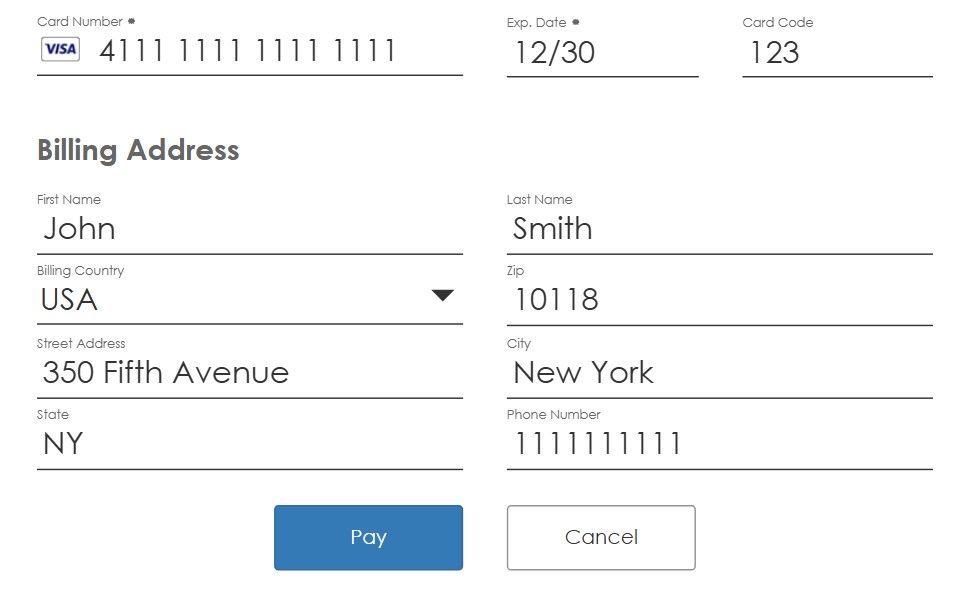
The customer enters the card and presses 'Pay'. On the sandbox you could test it with the Visa test card 4111 1111 1111 1111, any future date and any card code.
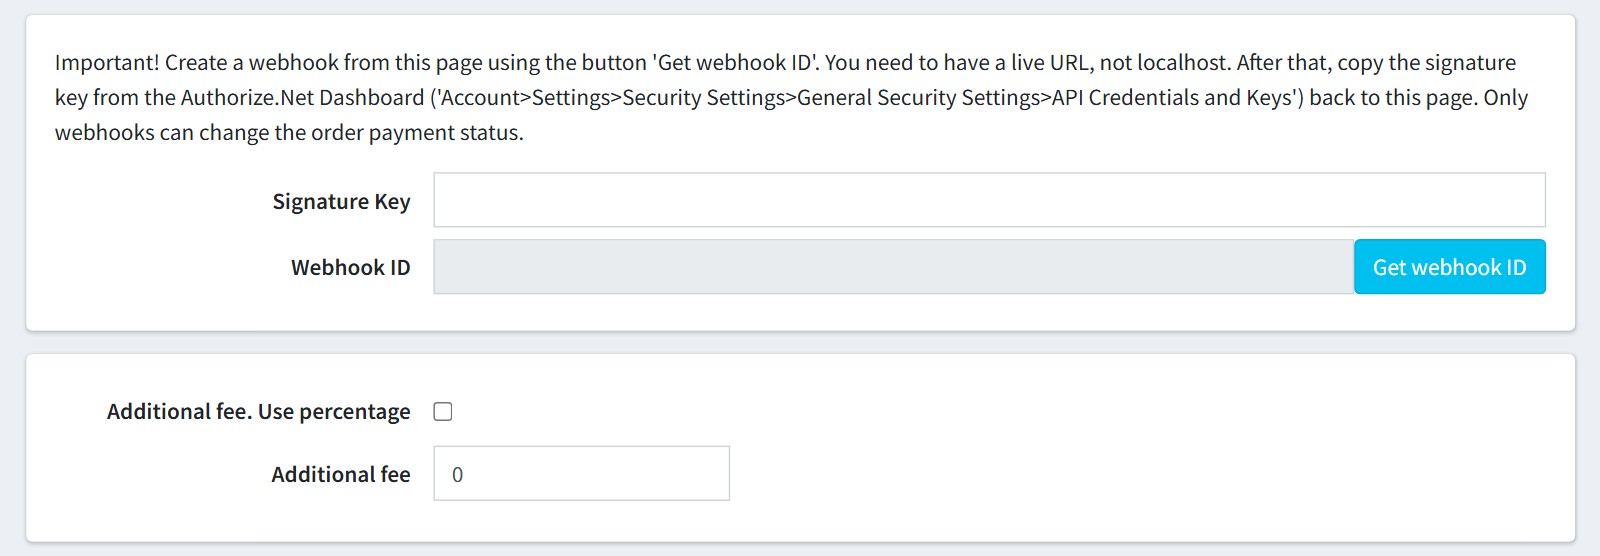
4. Configure Webhook. The Webhook changes the payment status of the nop order.
Open the plugin configure page and press the button 'Get webhook ID'. You should use the live URL with https, not localhost.
After it open the Authorize.Net Merchant Interface, go to 'Account > Settings > Security Settings > General Security Settings > API Credentials and Keys' and copy the signature key to 'Signature Key'.
If the amount of the payment differs from the order total, the plugin does not change the payment status and adds a note to the order.
You could add additional payment fees. Enable 'Additional fee. Use percentage' if the fee is a percentage of the order total.
5. You could capture, void and refund (full or partial) the payment from the admin order page. A payment which is not settled yet could only be refunded in full (the plugin voids it). A partial refund works after the settlement.
Make these actions from the admin order page. The webhook does not bring back a refund or a void made in the Authorize.Net Merchant Interface, so the nop order would not change.
The plugin sends only the order total to Authorize.Net, without the list of products, the tax and the shipping. Recurring payments are not supported.
If another installed plugin has its own AuthorizeNet.dll then the configure page shows an error, because the two files could conflict.
All settings could be set for each store separately. Select the store in 'Multi-store configuration for' and check the override checkboxes.