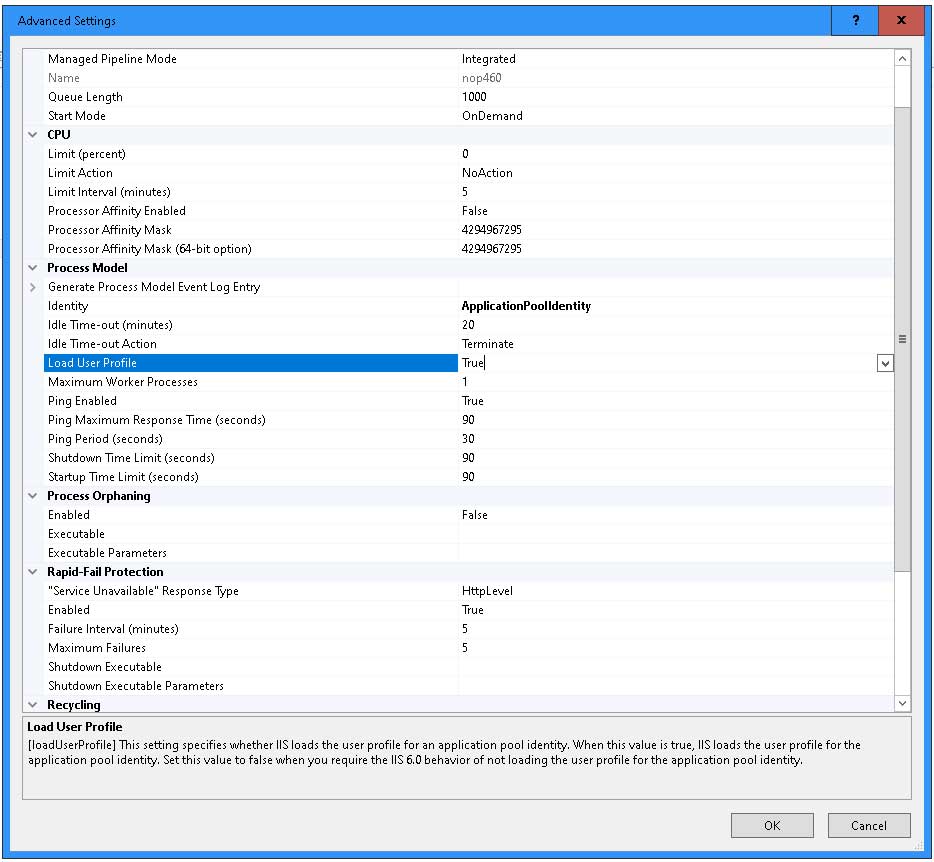
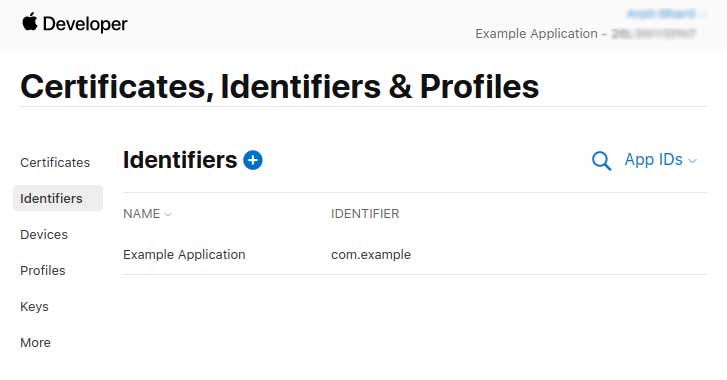
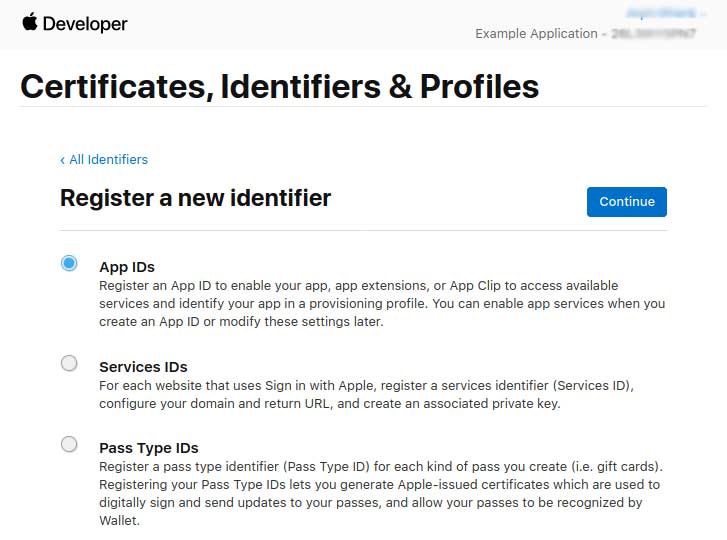
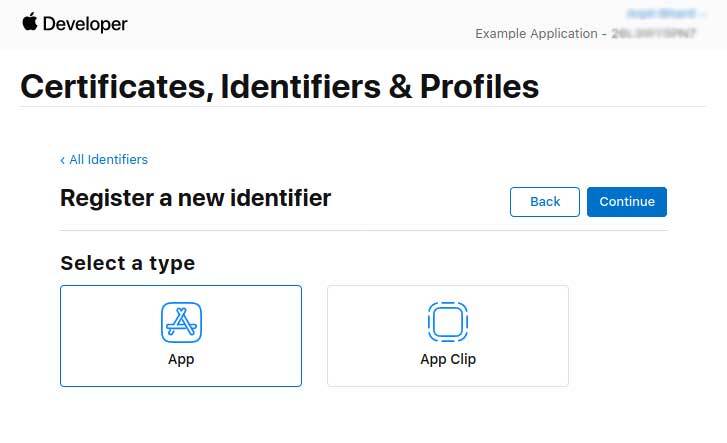
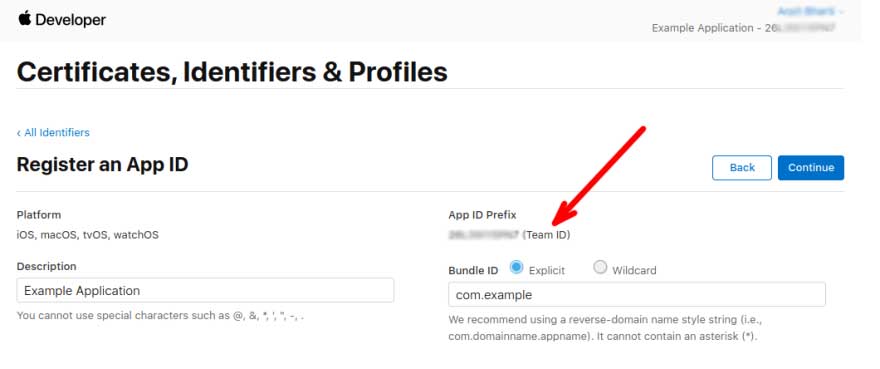
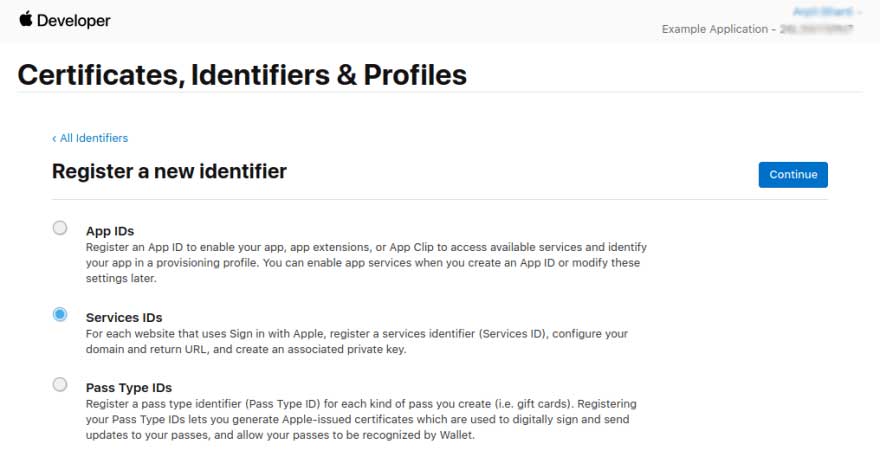
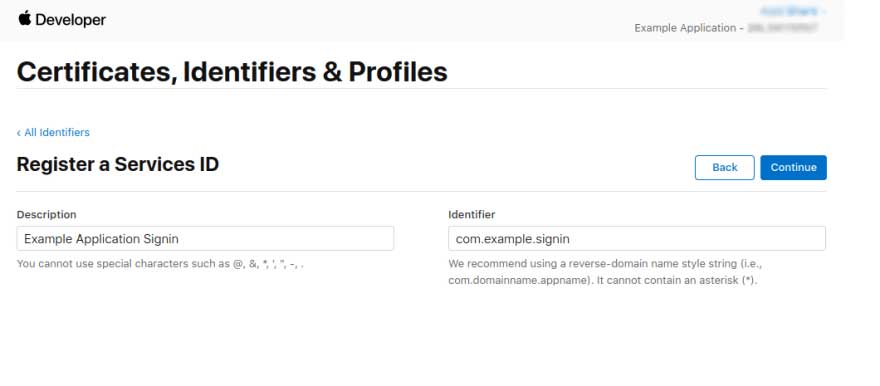
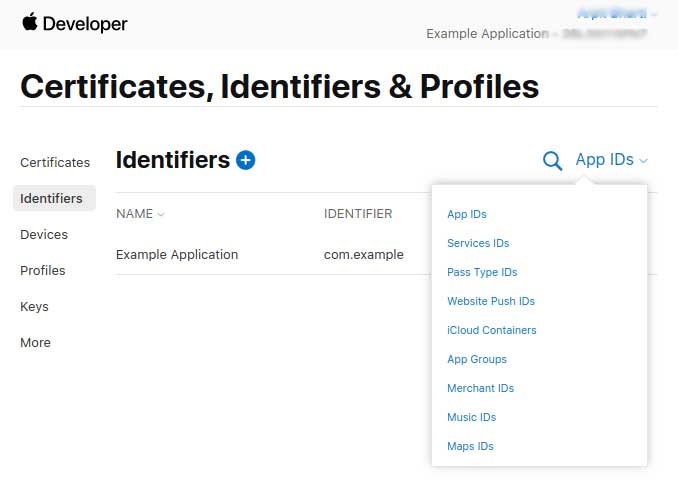
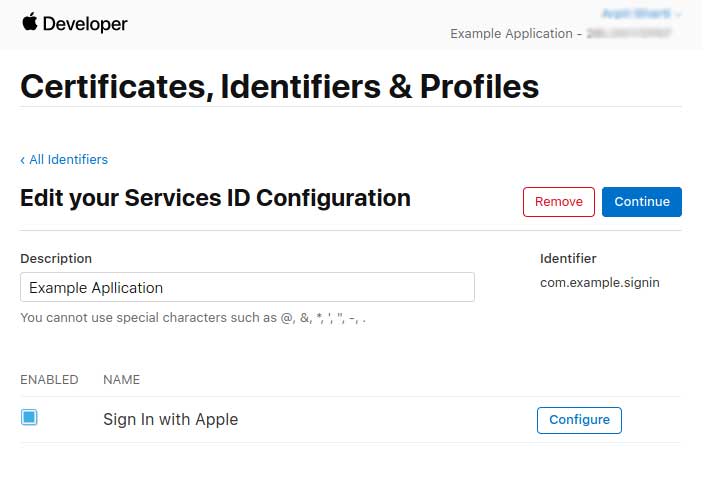
Installation and configuring plug-in Sign in with Apple Initial Setup App ID 1. Open Your developer console and find Certificates IDs & Profiles 2. Click on Identifiers in the side panel. Then click the plus symbol next to Identifiers to create a new App ID. 3. Select App IDs. 4. Select Type App 5. Use a descriptive name for your application, I've used Example Application here. We'll choose an explicit style Bundle ID for now, use apple's suggested reverse domain style for proper namespacing, the string can be anything but you should stick to convention. I've used com.example here. Service ID 1. Go back to the developer console and create a new identifier. This time select Services IDs. 2. Register a service with a proper description, I've used Example Application Signin here. For the identifier we'll follow the convention and use com.example.signin. 3. Your new Service ID is created, find it by using the dropdown you see on the left. 4. Click on your Service ID that you just created. 5. After you hit continue and save click in the identifier again. You'll be greeted with a checkbox tha say Sign In with Apple. Click on Configure. 6. A modal will popup, register your domain here. Check if your IIS application poll has this parameter "Load user profile= True".
You'll need to do these things:
1. Create an App ID.
2. Create a Serve ID.
3. Register the domains for your website.
The following are some screenshots to explain the process of App ID and Service ID creation.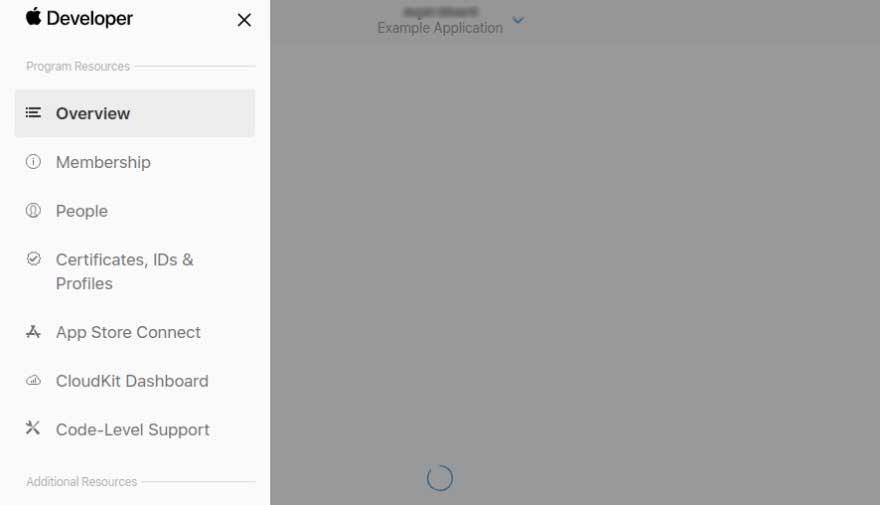

As your Primary App ID, choose the one we just created in the previous section.
In the domains section add the domain where this service will be used.
The return URL is the location to which apple will redirect us after authentication is completed. This is also the location where apple will send the user data after authentication. If it's a link to your server API, then apple will send a POST request to this URL. However, we will use location of our frontend as the return URL, and the data will be captured on the client side(more about this in the next section). I've assigned http://example.com for this example.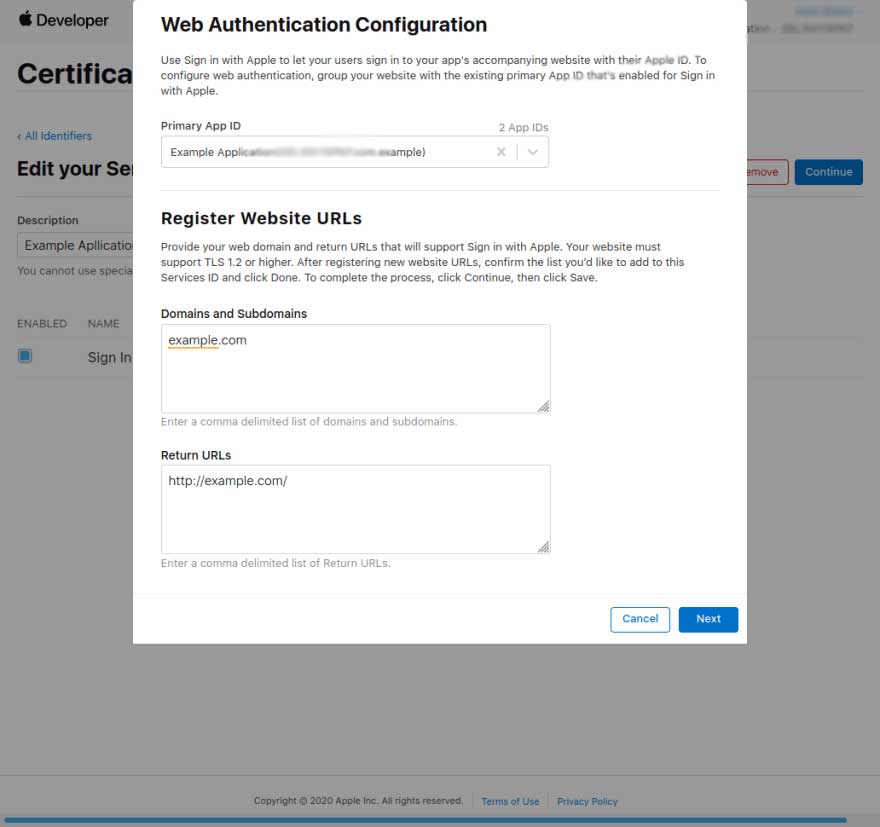
You should enable it for Azure too (WEBSITE_LOAD_USER_PROFILE should be set to 1). And you should use minimum Basic Tier 1.